A solar monitoring system is only as good as the wires that feed it. You can specify the best data logger and the most accurate revenue-grade meter, but if the current transformer is backwards, the RS-485 chain has no termination, or the shield is grounded at both ends, the dashboard will lie to you. And the lie is expensive — a misconfigured monitoring system can hide weeks of underperformance, mask string faults, and trigger false alarms that destroy the installer’s reputation.
This guide is the field manual I wish I had on my first 50 commercial commissioning jobs. It covers solar monitoring system wiring end to end: CT (current transformer) basics, polarity rules, ratio selection, RS-485 topology, Modbus addressing, termination, cable type selection, long-run strategies, grounding, shielding, and the most common mistakes I see on site visits. Every recommendation is grounded in the standards that govern this work — TIA/EIA-485, NEC Article 725, IEC 61724-1 — and in the practical lessons of installing more than a gigawatt of solar across 50+ countries.
Quick Answer — Solar Monitoring System Wiring
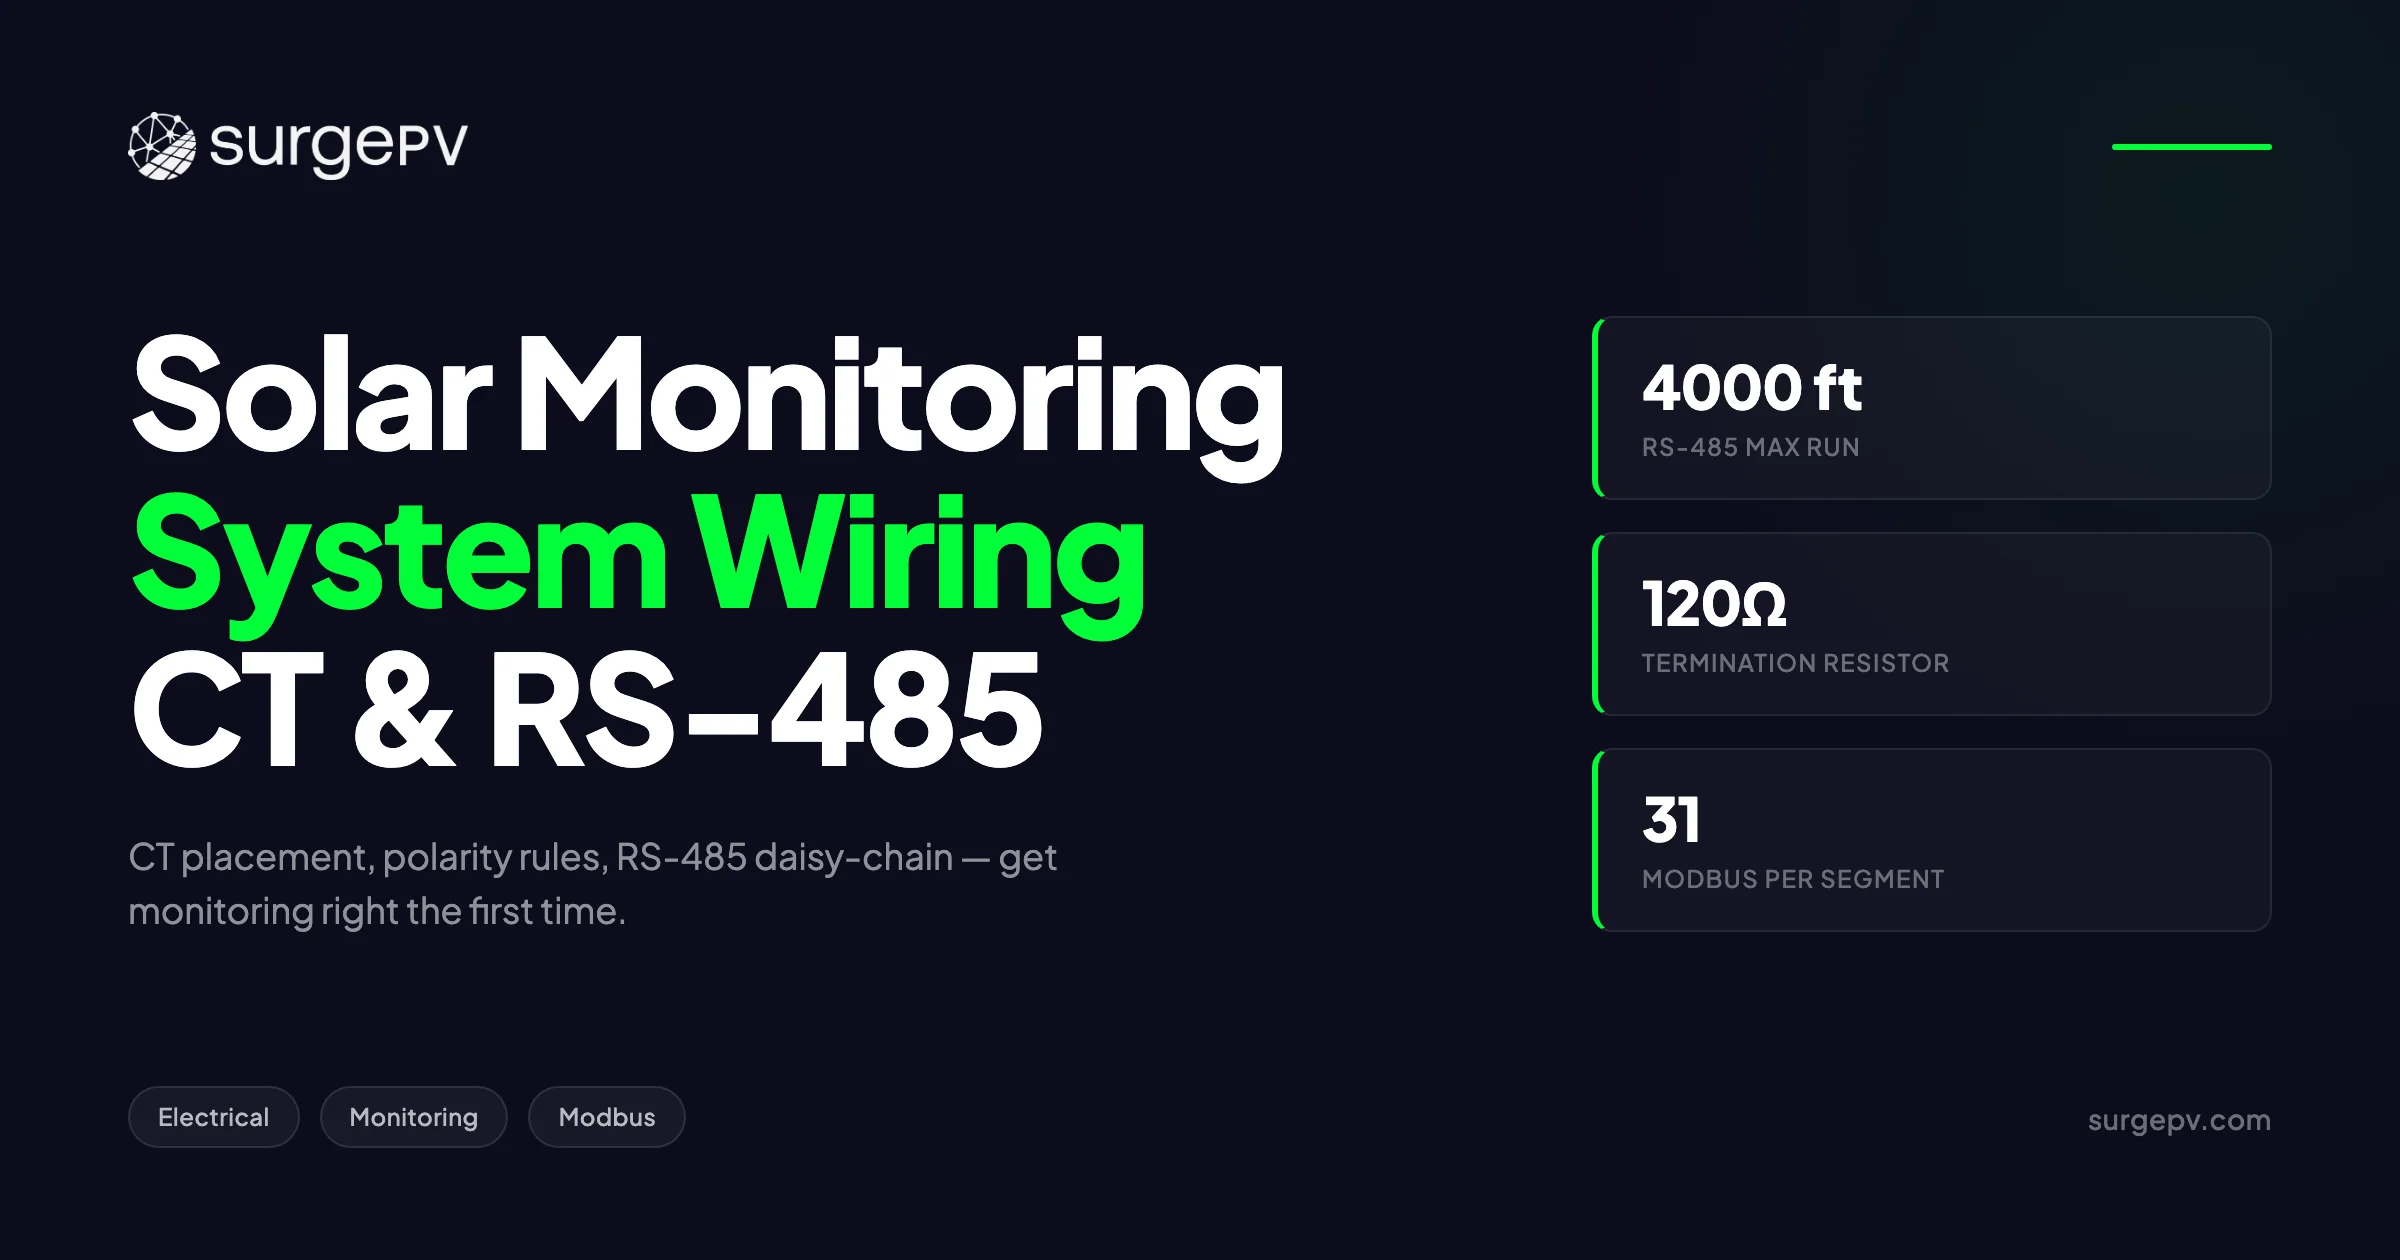
Solar monitoring system wiring depends on two correctly installed elements: current transformers (CTs) and an RS-485 communication bus. CTs must face the correct direction (arrow toward source for production, toward grid for consumption) and match the service size (100:5, 200:5, 400:5). RS-485 needs 120Ω termination at both ends, a daisy-chain topology, and 4,000 ft maximum run at 9,600 baud. Get these two right and 90% of monitoring problems disappear before they start.
In this guide:
- Why monitoring wiring decides whether you catch faults or miss them
- CT basics, solid-core versus split-core, and when each wins
- CT placement for production, consumption, and grid-tie metering
- CT polarity and how to fix negative production readings
- CT ratio selection matched to service size
- RS-485 daisy-chain topology rules and stub-length limits
- Modbus addressing and 120Ω termination resistors
- Cable type selection: Belden 9842, Cat5e, fiber optic
- Long-run strategies with repeaters and Ethernet gateways
- Grounding and shielding in noisy commercial environments
- Common wiring mistakes and how to avoid them on site
Solar Monitoring System Wiring 2026: What Changed
For installers tracking solar monitoring trends in 2026, three shifts matter for wiring decisions. Read Solar Racking Design Guide for a complete walkthrough.
Inverter manufacturers are standardizing on Modbus TCP over Ethernet. SMA, SolarEdge, Fronius, Sungrow, and Huawei all ship 2026-model commercial inverters with built-in Ethernet ports running Modbus TCP. RS-485 is still the universal fallback and the only option for legacy fleet retrofits, but new commercial designs increasingly default to LAN-based monitoring with PoE-powered gateways.
Revenue-grade metering is moving toward integrated CTs. Brands like Accuenergy, Continental Control Systems (WattNode), and Veris now ship meters with factory-matched Rogowski coils that auto-detect ratio. This eliminates the most common CT installation error — wrong ratio selection — but the polarity rules still apply.
NEC 2026 tightens Class 2 cable separation. NEC 725.136 requires monitoring cable to be separated from AC power conductors by at least 50 mm or use a grounded metal divider. Multiple AHJs now red-tag commercial monitoring installs that run Cat6 in the same conduit as 480V branch circuits.
Monitoring Wiring Update Table — May 2026
| Topic | Status | Notes |
|---|---|---|
| RS-485 daisy-chain (TIA/EIA-485) | Standard unchanged | 4,000 ft max at 9,600 baud, 32 unit loads max |
| Modbus RTU | Active | 247 addresses, 31 devices per segment without repeater |
| Modbus TCP over Ethernet | Growing | Default for new commercial inverters |
| NEC 725.136 (Class 2 separation) | Active | 50 mm separation from AC power, or metal divider |
| IEC 61724-1 monitoring spec | Active | Class A/B/C accuracy tiers, used in commercial PPA contracts |
| Revenue-grade ANSI C12.20 (0.5% accuracy) | Required for SREC/utility incentive markets | Check state-level rules |
| PoE-powered data loggers | Common | Reduces field wiring; check current draw against switch budget |
Why Monitoring Wiring Determines Whether You Catch Faults
Most commercial PV systems run for 25 years. Over that window, monitoring is the only continuous check on whether the array is producing what it should. A well-wired monitoring system flags underperformance within 24 hours. A badly wired one buries the same fault for months — sometimes for the life of the system.
I have seen rooftop arrays operate for two years at 60% of expected yield because the monitoring CT was clamped backwards and the dashboard showed “normal” daily totals that simply happened to fall in a plausible range. The owner never questioned the readings until a third-party audit caught the mismatch against the solar generation and financial tool projections. That two-year shortfall cost the EPC €38,000 in liquidated damages.
The economics are blunt. A 500 kW commercial array generating 700,000 kWh/year at €0.12/kWh produces €84,000 of energy. A 10% underperformance hidden by bad monitoring costs €8,400 per year — every year — until someone catches it. Over 25 years, that’s €210,000 of lost revenue masked by €30 of incorrectly installed copper.
What Monitoring Wiring Must Deliver
| Function | Wiring Element That Enables It | Failure Symptom |
|---|---|---|
| Real-time production accuracy | CT polarity correct, CT ratio matched | Negative values, capped readings, drifting totals |
| Consumption baseline (self-consumption math) | Consumption CT placement and direction | Wrong self-consumption %, bad ROI numbers |
| String-level fault detection | RS-485 path to inverter, MLPE comms | Missing strings, blank panels in dashboard |
| Revenue metering for utility/PPA | ANSI C12.20 meter wired upstream of inverter tap | Failed utility audit, lost SREC payments |
| Alarm dispatch within 24 hours | Stable RS-485 or Ethernet to data logger | Dropped sessions, missed offline alerts |
| Long-term degradation tracking | Consistent CT readings over years | Apparent drift that’s really CT saturation or aging |
The five-minute decision to place a CT correctly determines whether the monitoring system delivers all six of these functions or none of them.
For installers comparing logger and inverter brands, see our solar monitoring systems comparison for a side-by-side breakdown of SMA, SolarEdge, Sungrow, Tigo, and Enphase platforms. Read more about Agricultural Solar Case Study.
CT (Current Transformer) Basics: Solid-Core vs Split-Core
A current transformer is a passive device that converts a large primary current — the current flowing in your AC conductor — into a small, measurable secondary current. The most common solar monitoring ratio is “X:5” or “X:333mV” output, where X is the rated primary amperage.
The primary winding is the conductor you clamp the CT around. The secondary winding is internal to the CT and connects via X1 and X2 leads (or H1 and H2) to the meter or data logger.
Solid-Core CTs
A solid-core CT is a closed magnetic loop. The conductor must be threaded through the center hole during installation, which requires disconnecting power and physically routing the cable through the CT.
Where solid-core wins:
- New construction where the conductor can be threaded before termination
- Higher accuracy applications — solid cores have less air gap and lower phase shift error
- Revenue-grade metering installations (ANSI C12.20, 0.2% or 0.5% accuracy class)
- High-current applications above 800A where split-cores get expensive
Typical accuracy: 0.2% to 0.5% (revenue-grade)
Split-Core CTs
A split-core CT has a hinged or clamping magnetic loop. The CT opens, snaps around an existing conductor, and closes — no power disconnection needed.
Where split-core wins:
- Retrofits onto existing service entrance conductors
- Commissioning a monitoring system after the array is energized
- Any installation where utility disconnection is impractical
- Most residential and light-commercial monitoring applications
Typical accuracy: 1.0% to 2.0% (sufficient for most monitoring, not for revenue billing)
Solid-Core vs Split-Core: Field Decision Matrix
| Criterion | Solid-Core | Split-Core |
|---|---|---|
| Installation difficulty | High — requires power down | Low — clamps on live conductors* |
| Accuracy class | 0.2–0.5% | 1.0–2.0% |
| Cost (200:5 typical) | €25–€60 | €60–€140 |
| Revenue billing eligible | Yes | Usually no |
| Best for new construction | Yes | Acceptable |
| Best for retrofit | No | Yes |
| Long-term drift | Minimal | Slight increase from clamp wear |
*Always follow OSHA and local electrical code for working near energized conductors. PPE and lockout/tagout procedures apply even for split-core installation.
Output Type: 5A vs Voltage Output
Most CTs come in two output styles:
5A secondary (X:5 ratio): Traditional output, requires shorting blocks for safety. A 200:5 CT outputs 5A when 200A flows through the primary. Voltage at the meter terminal depends on burden (the impedance of the meter input). Open-circuiting a 5A CT under load destroys it because the magnetic core saturates and induces lethal voltages — always short the secondary before disconnecting.
Voltage output (333 mV at full scale): Modern monitoring CTs output 333 mV when at rated primary current. Safer to handle (open-circuit is harmless), simpler wiring, and most modern data loggers (eGauge, Veris, Continental WattNode) accept 333 mV input directly.
Recommendation for new monitoring installs: Use 333 mV voltage-output CTs unless utility revenue metering requires traditional 5A secondaries. They’re safer, easier to wire, and electrically interchangeable across most monitoring brands.
Pro Tip — Always Short 5A CT Secondaries Before Disconnect
If you’re working on a system with traditional 5A secondary CTs, install a shorting terminal block at the meter end. Before disconnecting any 5A CT secondary lead, short the two leads together first. Open-circuiting a 5A CT carrying primary current produces thousands of volts across the terminals — enough to kill the CT and potentially the technician.
For United States-specific compliance details, see United States arizona/phoenix.
CT Placement: Production vs Consumption vs Grid Tie
Where you place a CT determines what it measures. The same CT installed in three different physical locations produces three completely different data streams. Getting placement right is the foundation of every other monitoring decision.
Production CT Placement
A production CT measures the AC output of the inverter or array. Place it on the AC conductors between the inverter and the main panel — typically inside the AC combiner or on the inverter feed conductors.
Direction: Arrow or dot on the CT points toward the source of current, which on the AC side is the inverter. With the arrow pointing toward the inverter, the CT reads positive production.
Why this matters: Production CTs feed the kWh totals that determine system performance, warranty claims, and PPA payments. A backwards production CT shows negative production — a clear giveaway during commissioning, but easy to miss if the dashboard simply displays absolute values.
Consumption CT Placement
A consumption CT measures the building’s total electrical load. Place it on the main service conductors between the utility meter and the main breaker — upstream of any inverter back-feed connection.
Direction: Arrow points toward the loads (away from the utility transformer). This makes import current read positive and any export read negative — useful for net energy calculations.
Common error: Placing the consumption CT downstream of the inverter back-feed point. This causes the meter to subtract solar from grid import internally, hiding actual building consumption. The result: self-consumption ratios look artificially high and the solar self-consumption rate calculator returns garbage data.
Grid-Tie (Net Meter) CT Placement
A grid-tie CT measures net energy flow between the building and the utility grid. Place it on the service conductors at the point of common coupling — typically at the service entrance ahead of all building loads and inverter back-feeds.
Direction: Arrow points toward the utility transformer. This makes import positive and export negative, matching most utility billing conventions.
Placement Reference Diagram (Described)
For a typical commercial system, the AC conductor layout from utility to inverter looks like this:
Utility Grid → Revenue Meter → Service Disconnect → Main Panel → Building Loads
With the solar back-feed:
Inverter → AC Combiner → Inverter Disconnect → Main Panel (back-fed breaker)
Three CT placements:
- Grid-tie CT: On the service conductors between utility meter and service disconnect. Arrow toward grid. Measures net export/import.
- Production CT: On the inverter output conductors between inverter and inverter disconnect. Arrow toward inverter (source of AC). Measures gross solar production.
- Consumption CT: On the main panel feeder upstream of the inverter back-feed point. Arrow toward loads. Measures total building consumption.
This three-CT configuration provides every value a monitoring system needs: production, consumption, self-consumption, export, and import. All other metrics derive from these three.
Key Takeaway — Three-CT Layout for Commercial Systems
Most commercial monitoring problems trace back to inadequate CT placement. The minimum useful configuration for any system above 10 kW is three CTs: grid-tie at the service entrance, production at the inverter output, and consumption upstream of the back-feed point. Skipping any one of these forces the dashboard to estimate values that should be measured directly, and estimates drift.
For installers designing the AC side of a commercial array, the AC disconnect sizing guide covers the upstream electrical context that determines where each CT physically lives.
CT Polarity: The #1 Cause of Negative Production Readings
If a solar monitoring dashboard shows negative production, the CT polarity is wrong 95% of the time. The remaining 5% is reversed L1/L2 phase labeling at the meter — also a polarity error in spirit.
Why Polarity Matters
A current transformer is a phase-sensitive device. It converts not just the magnitude of primary current but also its phase relationship to voltage. When the CT arrow points toward the source, the secondary current is in phase with the conductor’s current direction, and the meter calculates positive real power (P = V × I × cos φ, where cos φ is positive).
When the CT is reversed, the secondary current is 180° out of phase with the actual current direction. The meter still calculates power, but with a negative sign. On a production CT, this shows as negative kW — solar appearing to consume energy instead of produce it.
How to Check CT Polarity in the Field
The cleanest field test takes 30 seconds with a clamp meter and the monitoring dashboard:
- Open the dashboard and look at the production kW reading on a sunny day
- If reading is negative — CT is reversed
- If reading is positive but low (e.g., 0.5 kW when actual is 50 kW) — one of three CTs in a three-phase install is reversed (subtraction error)
- If reading is correct on one phase but zero on another — that phase’s CT is open-circuited or unpaired
For three-phase systems, check each phase individually if the inverter exposes per-phase data via Modbus. Most commercial monitoring platforms (eGauge, AlsoEnergy, Locus Energy) display per-phase kW and per-phase amperage — making single-phase polarity errors trivial to isolate.
How to Fix Reversed CT Polarity
Three valid fixes:
- Physically flip the CT 180° on the conductor — works on split-core CTs without disconnecting load
- Swap the X1 and X2 leads at the meter terminal block — electrically equivalent to flipping the CT
- Reverse the CT direction in software — most modern meters (Continental WattNode, eGauge, Veris) have a per-channel polarity flag
The software fix is fastest but adds a configuration item that future technicians may not understand. I recommend physical correction for new installs and documented software correction only for completed jobs where pulling the CT means scheduling another truck roll.
The Three-Phase Trap: Mismatched Polarity
In a three-phase system, all three CTs must be installed in the same direction. If one is reversed, the math goes wrong without an obvious symptom — the dashboard may show plausible kW values that are simply 33% wrong.
Field test for three-phase CT polarity:
- On a sunny afternoon with the array producing at least 50% of rated, record per-phase kW from the monitoring system
- Three-phase production should be roughly balanced across L1, L2, L3 — within ±5% of average
- If one phase reads significantly low (or negative), that phase’s CT is reversed
- Reversing one CT in a three-phase install drops total kW by approximately 33% — a useful sanity check against expected production from your design model
Pro Tip — Photograph Every CT During Install
Before closing the AC combiner cover, take a photo of every CT showing the arrow direction and the conductor it’s clamped on. Store these photos in the as-built file. When a polarity question arises in year 3 or year 7, the photo answers it in seconds — no second site visit needed.
CT Ratio Selection: Matching to Service Size
Choosing the right CT ratio is a balance between range and resolution. Too small a ratio and the CT saturates above its rated current, distorting readings or damaging the meter. Too large a ratio and low-current readings are noisy or absent.
Standard CT Ratios for Solar Monitoring
| Service Size | Recommended CT Ratio | Typical Application |
|---|---|---|
| 100A | 100:5 or 100:333mV | Residential, light commercial |
| 200A | 200:5 or 200:333mV | Residential, small commercial |
| 400A | 400:5 or 400:333mV | Small/medium commercial |
| 600A | 600:5 or 600:333mV | Medium commercial |
| 800A | 800:5 or 800:333mV | Medium/large commercial |
| 1,000–1,200A | 1000:5 or 1200:5 | Large commercial, industrial |
| 1,600–2,000A | 1600:5 or 2000:5 | Industrial, MV substation primary |
The Oversizing Penalty
Most data loggers digitize the CT signal with a 12-bit or 16-bit ADC. A 16-bit ADC has 65,536 discrete levels across the full input range. If a 400:5 CT is installed on a service that never exceeds 100A, only 25% of the ADC range is ever used — effectively a 14-bit measurement at the actual operating range.
For low-current readings (5–20A residential standby), this loss of resolution shows as noisy readings, missed small loads, and inaccurate self-consumption ratios. The fix is to size the CT to the actual peak service current, not the conductor’s worst-case rating.
Rule of Thumb for CT Sizing
Pick the smallest standard CT ratio that meets or exceeds the maximum expected current. For example:
- Building with 200A service breaker but typical peak load of 80A → use a 100:5 CT (peak load uses 80% of the range, leaving 25% headroom for inverter back-feed)
- Building with 400A service that frequently runs near capacity → use a 400:5 CT
- 60 kW commercial solar inverter at 480V three-phase = 72A per phase → use a 100:5 CT on production
Multi-Inverter Systems: Sum the Inverters
For commercial systems with multiple inverters feeding a common AC combiner, install one production CT per inverter feed and let the monitoring system sum the results. This gives per-inverter visibility, which is essential for fault isolation — a single CT measuring combined output cannot tell you which of 6 inverters tripped offline.
For very large systems (>1 MW), use Rogowski coils instead of iron-core CTs on the main feeder. Rogowski coils are flexible, easy to install around large bus bars, and have no saturation limit, but require an active integrator and slightly more careful grounding. Read Design Commercial Solar System 1MW for a complete walkthrough.
RS-485 Daisy-Chain Topology Rules
RS-485 is the physical layer for almost every Modbus RTU communication in solar monitoring. It’s been the industry workhorse since the 1990s, and despite the slow shift to Ethernet, RS-485 still appears on every commercial inverter sold in 2026.
The Daisy-Chain Rule
RS-485 demands a true daisy-chain topology: one continuous cable that visits each device in sequence, with no T-branches, no star configurations, and minimal stubs.
Correct daisy-chain:
Master → Device 1 → Device 2 → Device 3 → ... → Device N (terminated)
The cable enters each device’s A/B terminals, jumpers across the internal terminal block, and exits to the next device. The two devices at the physical ends of the chain are terminated with 120Ω resistors.
Incorrect (star) topology:
Master → Hub → Device 1 (long branch)
Master → Hub → Device 2 (long branch)
Master → Hub → Device 3 (long branch)
Star topology creates reflections at every branch point. Even with terminators at every end, the impedance discontinuities at the branches cause Modbus timeouts, CRC errors, and unpredictable device drops.
Stub Length Limits
Inevitably some devices require a short drop from the main daisy-chain — for example, a Modbus power meter mounted away from the cable run. These drops are called stubs.
Stub length rules:
| Baud Rate | Maximum Stub Length |
|---|---|
| 9,600 baud | 100 m (330 ft) |
| 19,200 baud | 50 m (165 ft) |
| 38,400 baud | 25 m (82 ft) |
| 115,200 baud | 5 m (16 ft) |
In practice, keep stubs under 1 m wherever possible. Longer stubs reflect signals and degrade reliability — especially as the chain grows.
Maximum Bus Length
RS-485 maximum cable length depends on baud rate, cable quality, and the number of devices on the bus.
| Baud Rate | Max Cable Length (TIA/EIA-485) |
|---|---|
| 9,600 baud | 4,000 ft / 1,200 m |
| 19,200 baud | 3,000 ft / 900 m |
| 38,400 baud | 2,000 ft / 600 m |
| 57,600 baud | 1,000 ft / 300 m |
| 115,200 baud | 400 ft / 120 m |
Most solar monitoring runs at 9,600 baud — the universal default and the rate that achieves the maximum 4,000 ft distance. Higher baud rates are faster but rarely necessary because Modbus RTU’s per-register polling is the bottleneck, not raw bus speed.
Drop Limits Per Segment
RS-485 transceivers are rated in “unit loads.” A standard RS-485 transceiver is one unit load and the bus supports 32 unit loads total. With the master counting as one unit load, you can install 31 device transceivers per segment without a repeater.
Some modern transceivers are designed as 1/8 or 1/4 unit loads, allowing up to 256 devices on a single segment electrically. Check the transceiver datasheet of each inverter and meter before assuming you can exceed 31 devices.
Key Takeaway — RS-485 Topology Discipline
Most field RS-485 problems trace to topology errors that ignore the daisy-chain rule. Star wiring may seem easier to lay out, but it produces signal reflections that no amount of termination tuning can fix. If your physical site forces a star pattern, the correct fix is multiple RS-485 segments separated by repeaters — not a single bus with branching.
Modbus Addressing & Termination Resistors (120Ω)
Modbus RTU runs on top of RS-485 as the data protocol. Every device on the bus has a unique address (1–247), and the master polls each device in turn.
Assigning Modbus Addresses
Most inverters ship with a default Modbus address of 1 or 2. On a multi-inverter site, each inverter needs a unique address before the bus will work.
Address assignment best practices:
- Skip address 0 — it’s the broadcast address in Modbus RTU
- Start at address 1 and increment sequentially for inverters
- Reserve addresses 100+ for meters and auxiliary devices
- Document the address map in the commissioning paperwork — future technicians need this for diagnostics
- Match the address to a physical label on each device — write the address on the inverter face plate or use a printed label
The 120Ω Termination Resistor
RS-485 cable has a characteristic impedance of 120Ω (for proper data cable like Belden 9842). At both physical ends of the daisy chain, install a 120Ω resistor across the A/B data lines. This absorbs the signal at the bus end and prevents reflections.
Termination rules:
| Position on Bus | Termination |
|---|---|
| Far end (last device on chain) | 120Ω enabled |
| Near end (master/data logger) | 120Ω enabled |
| All middle devices | 120Ω disabled |
Most inverters and data loggers have a DIP switch, jumper, or screw terminal labeled “TERM” or “120R” that enables the internal 120Ω terminator. If the device lacks built-in termination, install a 120Ω 1/4 watt resistor across the A and B terminals manually.
Bias Resistors
In addition to termination, RS-485 needs bias resistors to hold the bus in a known state when no device is transmitting. Most modern transceivers include internal bias, but some legacy meters do not.
Symptoms of missing bias:
- Communication works most of the time but fails randomly
- First poll after a quiet period fails, then subsequent polls succeed
- CRC errors cluster around bus idle periods
Fix: Add 680Ω pull-up resistor from A to +5V and 680Ω pull-down from B to ground at the master end. Most modern RS-485 converters and data loggers have these built in — check the datasheet before adding external bias.
Baud Rate and Parity
All devices on a single RS-485 segment must use the same baud rate, parity, and stop bit settings. The most common solar monitoring defaults:
- Baud rate: 9,600
- Data bits: 8
- Parity: None (some legacy meters use Even)
- Stop bits: 1
Mismatched parity or baud rate causes complete communication failure with no devices responding. If a new device is unreachable, check parity first — it’s the most common configuration error.
For installers configuring data loggers like SolarLog, Locus LGate, or AlsoEnergy DAS, the solar commissioning checklist covers the full sign-off sequence including Modbus address verification.
Cable Type: Belden 9842 vs Cat5e vs Fiber
Cable choice has more impact on RS-485 reliability than any other single decision. The wrong cable can turn a textbook-correct topology into a broken bus.
Belden 9842 (and Equivalents)
Belden 9842 is the reference cable for RS-485. Specifically engineered as a 120Ω twisted-pair data cable with foil-plus-braid shielding.
Specs:
- Characteristic impedance: 120Ω ±10%
- Conductor: 24 AWG stranded
- Shield: 100% foil + 90% braid
- Capacitance: 12.8 pF/ft
- Outer jacket: PVC (CMR-rated)
When to use: Any commercial monitoring install, any run over 100 m, any installation in electrically noisy environments (motors, VFDs, large HVAC).
Equivalents: Alpha Wire 5471C, General Cable Carol C0764A, Olflex 110 CY data cable. All meet 120Ω twisted-pair spec.
Cost: €0.80–€1.20/m in 305 m (1,000 ft) reels.
Cat5e
Cat5e is a 100Ω twisted-pair cable designed for Ethernet, but it’s widely used for short RS-485 runs because it’s cheap, easy to source, and easy to terminate.
Pros:
- Cheap (€0.30–€0.50/m)
- Available everywhere
- Multiple twisted pairs in one cable (8 conductors, 4 pairs)
- Many installers already stock it for camera and access control work
Cons:
- 100Ω impedance creates 20% mismatch with RS-485’s 120Ω termination
- Unshielded versions are vulnerable to noise pickup
- Performance degrades faster than Belden 9842 over long runs
When Cat5e wins: Short runs under 100 m in low-noise environments — most residential and small commercial monitoring. Use shielded Cat5e (S/FTP) for any run near power conductors.
When to avoid Cat5e: Long runs over 100 m, any commercial install with significant motor loads or VFDs, any environment with RF noise.
Fiber Optic
Fiber optic provides electrical isolation, immunity to lightning surges, and effectively unlimited distance. The trade-off is cost and the requirement for media converters at both ends.
When fiber wins:
- Runs over 1,200 m where RS-485 can’t reach
- Crossing buildings with separate electrical services (avoids ground loops)
- Lightning-prone sites with elevated arrays or tall ground mounts
- High-noise industrial environments where copper picks up interference
Typical fiber media converters: RS-485 to multimode fiber, with SC or LC connectors. Cost per pair: €150–€350. Multimode fiber (OM3/OM4) supports up to 2 km; single-mode supports 10+ km.
Common deployment: Use copper RS-485 inside a single building, and fiber between buildings or between widely separated array sections.
Cable Selection Decision Table
| Distance | Environment | Recommended Cable |
|---|---|---|
| Under 50 m | Residential, low noise | Shielded Cat5e |
| 50–200 m | Small commercial | Belden 9842 or shielded Cat5e |
| 200–800 m | Commercial, moderate noise | Belden 9842 |
| 800–1,200 m | Commercial, high noise | Belden 9842 with repeater |
| Over 1,200 m | Any | Fiber optic with media converters |
| Building-to-building | Any | Fiber optic (always — avoid ground loops) |
Pro Tip — Reserve Spare Pairs in Every RS-485 Cable
When you pull cable, pull at least one extra twisted pair beyond what the current job needs. RS-485 cable runs are expensive to retrofit because they typically run inside conduit and through walls. A spare pair lets you add a second Modbus loop (e.g., for weather station, additional meter) without pulling new cable. Standard Belden 9842 has two pairs, so you have one ready by default.
Plan Monitoring Wiring Before You Pull Cable
Get the AC layout, CT placement, and Modbus topology right in the design phase using SurgePV’s solar design software — before the install crew arrives on site. Catch wiring errors at the BOM stage, not at commissioning.
Book a DemoNo commitment required · 20 minutes · Live project walkthrough
For a direct comparison, see Arka 360 vs SurgePV.
Long-Run Strategy: Repeaters, Fiber Converters, Ethernet Gateways
For sites that exceed the 4,000 ft RS-485 limit — large ground-mount arrays, multi-building installations, distributed rooftop campuses — you need an architecture that segments the long run into manageable pieces.
RS-485 Repeaters
An RS-485 repeater is a passive or active device that receives signal from one segment and retransmits it to a second segment. The two segments are electrically isolated, and each has its own termination and bias.
When to use a repeater:
- Total run length exceeds 1,200 m
- Device count exceeds 31 per segment
- One section of the bus has different electrical noise (e.g., crossing an MV substation)
Typical product: B&B Electronics ULinx ULI-422, Moxa TCC-100, Advantech ADAM-4520. Cost: €120–€400 each.
Limit: No more than 8 repeaters in series — at that point the cumulative latency exceeds Modbus timeout for most polling cycles.
RS-485 to Fiber Media Converters
A fiber media converter accepts RS-485 on the copper side and transmits over multimode or single-mode fiber. Two converters are required — one at each end of the fiber.
When to use fiber:
- Run exceeds 1,200 m
- Crossing between buildings with separate electrical services (eliminates ground loops)
- Any outdoor run exposed to lightning risk
- Industrial environments with strong EMI (large motors, VFDs, welding)
Cost per pair: €300–€700 including converters and fiber.
Ethernet Gateway / Modbus TCP
For sites with existing IT infrastructure, an Ethernet gateway converts RS-485 / Modbus RTU to Modbus TCP, then carries the data over the building LAN to the data logger or cloud platform.
Products: Moxa MGate MB3170, B&B Electronics Vlinx MESR901, Lantronix EDS1100. Cost: €200–€500.
Advantages:
- Leverages existing LAN cabling, no new pulls required
- Multiple monitoring systems can read the same data simultaneously (cloud platform + on-site display + utility audit)
- Easy to extend across the internet for remote diagnostics
Disadvantages:
- Requires reliable network infrastructure
- Adds a failure mode (network outage breaks monitoring even if RS-485 works)
- Some firewalls block Modbus TCP port 502 by default
Long-Run Architecture Decision Tree
Use this sequence to choose the right long-run approach:
- Is the total run under 1,200 m? → Direct RS-485 with Belden 9842
- Is the run 1,200–2,500 m, single-building? → RS-485 with one repeater
- Is the run over 2,500 m or building-to-building? → Fiber media converters
- Is there reliable Ethernet infrastructure? → Ethernet gateway with Modbus TCP
- Is the run over 10 km? → Cellular gateway with VPN to cloud platform
For installers planning sites with distributed array sections, see our guides on solar panel stringing and wiring and solar interconnection applications for the broader electrical context.
Grounding & Shielding for RS-485 in Noisy Environments
Solar sites are electrically noisy. Inverters switch high currents at high frequencies, contactors snap on and off, and AC conductors run alongside data cables. Without disciplined grounding, this noise corrupts RS-485 communication.
The Single-End Shield Ground Rule
The most common grounding mistake on commercial monitoring: bonding the cable shield to ground at both ends. This creates a ground loop because the earth potential at the inverter end differs from the earth potential at the data logger end. Even a few millivolts of difference produces a circulating current in the shield, which induces noise into the data pair via magnetic coupling.
Correct: Ground the shield at the data logger (master) end only. Leave the inverter end of the shield insulated and labeled.
Incorrect: Ground at both ends. Or worse, ground at multiple points along the run — every additional ground point adds another loop.
Equipotential Bonding for Large Sites
On large commercial and utility sites, the AC equipment ground is sometimes not at the same potential as the building electrical ground due to long distances and soil resistivity variation. In this case, the single-end ground rule still applies, but the choice of which end matters.
Best practice: Ground the shield at the end with the lowest impedance to building earth — usually the data logger, which sits in a wired electrical room with proper bonding.
For deeper guidance on PV grounding in general, see our solar PV grounding system design guide.
Separation From AC Power Conductors
NEC 725.136 requires Class 2 monitoring circuits to be separated from AC power conductors by:
- 50 mm (2 in) in open air, or
- A grounded metal divider in the same conduit, or
- A separate conduit dedicated to Class 2 circuits
Parallel runs near 480V three-phase inverter outputs are particularly damaging. The strong magnetic fields induced by switched power couple directly into unshielded data pairs.
Field practice: Where parallel runs are unavoidable, use shielded Belden 9842 with single-end shield ground. Cross AC conductors at 90° angles rather than running parallel. Use ferrite chokes on the RS-485 cable at the data logger end to filter common-mode noise.
Surge Protection for Outdoor Runs
Lightning surges propagate through every conductor in a building, including RS-485 cable. Outdoor and elevated array installations need RS-485 surge suppressors (TVS diode-based) at both ends of any cable that exits the building.
Typical product: Phoenix Contact TERMITRADE 1.5-RS485, Citel DLA-12D3RS-485. Cost: €40–€120 each.
Where to install: At every cable entry into a building, immediately after the lightning protection ground bar, and again at the data logger if it’s more than 10 m from the entry point.
Key Takeaway — Grounding Discipline Prevents Most RS-485 Problems
Three rules cover 90% of grounding issues on solar monitoring sites: ground the shield at one end only, separate Class 2 cable from AC power by 50 mm, and install surge protection at every building entry. Skip any one of these and the monitoring system will be unreliable in ways that are extremely hard to diagnose after commissioning.
Common Monitoring Wiring Mistakes & How to Avoid Them
After commissioning more than 1 GW of solar across 50+ countries, the same wiring errors appear over and over. Here are the most expensive ones and how to prevent them on every job.
Mistake 1: CT Polarity Reversed
Symptom: Negative production readings, or reduced apparent production (33% low on three-phase systems).
Fix: Flip CT 180° on conductor, or swap X1/X2 leads at the meter, or reverse polarity in software. Photograph every CT during install.
Prevention: Build a CT polarity check into your commissioning checklist. Verify positive production on a sunny day before signing off.
Mistake 2: Wrong CT Ratio
Symptom: Saturated readings at peak production (e.g., 50 kW system reading 30 kW maximum), or poor low-current resolution.
Fix: Match CT ratio to actual peak service current, not conductor rating. Replace the CT or update meter configuration if the meter has programmable ratios.
Prevention: Spec the CT ratio during design based on expected peak current, not the next-size-up worst case.
Mistake 3: No 120Ω Termination
Symptom: Intermittent communication, devices drop out under high traffic, CRC errors that increase with bus length.
Fix: Verify DIP switches or terminal block jumpers at both end devices. Install external 120Ω resistor if the device lacks built-in termination.
Prevention: Include termination verification in commissioning checklist. Test bus integrity with an oscilloscope or Modbus diagnostic tool before final sign-off.
Mistake 4: Star Topology Instead of Daisy Chain
Symptom: Random Modbus timeouts, devices that work individually but fail when others are added.
Fix: Rewire the bus into a true daisy chain. Where physical layout forces branching, install a repeater to create electrically separate segments.
Prevention: Layout RS-485 topology on the single-line diagram during design. Confirm with the install crew before they pull cable.
Mistake 5: Cable Shield Grounded at Both Ends
Symptom: Increasing CRC errors over time, sensitivity to nearby motor or HVAC loads, ground loop hum on adjacent analog circuits.
Fix: Disconnect shield ground at the inverter end. Cap and label the bare shield.
Prevention: Specify single-end shield grounding in the BOM. Train install crews on the difference between safety ground (always required) and shield ground (single-end only).
Mistake 6: Sharing Conduit With AC Power
Symptom: Constant CRC errors, communication that works at night but fails during high inverter output.
Fix: Pull data cable in a separate conduit, or install a grounded metal divider, or upgrade to shielded Belden 9842 if separation isn’t possible.
Prevention: Specify dedicated Class 2 conduit during design. Reference NEC 725.136 explicitly in the install drawings.
Mistake 7: Mismatched Baud Rate or Parity
Symptom: A new device added to a working bus refuses to communicate.
Fix: Confirm baud rate, parity, and stop bit settings at every device match the master. Most defaults are 9,600 / 8N1.
Prevention: Document the Modbus parameters at the top of the commissioning paperwork. Standardize across all sites.
Mistake 8: Duplicate Modbus Addresses
Symptom: Two devices respond to the same query, producing garbled or alternating data; the bus appears to “have ghosts.”
Fix: Walk the daisy chain and verify each device has a unique Modbus address. Document the address map on the as-built drawings.
Prevention: Assign sequential addresses during install. Label each device with its address on the face plate.
Mistake 9: No Surge Protection on Outdoor Runs
Symptom: RS-485 transceivers fail after thunderstorms — sometimes one device, sometimes the entire chain.
Fix: Install RS-485 surge suppressors at every building entry point. Verify lightning protection ground is bonded to building ground.
Prevention: Include surge protection in every BOM for outdoor or elevated array installations. Reference the lightning protection class of the site.
Mistake 10: Skipping the Per-Device Site Photo
Symptom: A year later, a tech revisits the site and can’t figure out which CT measures what, where the meter is mounted, or which DIP switch enables termination.
Fix: Photograph every device with the cover open, every CT with its arrow visible, and every DIP switch setting. Store photos in the as-built file.
Prevention: Make site photography part of the commissioning checklist. It takes 10 minutes and saves hours of troubleshooting over the system’s life.
For deeper guidance on the broader electrical commissioning process, see the solar system commissioning protocol guide.
Monitoring Compliance: IEC 61724-1 and Revenue Metering
For commercial systems under PPA, SREC, or utility incentive programs, the monitoring system has compliance obligations beyond simply “showing kWh on a dashboard.”
IEC 61724-1: PV Performance Monitoring Standard
IEC 61724-1 is the international standard for solar performance monitoring. It defines three accuracy classes:
| Class | Accuracy | Typical Use |
|---|---|---|
| Class A | ±2% on irradiance, ±1% on energy | Utility-scale, scientific research, contract performance verification |
| Class B | ±3% on irradiance, ±2% on energy | Commercial PPA, premium residential |
| Class C | ±5% on irradiance, ±3% on energy | Basic commercial, standard residential |
Most commercial PPAs reference IEC 61724-1 Class B or Class A as the required monitoring tier. This drives:
- CT accuracy class (0.5% or better)
- Pyranometer class (Class A pyranometer for tier A monitoring)
- Data logger sampling rate (1-minute or faster intervals)
- Data retention period (typically 10 years minimum)
ANSI C12.20 Revenue Metering
For systems that sell energy to the grid under a PPA or feed-in tariff, the energy meter must meet ANSI C12.20 accuracy class — typically 0.5% or 0.2%. This is a US standard; European equivalents include MID Class A (1.0%) and MID Class C (0.5%). Also see: European Solar Incentives. For Europe-specific compliance details, see Europe solar compliance.
Revenue-grade meters have specific wiring requirements:
- Solid-core CTs with calibration certificates traceable to NIST or equivalent national lab
- Documented installation per the meter manufacturer’s revenue-grade procedure
- Sealed meter enclosure with tamper detection
- Annual or biennial calibration verification
If the monitoring system also serves as the revenue meter, the CT and meter installation must meet the higher revenue-grade standard from day one. Retrofitting from monitoring-grade to revenue-grade typically requires replacing the CTs, which means a service disconnect — expensive on operating systems.
Wiring Cost Examples: Residential vs Commercial
To put monitoring wiring in financial context, here are typical wiring costs for three system sizes.
Example 1: 10 kW Residential System
| Item | Cost |
|---|---|
| 3× 100:5 split-core CTs | €60 |
| 30 m Belden 9842 (RS-485 cable) | €36 |
| Data logger (eGauge EG4115 or similar) | €450 |
| Cellular gateway with data plan (year 1) | €380 |
| Labor (4 hours, 1 technician) | €280 |
| Total monitoring wiring + setup | €1,206 |
Example 2: 100 kW Commercial Rooftop
| Item | Cost |
|---|---|
| 3× 200:5 solid-core revenue CTs | €240 |
| 6× 200:5 split-core monitoring CTs (per-inverter) | €480 |
| 150 m Belden 9842 | €180 |
| Modbus power meter (Continental WattNode WNC-3D-480-MB) | €620 |
| Data logger (AlsoEnergy AE5000 or similar) | €1,400 |
| Ethernet gateway + cellular backup | €620 |
| Surge protection (3× RS-485 SPD) | €180 |
| Labor (12 hours, 2 technicians) | €1,680 |
| Total monitoring wiring + setup | €5,400 |
Example 3: 1 MW Ground-Mount Solar
| Item | Cost |
|---|---|
| 6× 1200:5 solid-core revenue CTs (with calibration certs) | €1,800 |
| 20× 400:5 split-core monitoring CTs (per-inverter, per-combiner) | €2,400 |
| 1,200 m Belden 9842 | €1,440 |
| 2× fiber media converters + 800 m fiber | €1,200 |
| RS-485 repeater | €280 |
| Revenue meter (Schneider PowerLogic ION9000 or similar) | €4,500 |
| Data logger / SCADA (Locus LGate-101 or similar) | €5,200 |
| Pyranometer (Class A, Hukseflux SR30) | €4,800 |
| Surge protection (10× SPD) | €600 |
| Labor (48 hours, 2 technicians) | €6,720 |
| Total monitoring wiring + setup | €28,940 |
For a 1 MW system generating €120,000–€150,000/year in energy revenue, monitoring infrastructure represents roughly 20–25% of one year’s revenue. That’s an acceptable trade for a 25-year guarantee that the array is producing what it should — a guarantee that depends entirely on the wires being right.
Conclusion
Solar monitoring system wiring is unglamorous but high-leverage work. A correctly installed CT and a properly terminated RS-485 chain protect 25 years of revenue. A backwards CT or a missing 120Ω resistor can hide tens of thousands of euros in lost production for years before anyone notices. Also see: Us Residential Solar Market Trends 2026.
The discipline is straightforward: place CTs in the right physical location with the arrow pointing the right way, size the ratio to the actual peak current, run RS-485 as a true daisy chain with termination at both ends, and ground the shield at one end only. None of this requires exotic skills or expensive tools. It requires attention to the rules every time, on every job.
Three actions for your next commissioning:
- Photograph every CT during install — the arrow direction, the conductor, and the meter terminal block. Store the photos in the as-built file. This single habit eliminates 80% of future polarity disputes.
- Test 120Ω termination at both ends of every RS-485 chain before final sign-off. A digital multimeter across the A/B terminals with the bus de-energized reads about 60Ω with both terminators installed (120Ω in parallel) — a fast field check.
- Document the Modbus address map on the as-built drawings. Future technicians will thank you. So will the EPC’s reputation when the system needs warranty work in year 7.
For broader monitoring strategy, compare data loggers and platforms in our solar monitoring systems comparison, and see the solar weather monitoring tools guide for irradiance and weather station integration. To build complete commercial proposals that include monitoring scope and cost, solar proposal software with integrated monitoring BOMs prevents under-scoped quotes and protects margin.
Further Reading and References
- Texas Instruments — Introduction to the RS-485 Standard: definitive reference on TIA/EIA-485 electrical layer
- Modbus Organization — Modbus RTU specification: the authoritative Modbus standard documents
- IEC 61724-1 — Photovoltaic system performance monitoring: international standard for PV monitoring accuracy classes
- NFPA 70 (NEC) Article 725: Class 1, 2, and 3 remote-control, signaling, and power-limited circuits
- Belden 9842 datasheet: reference 120Ω twisted-pair cable for RS-485
- ANSI C12.20: revenue meter accuracy classes for utility billing
- NIST — Calibration traceability for revenue-grade CTs: national lab calibration standards
Frequently Asked Questions
What causes negative production readings on a solar monitoring system?
Negative production readings on a solar monitoring system are almost always a CT polarity error. The CT arrow or dot must point toward the source of current — meaning toward the inverter for production CTs and toward the grid for consumption CTs. If the CT is reversed, the meter reads exported power as negative. The fix is either flipping the CT 180° on the conductor or swapping the X1 and X2 leads at the meter terminal block.
How long can RS-485 cable run for solar monitoring?
RS-485 supports a maximum cable length of 4,000 ft (1,200 m) at 9,600 baud per the TIA/EIA-485 standard. At 19,200 baud the practical limit drops to about 3,000 ft, and at 115,200 baud it falls to around 400 ft. For runs longer than 4,000 ft, use an RS-485 repeater every 1,000 m, convert to fiber optic with media converters, or terminate at an Ethernet gateway and continue over LAN. Cable type, grounding, and termination quality also affect achievable distance.
Where should you place a CT on a solar monitoring system?
CT placement depends on what you want to measure. Production CTs go on the AC output conductors between the inverter and the main panel, with the arrow pointing toward the panel. Consumption CTs go on the main service conductors between the meter and the main breaker, with arrows pointing toward the loads. Grid-tie CTs sit on the line side of the main breaker with arrows pointing toward the grid. Never clamp a CT around both line conductors at once — current will cancel and the reading will be zero.
Do you need a 120Ω termination resistor on RS-485?
Yes — RS-485 requires a 120Ω termination resistor at each physical end of the daisy chain to match the characteristic impedance of twisted-pair cable. Without termination, signal reflections corrupt data and cause Modbus timeouts. Many inverters and data loggers have a DIP switch or jumper that enables an internal 120Ω terminator. Only the two devices at the ends of the chain should be terminated — devices in the middle must have termination disabled.
Can you use Cat5e for RS-485 solar monitoring wiring?
Cat5e works for short RS-485 runs under 100 m in low-noise environments, but it is not ideal. Cat5e has 100Ω impedance versus RS-485’s preferred 120Ω, which creates a minor impedance mismatch and reduces the useful range. For runs over 100 m or in electrically noisy commercial sites, use Belden 9842 or equivalent 120Ω shielded twisted-pair cable rated for RS-485. The shield should be grounded at one end only to avoid ground loops.
What CT ratio should you choose for a residential solar monitoring system?
CT ratio depends on the service size. For 100A residential services use a 100:5 CT, for 200A services use a 200:5 CT, and for 400A services use a 400:5 CT. Oversizing CTs reduces measurement accuracy at low currents because most of the CT range goes unused — a 400:5 CT on a 100A service will resolve poorly at 5–10A loads. Match the CT ratio to the actual maximum service amperage, not the conductor rating.
How many Modbus devices can you connect on one RS-485 segment?
The Modbus RTU specification supports up to 247 device addresses, but the practical limit on a single RS-485 segment is 31 devices without repeaters and 32 devices total including the master. Each device draws bias current from the line, and standard RS-485 transceivers can drive 32 unit loads. Beyond 31 devices, add an RS-485 repeater to start a new segment. Keep stub lengths under 1 m and assign unique Modbus addresses 1–247 in sequence for easy troubleshooting.
Why does my solar monitoring system show CRC errors?
CRC errors on a solar monitoring system indicate corrupted Modbus packets, which usually trace to one of four causes: missing or wrong 120Ω termination, incorrect baud rate or parity setting, ground loop interference from improper shield grounding, or excessive cable length without repeaters. Start by verifying termination at both ends, confirming all devices share the same baud rate and parity, and grounding the cable shield at one point only. If errors persist, halve the cable run with a repeater or move to fiber for the long leg.
Should RS-485 shield ground at one end or both ends?
Ground the RS-485 cable shield at one end only — typically the data logger or master device end. Grounding at both ends creates a ground loop because building earth potentials differ across long distances, and the resulting circulating current induces noise into the data pair. Single-end grounding drains static charge and provides EMI shielding without creating a current path. The unconnected shield end should be insulated and labeled to prevent accidental contact.
Do I need conduit for RS-485 monitoring cable in a commercial solar install?
Yes — NEC 725 classifies RS-485 monitoring cable as Class 2 or Class 3 circuits and requires it to be installed in conduit or use rated cable whenever it runs alongside power conductors, in concealed spaces, or outdoors. Use plenum-rated (CMP) cable in air-handling spaces and direct-burial-rated cable for underground runs. Separate Class 2 monitoring cable from AC power conductors by at least 50 mm (2 in) or use a grounded metal divider, per NEC 725.136.


