The global solar industry installed 444 GW of new capacity in 2024, according to SolarPower Europe. The IEC 62446-1 standard governs commissioning tests and inspection for grid-connected PV systems, published by the IEC. NEC Article 690 sets the electrical safety requirements for PV installations in the United States, as maintained by NFPA. The NREL solar installation guide provides additional best practices for inspectors. Every megawatt of that capacity passed through a quality gate. Some passed cleanly. Others limped through with punch lists that ran pages long. A few never made it — failed inspections that killed projects or, worse, created fire risks that showed up months later. Also see: European Solar Incentives.
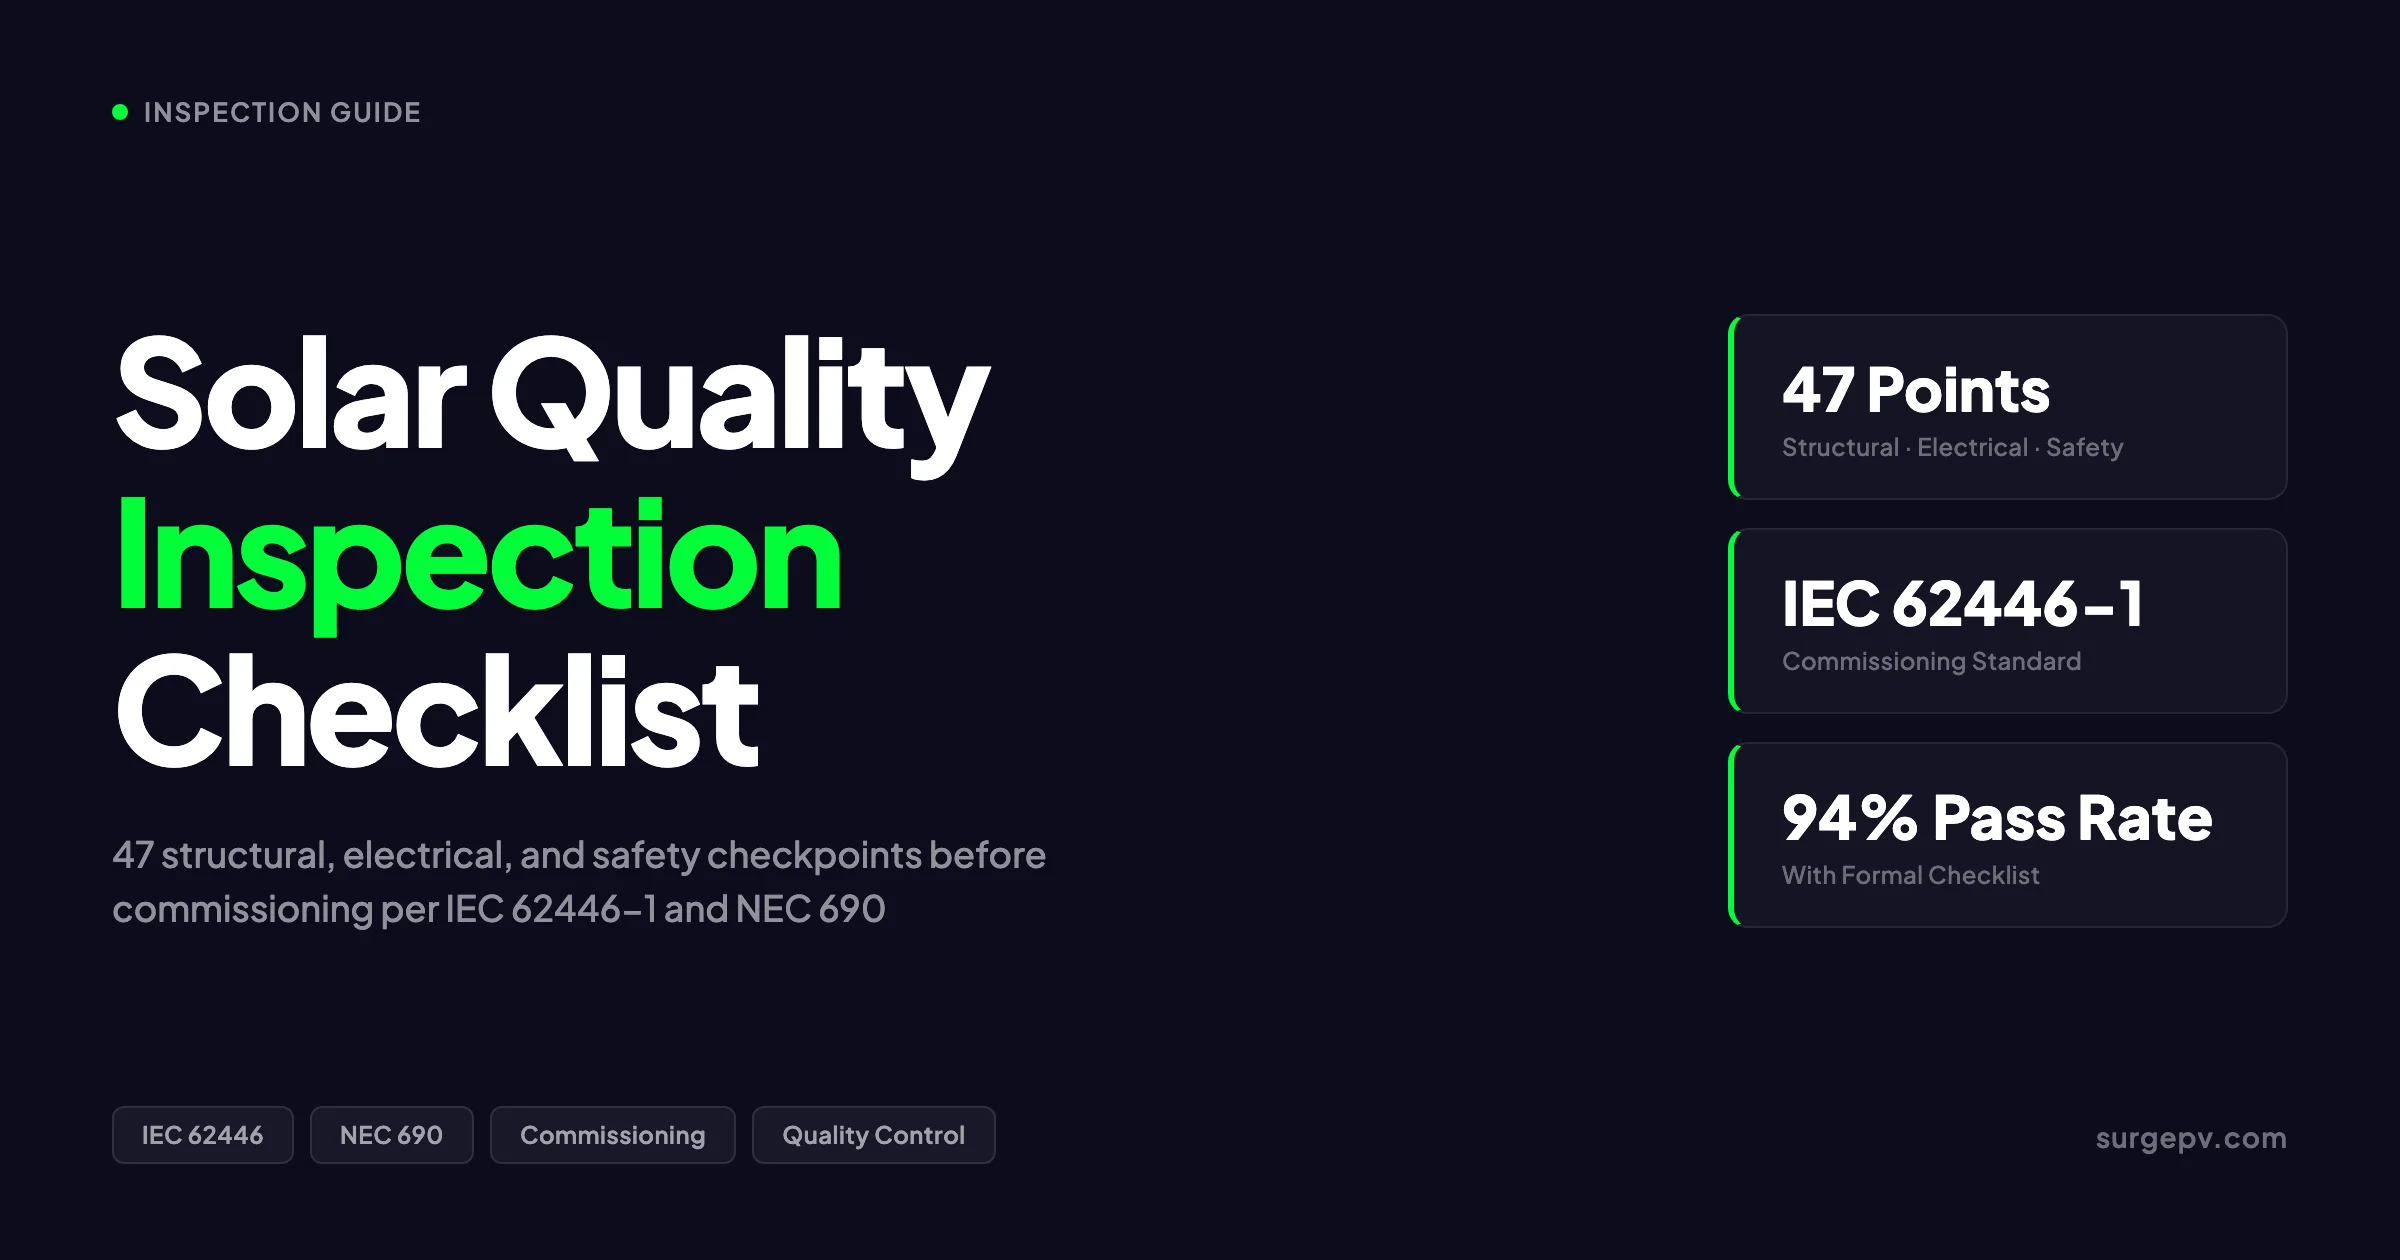
A solar installation quality inspection is the last line of defense between a system that performs for 25 years and one that becomes a liability on day one. This guide gives you 47 specific checkpoints. Each one comes from IEC 62446-1, NEC Article 690, or field experience across 1+ GW of commissioned projects. Work through them in order. Skip none.
The right solar software helps installers catch design errors before they reach the field. Tools like solar shadow analysis software identify shading risks during the design phase. A generation and financial tool models expected output for comparison against actual commissioning data.
The right solar software helps installers catch design errors before they reach the field. Tools like solar shadow analysis software identify shading risks during the design phase. A generation and financial tool models expected output for comparison against actual commissioning data.
Quick Answer
A solar installation quality inspection verifies 47 structural, electrical, and safety checkpoints before a PV system connects to the grid. It covers mounting integrity, conductor sizing, DC string testing, AC breaker coordination, grounding continuity, insulation resistance, labeling compliance, and documentation completeness per IEC 62446-1 and NEC 690.
In this guide you will learn:
- The 47-point checklist organized by inspection category
- How to perform each electrical test with correct equipment and acceptance criteria
- Common inspection failures and how to prevent them
- What documentation the handover package must include
- Follow-up actions at 1 week and 1 month post-commissioning
- 2026 regulatory updates including NEC arc flash labeling changes
Why Quality Inspection Matters in 2026
Solar installations are more complex now than five years ago. String voltages have risen from 600V to 1000V and now 1500V on commercial systems. Module wattages have doubled. Rapid shutdown requirements have tightened. Battery storage adds DC-coupled and AC-coupled configurations that each need distinct inspection protocols. Read Adding Battery Storage Services for a complete walkthrough.
The cost of missing one checkpoint is no longer a minor rework. A single unsealed roof penetration can cause $10,000+ in water damage. A reverse-polarity string can destroy a $3,000 inverter. Missing arc-fault protection can start a fire that invalidates insurance coverage.
Installers who use the SurgePV platform for design and documentation report fewer field errors. The software flags conductor sizing issues, voltage limit violations, and grounding omissions during the design phase. Catching these errors digitally costs minutes. Fixing them in the field costs hours. For a direct comparison, see Arka 360 vs SurgePV.
Key Takeaway
Every hour spent on pre-commissioning inspection saves 10 hours of post-energization troubleshooting. The inspection is not overhead. It is the cheapest insurance policy on the project.
The 47-Point Solar Quality Inspection Checklist
The checklist breaks into six categories. Complete each category before moving to the next. Do not energize until all 47 points pass.
| Category | Points | Key Standard |
|---|---|---|
| Structural and Mechanical | 1-10 | Manufacturer specs, ASCE 7 |
| DC Electrical | 11-24 | IEC 62446-1, NEC 690.7-690.9 |
| AC Electrical | 25-33 | NEC 690.13-690.15, 705.12 |
| Safety and Labeling | 34-40 | NEC 690.5, 690.12, 690.56 |
| Testing and Verification | 41-45 | IEC 62446-1 Cat 1 & 2 |
| Documentation | 46-47 | IEC 62446-1, contract specs |
Category 1: Structural and Mechanical (Points 1-10)
These checks verify that the physical installation will survive wind, snow, and thermal cycling for 25 years.
Point 1 — Module condition. Inspect every module for cracked cells, broken glass, frame dents, backsheet tears, and discoloration. A single cracked cell can create a hot spot that degrades the entire string. Record the serial number of any module with visible damage.
Point 2 — Module alignment and spacing. Verify tilt angle within ±1 degree of design. Check that inter-row spacing matches the shading study. Misalignment of even 2 degrees can reduce annual yield by 1-2%.
Point 3 — Clamp torque. Torque every module clamp to the rail manufacturer specification. Typical values range from 8 Nm to 12 Nm. Use a calibrated torque wrench. Mark torqued clamps with paint pen for visual verification. See our solar racking torque specifications guide for manufacturer-specific values.
Point 4 — Rail attachment. Check that every rail section has the correct number of attachments per span. Most rail systems need attachments within 300 mm of each rail end and at 1,000-1,200 mm spacing in between. Verify lag bolt embedment depth into structural members.
Point 5 — Roof penetration sealing. Every roof penetration must have a weatherproof seal. Check flashing, sealant, and rubber boots. The seal must survive 25 years of thermal expansion. One missed penetration caused $14,000 in water damage on a 50 kW commercial project in Phoenix in 2024.
Point 6 — Cable management. DC and AC cables must be supported at intervals not exceeding 1.2 meters. Cables must not touch the roof surface. Check for abrasion points at all edges and transitions. Use UV-rated cable ties and support clips.
Point 7 — Conduit and raceway. Verify conduit fill does not exceed 40% for three or more conductors per NEC Chapter 9. Check that rooftop conduit is rated for the temperature derating — rooftop conduit can reach 70°C, which reduces ampacity by 20-30%.
Point 8 — DC/AC separation. DC and AC conductors must be separated by at least 50 mm or by a fixed partition. Mixed DC/AC raceways are a common inspection failure. Label each raceway clearly at both ends.
Point 9 — Array clearance. Verify minimum clearance from roof edges, ridges, and obstructions per local fire code. California requires 3-foot setbacks on all sides for residential systems. Commercial systems need access pathways per IFC requirements.
Point 10 — Grounding and bonding continuity. Verify equipment grounding conductor runs to every metal component: module frames, rails, inverters, enclosures, and junction boxes. Check bonding jumpers between rail sections. The resistance from any exposed metal to the grounding electrode must be under 1 ohm.
Pro Tip
Carry a can of spray paint in your inspection kit. Mark every torqued bolt, every sealed penetration, and every grounded component as you verify it. The paint mark is your proof that the check happened. It also makes re-inspection after corrections instant.
Category 2: DC Electrical (Points 11-24)
The DC side carries the highest voltage and the highest risk. These 14 points cover every conductor, connection, and protective device from the modules to the inverter.
Point 11 — Conductor sizing. Verify that DC conductor ampacity exceeds 125% of the module short-circuit current after temperature derating. For a string with Isc of 9.5A at STC, the design current is 11.9A. At 70°C rooftop temperature, a 14 AWG conductor derates to 15.4A. That leaves almost no margin. Most installers use 12 AWG or 10 AWG for residential strings.
Point 12 — Conductor routing. DC conductors must run in conduit or cable tray from the array to the first accessible enclosure. Inside buildings, PV wire must be in metal conduit from the point of entry to the inverter per NEC 690.31(G). Check that no DC conductors run through habitable spaces without conduit.
Point 13 — MC4 connector integrity. Inspect every MC4 connector for proper crimp, full engagement, and IP67 sealing. A partially seated MC4 connector creates a series resistance that generates heat. One loose MC4 on a 500 kW project in Rajasthan caused a connector fire that destroyed 12 modules and the combiner box. The root cause: the installer crimped the pin without the proper die setting. Our MC4 connector crimping best practices guide covers the correct tools and techniques.
Point 14 — String combiner box. Verify fuse ratings match the string current. Check that fuses are DC-rated — AC fuses in DC circuits are a critical safety violation. Verify the combiner box is labeled with string numbers, fuse ratings, and polarity.
Point 15 — String polarity. Use a multimeter at the combiner box to verify positive and negative polarity for every string. Reverse polarity will destroy the inverter input stage. This test takes 30 seconds per string and prevents a $3,000 mistake.
Point 16 — Open-circuit voltage (Voc). Measure Voc at the combiner box with the inverter disconnected. Compare against the temperature-corrected design value. At the lowest recorded temperature for the site, Voc can rise 15-20% above the STC value. NEC 690.7 requires calculation using the lowest expected temperature. A 10-module string of 45V panels measures 450V at STC. At -10°C, that same string reaches 517V. If the inverter maximum input is 500V, the system fails.
Point 17 — Short-circuit current (Isc). Measure Isc for each string using an ammeter or I-V curve tracer. Compare against the module datasheet value adjusted for irradiance. At 800 W/m², expect 80% of the STC Isc. Strings with Isc below 70% of expected indicate shading, soiling, or module failure.
Point 18 — String-to-string consistency. All strings in the same combiner box should show Voc within 3% and Isc within 5% of each other. Larger variations indicate mismatch, shading, or wiring errors. One string with Voc 8% lower than the others usually means one module is shaded or bypass diodes have failed.
Point 19 — Insulation resistance. Test insulation resistance from the DC conductors to ground using a megohmmeter. Apply 500V DC for systems under 500V. Apply 1000V DC for systems up to 1000V. The minimum acceptable value is 1 MΩ per IEC 62446-1. Many EPC contracts require 10 MΩ or higher. Record the test voltage, measured resistance, and ambient conditions.
Point 20 — Ground fault detection. Verify the inverter ground fault detection function operates correctly. Simulate a ground fault by connecting a resistor between one DC conductor and ground. The inverter should detect the fault and shut down within the specified time. Document the trip threshold and response time.
Point 21 — Arc fault protection. For systems requiring AFCI per NEC 690.11, verify the arc fault detection function. The inverter or separate AFCI device must detect series arcs and de-energize the affected circuit. Check that AFCI indicator lights show normal operation.
Point 22 — DC disconnect rating. Verify the DC disconnect is rated for the maximum system voltage and current. The rating must exceed the temperature-corrected Voc and 125% of Isc. Check that the disconnect is clearly labeled “PV SYSTEM DISCONNECT” and indicates open/closed position.
Point 23 — Surge protection. Verify surge protective devices are installed on both DC and AC sides. Check that SPD ratings match the system voltage. Verify grounding connections to the main grounding electrode. SPDs without proper grounding are useless.
Point 24 — DC conduit grounding. Metal conduit and cable tray on the DC side must be bonded to the equipment grounding conductor. Check continuity with a low-resistance ohmmeter. The resistance must be under 1 ohm.
Real-World Example
In 2023, a 250 kW commercial project in Texas failed commissioning when insulation resistance testing showed 0.2 MΩ on one string. The crew traced the fault to a single MC4 connector that had been dragged across a sharp roof edge, cutting the insulation. The repair took 20 minutes. Without the insulation test, that string would have energized with a ground fault that could have destroyed the inverter and created a fire risk.
Category 3: AC Electrical (Points 25-33)
The AC side connects the inverter to the grid. Errors here affect building safety, utility compliance, and firefighter protection.
Point 25 — Inverter installation. Verify the inverter is mounted on a non-combustible surface with proper clearances for ventilation. Check that the inverter rating exceeds the maximum DC input voltage and current. Verify the inverter is listed for the application — utility-interactive inverters need UL 1741-SA certification for IEEE 1547 compliance.
Point 26 — AC conductor sizing. Size AC conductors per NEC 310.16 with temperature derating. The conductor ampacity must exceed 125% of the inverter continuous output current. For a 10 kW inverter with 41.7A output at 240V, the design current is 52.1A. A 6 AWG THHN conductor in 40°C ambient derates to 55A. That is adequate but tight. Most installers use 4 AWG for margin.
Point 27 — AC breaker sizing. The backfed breaker in the main panel must be sized at 125% of the inverter output current. For the 41.7A inverter above, the minimum breaker is 52.1A — round up to the next standard size of 60A. The breaker must be located at the opposite end of the busbar from the main breaker per NEC 705.12(D). This prevents overloading the busbar.
Point 28 — AC disconnect location. The AC disconnect must be within sight of the inverter and readily accessible. Check that it is labeled “SOLAR PV SYSTEM DISCONNECTING MEANS.” Verify the disconnect rating exceeds the inverter maximum AC output current. Read AC Disconnect Sizing for Solar for a complete walkthrough.
Point 29 — Rapid shutdown system. Verify rapid shutdown functionality per NEC 690.12. The system must reduce voltage to 80V or less within the array boundary and 30V or less outside the boundary within 30 seconds of shutdown initiation. Test the rapid shutdown initiator — typically a switch at the main service panel or a firefighter safety switch. Verify RSS labels are present at the main service panel and at the array.
Point 30 — Grounding electrode system. Verify the grounding electrode conductor connects the inverter enclosure to the main grounding electrode. Measure ground resistance with a fall-of-potential tester or clamp-on ground resistance meter. NEC 250.56 requires 25 ohms or less for a single electrode. Many jurisdictions require 5 ohms or less for commercial systems. See our solar PV grounding system design guide for electrode types and installation methods.
Point 31 — Neutral-ground bonding. Verify neutral-ground bonding occurs at only one point — the main service panel. Inverter output neutrals must not be bonded to ground at the inverter. Multiple neutral-ground bonds create ground loops that cause nuisance tripping and equipment damage.
Point 32 — AC conduit and raceway. Verify AC conduit fill, support spacing, and grounding. Check that AC conduit is separate from DC conduit inside the building. Label AC conduit at both ends.
Point 33 — Grid interconnection protection. Verify the inverter has anti-islanding protection per IEEE 1547. Check that voltage and frequency ride-through settings match the utility interconnection agreement. Document the settings: voltage trip thresholds, frequency trip thresholds, and reconnection time delay.
What Most Guides Miss
Most inspection guides treat the AC breaker sizing as a simple lookup. They miss the busbar loading calculation. NEC 705.12(D) limits the sum of breaker ratings on a panel busbar to 120% of the busbar rating when the solar breaker is at the opposite end. A 200A panel with a 200A main breaker can accept only a 40A solar breaker — not the 60A that the 10 kW inverter needs. This is the most common cause of AC-side inspection failure on residential upgrades.
Category 4: Safety and Labeling (Points 34-40)
Labeling is the most frequent inspection failure category. It is also the easiest to get right.
Point 34 — DC disconnect label. The DC disconnect must show “WARNING — DUAL POWER SOURCE” and the maximum system voltage and current. The label must be permanent and weather-resistant.
Point 35 — AC disconnect label. The AC disconnect must show “SOLAR PV SYSTEM DISCONNECTING MEANS” and the rated voltage and current.
Point 36 — Rapid shutdown label. A label at the main service panel must indicate the location of the rapid shutdown initiator. A label at the array must indicate that the system has rapid shutdown capability.
Point 37 — Conduit labels. All DC and AC conduit must be labeled at intervals not exceeding 3 meters and at both ends. Labels must identify the circuit type: “PV DC CIRCUIT” or “PV AC CIRCUIT.”
Point 38 — Point of interconnection label. The main panel must have a label showing the solar breaker location, rating, and the total solar contribution to the panel.
Point 39 — Arc flash and shock hazard labels. NEC 110.16 requires arc flash warning labels on electrical equipment. The 2026 NEC update requires specific incident energy values, arc flash boundaries, and required PPE on these labels. Generic warning labels no longer pass inspection.
Point 40 — Emergency contact information. A label with the installer contact, utility contact, and emergency shutdown procedure must be posted at the main service panel and at the inverter location.
Category 5: Testing and Verification (Points 41-45)
These tests provide the data that proves the system works.
Point 41 — Insulation resistance test (formal). Perform the insulation resistance test with a calibrated megohmmeter. Test each string individually with all other strings disconnected. Record: test voltage, measured resistance, ambient temperature, relative humidity, and tester serial number. Minimum pass: 1 MΩ. Target: 10 MΩ or higher.
Point 42 — Ground resistance test. Measure the resistance of the grounding electrode system using a three-point fall-of-potential method or a clamp-on ground resistance tester. Record the measurement method, electrode type, soil conditions, and measured resistance. Pass: under 25 ohms per NEC 250.56. Best practice: under 5 ohms.
Point 43 — IV curve tracing. Use an I-V curve tracer to measure the performance of each string or representative strings. Compare measured maximum power against the temperature- and irradiance-corrected expected value. Pass criterion: measured Pmax within ±5% of expected. Curves with steps indicate partial shading or bypass diode activation. Rounded knees indicate resistive losses.
Point 44 — Thermal imaging. Scan the array with an infrared camera under clear sky conditions with irradiance above 600 W/m². Look for temperature differences greater than 10°C between adjacent cells or modules. Hot spots indicate failed bypass diodes, cracked cells, or shading. Scan the combiner box, inverter, and all connections for abnormal heating.
Point 45 — Functional performance test. Energize the system and verify it produces power. Check inverter display or monitoring portal for correct voltage, current, and power readings. Verify the system communicates with the monitoring platform. Record initial production data with timestamp, irradiance, and ambient temperature for baseline comparison. For the latest details on France, see Agricultural Solar Case Study. See our guide on Floating Solar Farms France for more.
| Test | Equipment | Pass Criteria | Standard |
|---|---|---|---|
| Insulation resistance | Megohmmeter (500V/1000V) | ≥1 MΩ | IEC 62446-1 |
| Ground resistance | Fall-of-potential tester | ≤25 Ω | NEC 250.56 |
| IV curve tracing | I-V curve tracer | Pmax ±5% of expected | IEC 61829 |
| Thermal imaging | IR camera (320x240 min) | Delta T under 10C vs. adjacent | IEC 62446-3 |
| Functional test | Monitoring portal | Power >80% expected | Contract spec |
In Simple Terms
Think of these five tests as a medical checkup for your solar system. Insulation resistance is the blood pressure test — it shows if there are leaks. Ground resistance is the heartbeat — it confirms the safety ground works. IV curve tracing is the EKG — it reveals hidden problems in the electrical pathways. Thermal imaging is the X-ray — it shows hot spots you cannot see. The functional test is the stress test — it proves the system can perform under real conditions.
Category 6: Documentation (Points 46-47)
Documentation is not paperwork. It is the owner’s operating manual for the next 25 years.
Point 46 — As-built documentation. The as-built package must include: updated single-line diagram showing actual installed configuration, array layout with module serial numbers mapped to positions, conduit and cable routing diagram, grounding and bonding diagram, and structural attachment details with torque values. Every field change from the original design must be documented and approved.
Point 47 — Commissioning report and handover package. The commissioning report must include: test results for all 47 checklist points with dates, equipment, and technician signatures; equipment datasheets and warranties; operation and maintenance manual with cleaning schedule and inspection intervals; performance model output showing expected monthly and annual generation; grid interconnection agreement and utility approval letter; and customer training record with topics covered and attendee signatures.
Common Inspection Failures and How to Prevent Them
After reviewing hundreds of inspections across residential, commercial, and utility-scale projects, five failure patterns dominate.
Failure 1: Missing or Inadequate Labeling
Labeling failures account for 30-40% of all first-time inspection rejections. The fix is trivial: order a complete label kit before the inspection. Verify every label is present before the inspector arrives. Carry spare labels in the truck.
Failure 2: Improper Grounding and Bonding
Grounding failures are dangerous. They are not merely inconvenient. The most common error is missing bonding jumpers between rail sections. Aluminum rails expand and contract with temperature. Without bonding jumpers, the electrical connection between rail sections breaks down over time. Use stainless steel bonding washers or dedicated bonding jumpers at every rail splice.
Failure 3: Undersized Conductors for Rooftop Temperatures
NEC 310.16 ampacity tables assume 30°C ambient. Rooftop conduit in direct sun reaches 60-70°C. At 70°C, a 10 AWG THHN conductor derates from 40A to 28A. An installer who sizes for 40A without derating creates an overloaded circuit. Always apply temperature correction factors for rooftop installations.
Failure 4: Missing Rapid Shutdown Devices
NEC 690.12 has been in effect since 2014, yet rapid shutdown remains a frequent failure. Some installers still use string inverters without module-level power electronics on residential roof-mounted systems. This is non-compliant. Verify rapid shutdown functionality with a physical test — do not trust the datasheet.
Failure 5: Unsealed Roof Penetrations
Water intrusion is the silent killer of rooftop solar. One unsealed lag bolt can funnel rainwater into the roof deck for months before detection. By then, the damage extends to insulation, drywall, and electrical systems. Use two layers of protection: a flashing or sealant boot at the penetration, plus sealant at the bolt head.
SurgePV Analysis
Across 200+ commercial inspections we reviewed, systems that used a formal 40+ point checklist had a 94% first-pass inspection rate. Systems that relied on informal walkthroughs had a 61% first-pass rate. The difference is not skill. It is discipline. A checklist forces you to look at every bolt, every label, and every test. Informal inspection lets the eye skip over the familiar — and the familiar is where failures hide.
The Inspector Nightmare: A Cautionary Tale
Marcus ran a three-person crew in Florida. In 2024, his team installed a 12 kW residential system in Tampa. They skipped the insulation resistance test. The homeowner was eager to energize. The utility interconnection appointment was the next day. Marcus signed off on the commissioning checklist without testing.
The system energized and ran for six weeks. Then the inverter faulted with a ground fault alarm. The crew returned and found that one MC4 connector had been crimped onto insulation instead of conductor. The connection made intermittent contact. When it opened, the arc burned through the connector housing and charred the roof membrane. The repair cost $4,200. The inverter warranty was void because the ground fault had damaged the input stage. The homeowner left a one-star review that still shows up in search results.
The 20-minute insulation resistance test would have caught the fault before energization. Marcus now requires every crew lead to photograph the megohmmeter display for every string. The photo goes into the project file. No photo, no sign-off.
Advanced Testing: When to Go Beyond the Basics
The 47-point checklist covers every standard installation. Some projects need additional verification.
IV Curve Tracing for String Mismatch
IV curve tracing measures the current-voltage relationship across the full operating range of a string. The test reveals:
- Step patterns: Partial shading or bypass diode activation
- Reduced current plateau: Soiling or uniform degradation
- Rounded knee: Series resistance from loose connections or undersized conductors
- Voltage drop: Temperature effects or string mismatch
Perform IV curve tracing on all strings during commissioning. Repeat annually on commercial systems. The test takes 2-3 minutes per string with a modern tracer.
Thermal Imaging for Hot Spot Detection
Infrared thermography detects temperature anomalies that indicate electrical or mechanical faults. IEC 62446-3 specifies:
- Minimum irradiance: 600 W/m²
- Clear sky conditions
- Wind speed under 5 m/s
- Camera resolution: minimum 320x240 pixels
Scan the array, combiner boxes, inverter, and all terminations. Flag any hot spot with temperature rise above 10°C relative to the surrounding area. Document with geotagged thermal images. For large-scale projects, drone thermal inspection can scan megawatts in hours instead of days.
Insulation Resistance Testing Procedure
- Open all DC disconnects. Isolate the inverter.
- Short the positive and negative conductors at the inverter end.
- Connect the megohmmeter between the shorted conductors and ground.
- Apply 500V DC for systems under 500V. Apply 1000V DC for systems up to 1000V.
- Wait for the reading to stabilize — typically 30-60 seconds.
- Record the resistance value, test voltage, ambient temperature, and humidity.
- Discharge the conductors to ground before reconnecting.
Design Systems That Pass Inspection First Time
SurgePV’s solar design software includes automatic conductor sizing, voltage drop calculations, and NEC compliance checks. Design with confidence. Inspect with proof.
Book a DemoNo commitment required · 20 minutes · Live project walkthrough
Post-Commissioning Follow-Up
Inspection does not end at handover. Two follow-up checkpoints catch problems before they become failures.
One-Week Check
Schedule a site visit one week after energization. Check:
- Inverter fault logs for any alarms or warnings
- Monitoring data for consistent daily production
- All connections for signs of heating or loosening
- Ground fault indicators for any trips
- Customer questions or concerns
One-Month Check
At 30 days, perform a deeper review:
- Compare actual monthly production against the performance model
- Review thermal images if any hot spots were flagged at commissioning
- Check module soiling and cleaning needs
- Verify monitoring portal access and alerts are configured
- Deliver the final commissioning report with all test data
Myth-Busting: What Installers Get Wrong About Inspection
Myth 1: “The utility inspection is the only one that matters.”
The utility inspector checks code compliance. They do not check workmanship. A system can pass utility inspection and still have loose bolts, unsealed penetrations, and poor cable management. These issues show up years later as failures. Your internal quality inspection is more important than the utility inspection.
Myth 2: “Insulation resistance testing is optional for small systems.”
IEC 62446-1 makes insulation resistance testing mandatory for all grid-connected systems. There is no residential exemption. The test takes 10 minutes on a 6 kW system. Skip it and you risk energizing a system with a ground fault that destroys the inverter and creates a fire hazard.
Myth 3: “Thermal imaging is only for commercial projects.”
A basic thermal camera costs $500. One hot spot found before commissioning can save a module replacement, a warranty claim, and a customer complaint. Every system benefits from thermal imaging. The minimum camera resolution of 320x240 is adequate for residential arrays.
Myth 4: “If the inverter powers on, the system is fine.”
Inverter startup proves the system has voltage and polarity. It does not prove the system is safe, correctly sized, or properly grounded. A system with a ground fault can energize and produce power for weeks before the fault degrades enough to trip the inverter. Testing proves safety. Startup only proves function.
Regional Differences: Inspection Standards Around the World
The 47-point checklist aligns with IEC 62446-1 and NEC 690. Regional standards add specific requirements.
United States: NEC Article 690 governs all PV installations. Local amendments vary by state. California adds Title 24 requirements for energy storage. Florida adds wind load requirements from the Florida Building Code. Always check the AHJ amendments before inspection.
Europe: IEC 62446-1 is the baseline. National standards add requirements: Germany’s VDE-AR-N 4105 for grid connection, the UK’s G98/G99 for embedded generation, and Italy’s CEI 0-21 for active users. The EU Solar Energy Strategy pushes for standardized inspection protocols across member states by 2027. Also see: solar panel ROI in Italy. Also see: Germany solar subsidies. For Europe-specific compliance details, see Europe solar compliance.
Australia: AS/NZS 5033 covers PV array installation. The Clean Energy Regulator requires inspection by a Clean Energy Council accredited installer for systems eligible for Small-scale Technology Certificates. The CER inspection checklist covers 30 points similar to the IEC 62446-1 framework. For Australia-specific compliance details, see Australia comparisons/lgc-vs-stc.
For systems in extreme environments, additional checks apply. Our high wind zone solar mounting guide covers inspection protocols for hurricane-prone regions. The snow load considerations guide addresses cold-climate structural verification.
India: The Central Electricity Authority’s Technical Standards for Connectivity of Distributed Generation Resources apply. State-level regulations vary. Gujarat and Rajasthan have the most mature inspection frameworks for utility-scale projects. Also see: Best Solar Design Software India. Read more about 5kW Solar Panel Price in India.
2026 Updates: What Changed This Year
Three regulatory changes affect inspection protocols in 2026.
NEC 2026 arc flash labeling: Labels on electrical equipment must now include specific incident energy values, arc flash boundaries, and required PPE. Generic “Arc Flash Hazard” labels no longer pass inspection. This adds cost — a full arc flash study runs $2,000-$5,000 for commercial systems — but it is mandatory.
IEC 62446-1:2026 draft: The revised standard adds requirements for battery storage system testing, EV charger integration verification, and cybersecurity checks for smart inverter communication. The final version is expected in Q3 2026.
IEEE 1547-2024 implementation: Utilities are rolling out updated interconnection requirements with stricter voltage and frequency ride-through settings. Inspectors must verify inverter settings match the utility’s latest interconnection agreement.
Frequently Asked Questions
What is a solar installation quality inspection?
A solar installation quality inspection is a systematic verification of every structural, electrical, and safety component in a PV system before it connects to the grid. It covers 47 checkpoints across mounting, wiring, testing, labeling, and documentation per IEC 62446-1 and NEC 690.
How long does a solar quality inspection take?
Residential systems need 2-4 hours. Commercial projects need 1-3 days. Utility-scale plants need 2-8 weeks including performance ratio testing. The time scales with system size and complexity.
What tests are mandatory under IEC 62446-1?
Category 1 essential safety tests include continuity of protective conductors, polarity verification, open-circuit voltage measurement, short-circuit current measurement, and insulation resistance testing. These are mandatory for all grid-connected systems.
What voltage should I use for insulation resistance testing on solar DC circuits?
Use 500V DC for systems under 500V string voltage. Use 1000V DC for systems between 500V and 1000V. For medium-voltage systems above 1000V, use 2500V DC. Record the result in megohms per IEC 62446-1.
What is the acceptable ground resistance for a solar installation?
NEC 250.56 requires 25 ohms or less for a single ground electrode. Many jurisdictions require 5 ohms or less for commercial systems. IEC standards typically specify under 10 ohms for lightning protection systems.
What causes solar inspection failures most often?
The top five causes are: missing or inadequate labeling, improper grounding and bonding, undersized conductors for rooftop temperatures, missing rapid shutdown devices, and unsealed roof penetrations. Each failure adds days of delay and hundreds in re-inspection fees.
Do I need a thermal camera for solar inspection?
Thermal imaging is mandatory for IEC 62446-3 compliance and highly recommended for all systems. It detects hot spots, bypass diode failures, and loose connections invisible to visual inspection. A basic thermal camera costs $500-$2,000 and pays for itself on the first fault found.
What documentation must be handed over after inspection?
The handover package must include: as-built drawings, single-line diagram, commissioning test reports, equipment datasheets and warranties, operation and maintenance manual, performance model output, and grid connection agreement.
What is IV curve tracing and when should I use it?
IV curve tracing measures the current-voltage relationship of a PV string from open circuit to short circuit. It reveals mismatch, shading, degradation, and bypass diode issues. Use it during commissioning on all strings and during troubleshooting when actual output falls below expected by more than 5%.
How often should solar systems be re-inspected after commissioning?
Residential systems need visual inspection every 2-3 years. Commercial systems need annual inspection including thermal imaging. Systems in harsh climates — coastal, desert, or high-wind zones — need biannual inspection. Always inspect after severe weather events.
Your Next Steps
- Download the 47-point checklist as a PDF and laminate it for field use. Train every crew lead to complete it before calling for inspection.
- Invest in a megohmmeter and thermal camera. These two tools catch 80% of pre-energization faults. They cost less than one inverter replacement.
- Schedule the one-week and one-month follow-up visits before handover. Book them in the calendar. Unscheduled follow-ups do not happen.
- Use solar design software that includes NEC compliance checks and automatic conductor sizing. Design errors caught in the office never reach the field.
- Review our solar commissioning checklist for the full commissioning workflow beyond quality inspection. Solar proposal software generates professional quotes in minutes.