Quick Answer
A house with three south-facing dormers loses 30 to 40 percent of its theoretical solar potential before a single module is placed. Direct area loss — the dormer footprint and its roof together remove 30 to 80 square feet of main-slope area, depending on size. 2.
Dormer windows are the single most expensive ornamental feature on a residential roof when you measure cost in lost solar kWh. They cut into usable roof area, cast shadows that move across adjacent modules from morning to mid-afternoon, and force code-required exclusion zones that compound across every dormer on the slope. A house with three south-facing dormers loses 30 to 40 percent of its theoretical solar potential before a single module is placed. This guide walks through how to design around them: the setback rules that govern every edge, the dormer geometries that change the math, the shading profiles that drive MLPE choice, and the software workflows that turn a four-hour manual layout into a 30-minute job that captures every recoverable kWh. Also see: Us Residential Solar Market Trends 2026.
A house with three south-facing dormers loses 30 to 40 percent of its theoretical solar potential before a single module is placed. Direct area loss — the dormer footprint and its roof together remove 30 to 80 square feet of main-slope area, depending on size. 2.
TL;DR — Solar Panel Layout Around Dormer Windows
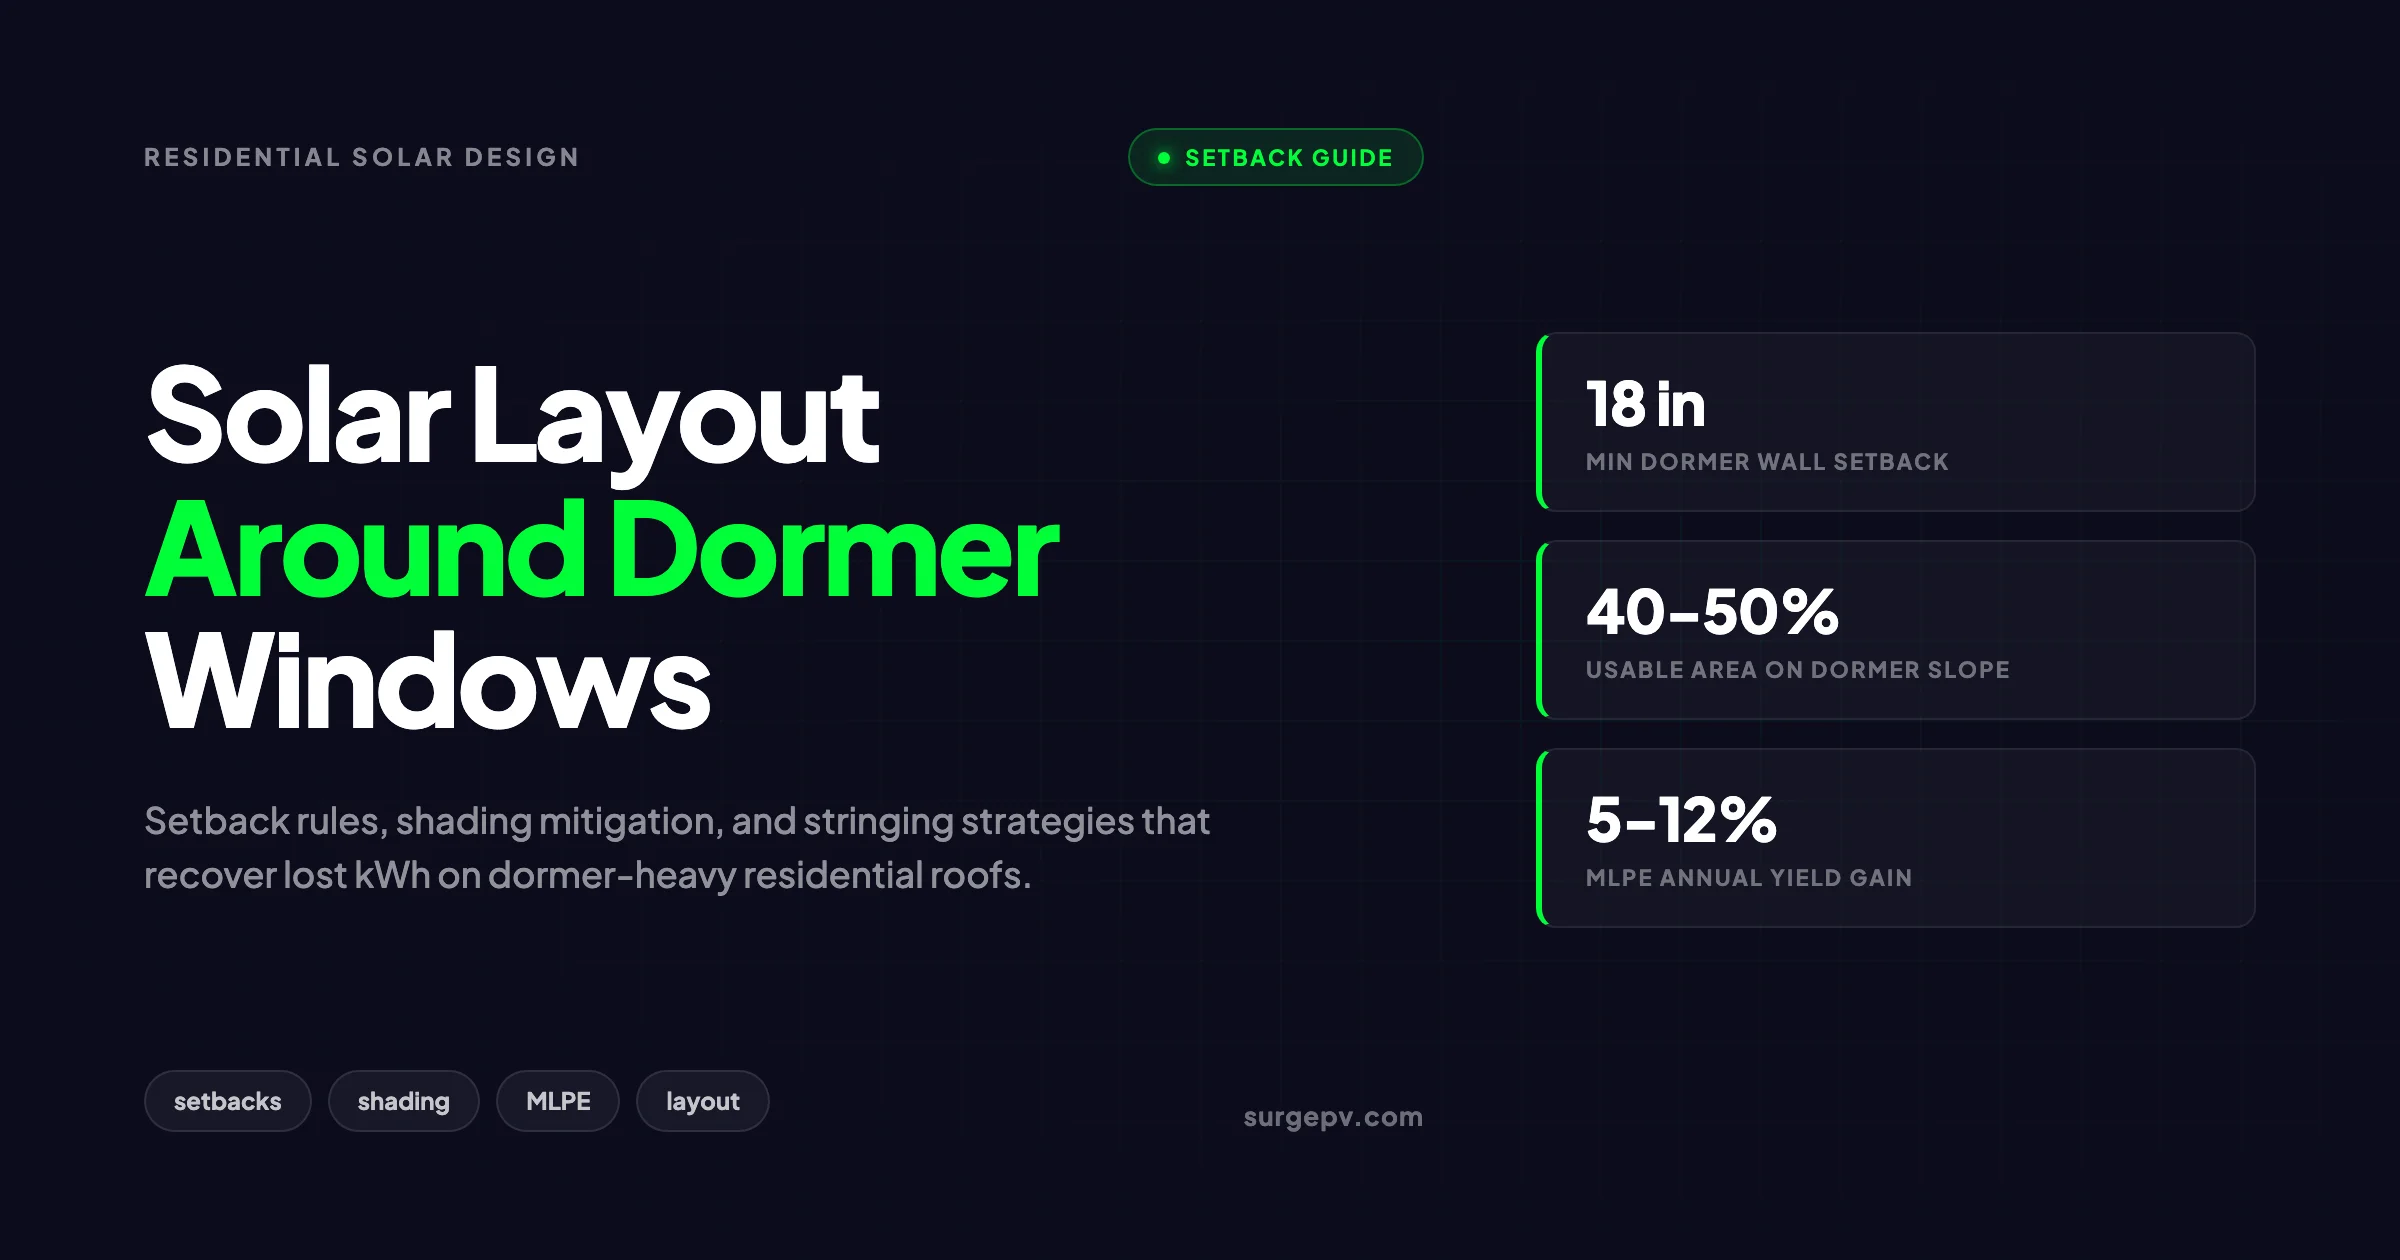
Apply 18-inch setbacks from every dormer wall, hip, and eave, and 36 inches from the main ridge. Reserve a 36-inch firefighter pathway when array coverage exceeds 33 percent of the roof slope or when an AHJ requires it for egress dormers. Run a 3D shading study at hourly resolution and tag any module losing more than 5 percent of annual production. Wire shaded modules through microinverters or DC optimizers so partial shade does not drag down the rest of the string. Expect 50 to 65 percent of gross roof area to remain usable on a slope with two or three dormers.
See Solar Shading Analysis Guide for detailed guidance.
Here is what this guide covers:
- Why dormers are the hardest residential roof obstruction to design around, and how the four common dormer types change the layout problem
- Exact code-required setbacks from dormer walls, hips, eaves, and ridges under the International Fire Code, IRC R324, and common state amendments
- How to calculate the shading footprint of a dormer at every hour of the year
- Module orientation and stringing rules for the narrow strips between dormers
- When to switch from string inverters to microinverters or DC optimizers
- The eight design mistakes that cost installers the most kWh on dormer-heavy roofs
- Software workflows that compress a four-hour manual layout into 30 minutes (and feed straight into solar proposal software)
- Three real-world layouts on common dormer configurations, with kW numbers
This is written for solar designers, residential EPC engineers, and installers who keep losing modules to dormer geometry they did not plan for.
What Makes Dormers the Hardest Roof Obstruction to Design Around
A skylight is a hole. A vent pipe is a circle. A dormer is a building. It has its own walls, its own roof, its own ridge, its own eaves, and in code terms, its own complete set of setback boundaries. Every dormer on a slope multiplies the number of edges the array has to respect.
The geometry problem comes in three layers:
- Direct area loss — the dormer footprint and its roof together remove 30 to 80 square feet of main-slope area, depending on size.
- Setback exclusion zones — the perimeter around the dormer where modules are not allowed, typically 18 inches on every side, which doubles the effective footprint.
- Shading footprint — the moving shadow the dormer casts on the main slope from sunrise to mid-afternoon, which can disqualify modules even outside the setback zone.
The ratio of usable area to gross slope area on a roof with two dormers is rarely above 65 percent, and on roofs with three or more it often falls under 55 percent. Compare that to a clean gable roof at 75 to 85 percent and the cost becomes clear.
The electrical problem comes from how dormers fragment the slope into narrow strips. A clean slope can accept long strings of 10 to 14 modules at a single tilt and azimuth. A dormer-heavy slope breaks into pockets of three to six modules each, which creates string sizing and MPPT count problems that string inverters were not designed for.
The shading problem is the most overlooked. A 6-foot-tall dormer casts a 6-to-12-foot shadow at 30-degree solar elevation, and that shadow falls on different modules at different hours. Without shading analysis at hourly resolution, designers undercount the loss and the homeowner sees production gaps the proposal never predicted.
The Four Dormer Types and How Each Changes the Layout
Not every dormer behaves the same way. The roof shape, height, and projection direction each change the setback math and the shadow geometry. The four common types account for almost every residential dormer in North America and Europe. Also see: European Solar Incentives. For Europe-specific compliance details, see Europe solar compliance.
Gable Dormer
A gable dormer has a triangular front and a pitched roof that mirrors the main slope’s pitch. It is the most common ornamental dormer on Colonial, Cape Cod, and traditional residential designs.
Setback profile: 18-inch exclusion on each side wall, 18 inches above the dormer ridge where it meets the main slope, and 18 inches around the dormer’s own roof if you intend to place modules on it.
Shading profile: Tall and narrow. The shadow at low sun elevations can stretch 8 to 15 feet across the main slope on either side of the dormer. The strip directly behind the dormer (uphill) often sits in shade until the sun rises above the dormer ridge, which is usually 9 to 11 AM.
Layout impact: Gable dormers create the widest exclusion zones because their walls extend outward from the main slope at a sharp angle. Expect to lose 40 to 50 square feet of usable area per dormer on the main slope alone.
Shed Dormer
A shed dormer has a single-pitch roof that runs at a shallower angle than the main slope. It often runs the full width of the second story on Cape Cod homes and extends back from the front of the house.
Setback profile: 18 inches on each side wall and 18 inches at the wall where the shed dormer meets the main slope above. The dormer roof itself is often large enough to host its own array.
Shading profile: Wide and shallow. Because the dormer roof projects forward at a low pitch, it shades a wider but shorter zone of the main slope. The main slope above a shed dormer is typically narrow, often only 3 to 5 feet from the dormer ridge to the main ridge.
Layout impact: Shed dormers are the most solar-friendly dormer type because their own roof can carry modules at a viable tilt. A shed dormer that runs 18 feet wide can host 4 to 6 modules in landscape orientation if the pitch is at least 15 degrees.
Hip Dormer
A hip dormer has a sloped roof on three sides instead of a gable end. It is more compact than a gable dormer but creates more setback edges.
Setback profile: 18 inches on each of the three hip lines plus 18 inches at the wall where the dormer meets the main slope. The dormer roof is rarely large enough to host modules on a hip dormer.
Shading profile: Compact and conical. The shadow is shorter than a gable dormer’s because the hip dormer is usually smaller, but it is wider in proportion to its height.
Layout impact: Hip dormers steal less roof area than gable dormers but compromise more module spaces because of the multiple hip-line setbacks. Treat each hip-line setback as 18 inches measured from the hip ridge itself.
Eyebrow Dormer
An eyebrow dormer has a curved, low-profile roof that arches up from the main slope without a vertical wall. It is common on shingle-style and Tudor revival homes.
Setback profile: Most AHJs treat the eyebrow as a roof obstruction rather than a separate plane and apply an 18-inch setback around its full perimeter.
Shading profile: Low and wide. The eyebrow rarely casts a shadow longer than 4 feet because of its low projection.
Layout impact: Eyebrow dormers cost the least in solar yield, typically 1 to 2 modules per dormer, but they appear on the most architecturally restricted homes where the homeowner is also the most resistant to visible array layouts.
Pro Tip — Identify the Dormer Type Before the Site Visit
Use Google Earth and Street View to classify every dormer on the roof before you arrive on site. The classification drives your shading study assumptions, your setback math, and whether to bring a ladder long enough to measure dormer roof pitch. Walking up to a roof and discovering three hip dormers when you planned for two gable dormers can cost an hour of remeasurement.
Setback Rules: Code, AHJ Variation, and How to Read Them
Every solar designer working on residential roofs in the United States needs to know three documents: the International Fire Code (IFC), the International Residential Code (IRC) Section R324, and the local AHJ amendments. The European equivalents are MCS guidance in the UK and the national fire codes in Germany, France, Spain, and Italy. Also see: solar panel ROI in Italy. Also see: Germany solar subsidies. Also see: France solar feed-in tariffs. Also see: Spain net metering.
The 18-Inch and 36-Inch Rule
The IFC and IRC R324.6 in their most recent editions both default to:
| Condition | Required Setback |
|---|---|
| Array covers ≤ 33 percent of roof slope | 18 inches from ridge, hips, valleys, and dormer walls |
| Array covers > 33 percent of roof slope | 36 inches from ridge; 18 inches from hips, valleys, dormer walls; 36-inch eave-to-ridge access pathway required |
| Egress dormer (bedroom escape window) | 36-inch clearance below window plus access pathway on at least one side |
| Edge of roof (eave or rake) | 18 inches typical, sometimes 1/3 of eave-to-ridge depth |
The threshold question is always: does the array cover more than one third of the slope? On a small one-story ranch with a 24-by-30-foot roof slope, even a 5 kW system can cross the threshold and trigger the 36-inch ridge setback. On a two-story Colonial with a 40-by-30-foot slope, a 10 kW system might stay under the threshold.
What Actually Counts as a Dormer Setback
The code language is sometimes ambiguous on dormers. The IFC names “ridges” and “hips” explicitly, and most AHJs interpret a dormer’s gable end as a hip-equivalent and the dormer’s side walls as obstruction setbacks under the catch-all “obstacles” provision. In practice, this means:
- Dormer side walls — 18 inches measured from the wall face on the main slope
- Dormer hip lines — 18 inches measured from the hip ridge itself
- Dormer eave — 18 inches from the dormer’s lower roof edge if you place modules on the dormer roof
- Dormer ridge — 18 inches if covered by ≤ 33 percent rule, 36 inches above
State and City Amendments That Matter
State codes and city amendments introduce real variation. A few of the most common:
- California — Title 24 and the California Residential Code generally follow the IFC defaults but allow for “smoke ventilation” alternatives in lieu of the 36-inch ridge setback when array exceeds 33 percent. The alternative typically requires a smoke ventilation device or rapid shutdown documented at the inverter.
- New York City — Local Law and FDNY rules add a 6-foot perimeter clearance on flat roofs but on pitched roofs default to IFC. Egress dormers receive heightened scrutiny.
- Florida — FBC Section R324.6 follows IFC defaults but adds wind uplift requirements that change the racking layout near dormer walls because of vortex effects at the wall corner.
- Larimer County, Colorado — Per its 2026 residential solar array roof layout guide, requires 36-inch pathways on each side of the array unless a documented exception is approved at plan review.
- United Kingdom — MCS guidance recommends 400 mm (about 15.7 inches) from any roof edge or feature. UK Building Regulations Approved Document B does not require a fire access pathway on residential roofs but local insurance underwriters often add one.
- Germany — VDE-AR-E 2100-712 and DIN VDE 0100-712 govern PV layout. Most German states require 0.5 to 1 meter clearance from roof edges, dormer walls, and egress windows. Stricter than US defaults.
The fact pattern that catches most designers is the difference between “code minimum” and “what the AHJ will actually approve.” A 12-inch dormer wall setback might pass under literal IFC reading in jurisdictions that have not adopted the 18-inch rule, but the inspector might still reject it. The safe practice is to default to the stricter of IFC, state code, and local AHJ pre-application guidance.
For more on how AHJ jurisdiction shapes residential design, see our guide to solar design principles for installers and the AHJ glossary entry.
How to Map a Roof With Dormers Before You Touch Software
Site survey quality determines layout quality. A bad survey produces a bad design no matter how good the software is. The non-negotiables for a dormer-heavy roof:
- Plan-view dimensions of every roof plane — main slope, dormer walls, dormer roof, and the position of the dormer relative to ridge and eave.
- Pitch of every plane in degrees, not “looks like a 6/12.” Use a pitch gauge or a pitch app on a phone, validated against an aerial measurement service.
- Azimuth of every plane in compass degrees from true north, not magnetic.
- Height of each dormer measured from the main slope to the dormer ridge.
- Distance from dormer side wall to nearest roof edge or other dormer.
- Position of every penetration within the same image: chimneys, vents, satellite dishes, attic vents, and electrical service entry.
- Photographic documentation at a minimum of one ground photo per slope plus ladder shots of each dormer connection to the main slope.
Aerial measurement services such as EagleView, Hover, and Nearmap can deliver 95 percent of the dimensions remotely if the imagery is recent. The dormer height and pitch usually need on-site validation because flyover imagery struggles with vertical features. LiDAR-based services capture dormer height accurately but cost more per report.
A LiDAR roof model that includes dormer geometry to 6-inch resolution lets the designer skip the on-site climb in roughly two-thirds of cases. The break-even on LiDAR purchase is about 12 designs per month based on installer-time savings.
For sites without LiDAR, an aerial roof scan using drone photogrammetry produces equivalent geometry in 20 minutes on site and integrates directly into modern solar design software.
Calculating Usable Area on a Slope with Dormers
The math has four steps. Get any one wrong and the kW estimate is wrong by 20 percent or more.
Step 1: Gross Slope Area
Multiply the slope length (eave to ridge) by the slope width (rake to rake) measured along the roof surface, not in plan view. Slope length equals plan-view length divided by cosine of the pitch angle.
For a slope that measures 30 feet wide and 18 feet eave-to-ridge in plan view at a 6/12 pitch (26.6 degrees):
Slope length = 18 / cos(26.6°) = 18 / 0.894 = 20.1 feet
Gross slope area = 30 × 20.1 = 604 sq ft
Step 2: Subtract Code Setbacks
Subtract the perimeter setback strips. For an 18-inch eave setback, 36-inch ridge setback (assuming the array exceeds 33 percent of the slope, which on a 600 sq ft slope is anything over 200 sq ft), 18-inch rake setbacks on each side, and a 36-inch eave-to-ridge access pathway:
| Setback Element | Area Lost |
|---|---|
| 18-inch eave (1.5 ft × 30 ft) | 45 sq ft |
| 36-inch ridge (3 ft × 30 ft) | 90 sq ft |
| 18-inch rake left (1.5 ft × 14 ft remaining height) | 21 sq ft |
| 18-inch rake right (1.5 ft × 14 ft remaining height) | 21 sq ft |
| 36-inch access pathway (3 ft × 14 ft) | 42 sq ft |
| Total perimeter setback loss | 219 sq ft |
Net after perimeter setbacks: 604 − 219 = 385 sq ft.
Step 3: Subtract Dormer Footprint and Setbacks
A 6-foot wide by 5-foot deep gable dormer with its base at the middle of the slope:
| Dormer Element | Area Lost |
|---|---|
| Dormer footprint on main slope | 30 sq ft |
| 18-inch setback around three sides (6 + 5 + 5 ft × 1.5 ft) | 24 sq ft |
| Triangular shadow exclusion zone on each side wall | 30 sq ft |
| Total dormer-related loss | 84 sq ft |
Net after dormer: 385 − 84 = 301 sq ft.
Step 4: Subtract Shading Exclusions
Run a shading study and tag every module location that loses more than 5 percent of its annual production. For one south-facing 6-foot dormer on a 30 by 20 foot slope at 40 degrees latitude, the shading footprint typically removes another 40 to 60 sq ft from the morning and afternoon strips on either side of the dormer. Conservative estimate: 50 sq ft.
Net usable area: 301 − 50 = 251 sq ft.
The slope started at 604 gross sq ft and ended at 251 truly usable sq ft. That is a 58 percent reduction. At a typical module footprint of 21 sq ft per 440 W module, the slope fits 12 modules, equivalent to 5.28 kW. Without the dormer, the same slope would have fit 18 modules at 7.92 kW. The dormer cost 2.64 kW, or 33 percent of the system’s potential.
solar design software automates all of this when the designer enters dormer geometry once. Doing it by hand on a calculator is how 30-minute jobs become four-hour jobs.
Module Orientation Around Dormers: Portrait, Landscape, or Mixed
Module orientation matters more around dormers than on clean slopes because the strips between dormers are often shorter than a full module length in one direction.
When Portrait Wins
- Strip is taller than it is wide (more than 4 feet vertical clearance from setback to ridge or to next obstruction).
- String design favors longer strings of fewer rows. Portrait modules at 6.5 feet tall can run 2 rows in a 14-foot strip.
- Aesthetically continuous with the rest of the array.
When Landscape Wins
- Strip is wider than it is tall (less than 4 feet vertical clearance).
- The space between two dormers measures 4 to 6 feet of vertical roof depth and 8 to 12 feet horizontal.
- Hip-cut areas where the diagonal hip line wastes the top of every portrait row.
- Need to fit a single row above a shed dormer where the strip is only 3.5 to 4 feet deep.
When to Mix
Mixed orientation is rarely a good idea on residential because it complicates the racking layout and tends to look chaotic from the street, but it is sometimes the only way to fit modules in irregular pockets. The trade-off: For more on this topic, see Solar Racking Design Guide.
- Mixed orientation requires careful string design because portrait and landscape modules have different shading sensitivities.
- The racking installer has to layout rails differently for each orientation, which adds 30 to 60 minutes of install time.
- The visual appearance is harder to defend at the homeowner walkthrough.
In practice, default to a single orientation per slope unless you can fit at least 2 additional modules by mixing.
For a deeper treatment of when each orientation makes sense, the solar panel layout design guide covers the trade-offs across roof types in more detail.
Design Around Dormers in 30 Minutes, Not 4 Hours
SurgePV’s automated dormer setback rules, 3D shading analysis, and per-plane string design produce a complete dormer-aware layout, BOM, and proposal in a single workflow.
Book a DemoNo commitment required · 20 minutes · Live project walkthrough
For a direct comparison, see Arka 360 vs SurgePV.
Shading Analysis: The Layer Most Designers Underweight
Setbacks are easy to draw because they have hard edges. Shading is harder because it moves. A dormer that does not steal a single module to setback rules can still cost 800 kWh per year through shadow loss on adjacent modules.
How Dormers Cast Shadows
The shadow length at a given solar elevation is:
Shadow length = dormer height / tan(solar elevation angle)
A 6-foot tall dormer at 30-degree sun elevation casts a 10.4-foot shadow. At 20-degree elevation it casts a 16.5-foot shadow. At 60-degree elevation (summer noon at mid-latitudes), only 3.5 feet.
The shadow direction follows the sun’s azimuth, which in the Northern Hemisphere swings from east (sunrise) to south (noon) to west (sunset) over the course of a day. A dormer on a south-facing slope casts shadows:
- Morning (solar azimuth east of south) — westward across the main slope
- Solar noon — directly behind the dormer (uphill on a south-facing slope)
- Afternoon (solar azimuth west of south) — eastward across the main slope
The total area swept by the shadow over a full year is the dormer’s “shading footprint” on the main slope. Modules within the footprint suffer partial shading at predictable hours.
Why Partial Shading Costs So Much
A solar module made of 60 cells in three substrings will lose 33 percent of its production when one substring is shaded if no module-level power electronics are installed. In a string of 12 modules, one fully shaded module can cut total string production by up to 90 percent of that module’s output because the bypass diodes carry current around the shaded substring at a lower voltage.
Studies have shown that even a small amount of shading can lead to a 20 to 40 percent decrease in energy production on a string-inverter system without optimizers. With module-level power electronics installed, that loss drops to roughly the actual shaded fraction of the module — typically 20 to 50 percent recovery of the lost energy.
Shading Study Best Practices
A useful shading study has three properties:
- 3D geometry — the dormer is modeled as a 3D object, not a flat polygon. A flat-plane approximation undercounts the shadow length at low sun angles.
- Hourly resolution — shadows are computed at every hour from sunrise to sunset across at least four representative days (winter solstice, equinoxes, summer solstice). A daily-only study misses morning and afternoon losses.
- Per-module loss in kWh — output is in kWh per year per module, not just “shaded area.” A module that loses 8 percent of its annual production from shading is a different financial decision from one that loses 2 percent.
Modern solar shadow analysis software handles all three by default. Manual shading studies using a Solar Pathfinder or Suneye are useful for spot-checks but rarely capture per-module annual loss with the resolution needed for stringing decisions.
For a deeper read on how shading hits residential systems, see how shading affects solar panels and the automated shading analysis glossary entry.
Stringing and MLPE Decisions Around Dormers
The electrical design problem on a dormer-heavy roof is twofold: the strips between dormers are short, and modules near dormers face partial shading.
The String Length Problem
A typical residential string inverter requires 6 to 14 modules per string at residential voltages. A clean 30-foot wide slope easily fits a 12-module string. A slope broken by two dormers might offer:
- 4 modules in the strip left of the first dormer
- 5 modules in the strip between the two dormers
- 4 modules in the strip right of the second dormer
- 3 modules in the strip above the dormers, between the dormer ridges and the main ridge
That is 16 modules across four strips, none of which alone meets the minimum string length of 6 to 7 modules for most residential string inverters. The designer then has three options:
- Combine strips into one string — works only if all four strips share the same azimuth and tilt, which is true on a single south-facing slope. Run the string through all 16 modules.
- Use multiple MPPT inputs — assign each strip to its own MPPT input on a multi-tracker inverter. Most residential string inverters offer 2 to 4 MPPT inputs.
- Switch to microinverters or DC optimizers — every module operates independently, so string length is irrelevant.
When MLPE Is the Right Call
Module-level power electronics — meaning microinverters or DC optimizers — make economic sense when any of these are true:
- Three or more distinct module groups on different orientations or shading profiles
- Any module location loses more than 5 percent of annual production to shading
- Strings cannot reach the minimum length on the available roof
- The homeowner specifically requests panel-level monitoring
- Future expansion is planned and string sizing flexibility matters
A microinverter system costs 8 to 15 percent more than a string inverter system at residential scale, but that premium is paid back through 5 to 12 percent higher annual production on dormer-heavy roofs. The break-even is roughly two dormers on the active slope.
When String Inverters Still Win
Despite the dormer challenge, string inverters with 2 to 4 MPPT inputs remain the right answer when:
- One or zero dormers are on the active slope
- The roof has clean strips long enough for minimum string length on each MPPT
- No module location loses more than 3 percent of annual production to shading
- Cost is the dominant decision factor and the homeowner is comfortable with single-string monitoring
For more on the string design trade-offs, see our solar string design guide and the common solar string design mistakes we see on residential projects.
Eight Mistakes That Cost the Most kWh Around Dormers
The same patterns repeat across thousands of residential designs. Avoiding these eight is the difference between a 5.5 kW system and the 7 kW the homeowner could have had.
1. Treating the Dormer as a Single Setback
A gable dormer has three walls, two roof slopes, and a ridge. Each is a setback boundary. Designers who treat the dormer as one polygon and apply a single 18-inch buffer around it lose 1 to 2 modules per dormer compared to designs that respect the actual geometry.
2. Ignoring Shadow Direction Asymmetry
Dormers cast longer shadows in winter and shorter shadows in summer. Residential systems produce most of their energy April through September when the sun is high and shadows are short. Designers who exclude every module that ever sees a winter shadow are over-conservative. Run the production-weighted shading model, not the worst-case shading model.
3. Forgetting the Dormer Roof Itself
A shed dormer with an 18 by 6 foot south-facing roof at 15-degree pitch can host 4 to 6 modules. Many designers skip the dormer roof entirely because it is small. On a system that needs every kWh, those 4 to 6 modules produce 1,800 to 2,800 kWh per year.
4. Mixing String and Microinverter on the Same Slope
If part of the slope warrants MLPE because of shading, the whole slope should usually be on MLPE. Mixing inverter types on the same slope makes monitoring messy, complicates the as-built diagram, and creates installation friction. Pick one approach per slope.
5. Underspecifying the Edge Setback
The IFC default is 18 inches at the eave, but some AHJs require 1/3 of the eave-to-ridge depth. A 30-foot eave-to-ridge slope under that rule loses 10 feet at the eave, not 1.5 feet. Always confirm before drawing.
6. Designing Without 3D Shading
Flat-plane shading approximations undercount loss by 30 to 50 percent on dormer-heavy roofs. A design tool that runs only a horizon-line shading study is not enough. Use 3D shading or budget time for a manual SunEye sweep at every module location.
7. Skipping the Dormer Wall in Wind Calcs
Dormer walls create wind acceleration and vortex effects on the modules within 4 feet of the wall. ASCE 7 wind load calculations need to account for the wall, which often increases ballast or attachment density on the modules immediately adjacent to the dormer. Skipping this is the most common reason for racking failure at the dormer interface.
8. Losing the Egress Pathway
Dormers above bedrooms often contain emergency egress windows. AHJs almost always require a clear path from the egress window to the eave. Designers who ignore this constraint get plan review rejections that cost a week of project schedule.
Three Real-World Layouts on Common Dormer Configurations
The same theory plays out differently on real roofs. Here are three configurations and what to expect.
Configuration 1: Cape Cod with Two Front Gable Dormers
House: 1,650 sq ft Cape Cod, 1.5 stories, south-facing front, two 6 by 5 ft gable dormers spaced 8 ft apart on the front slope.
Front slope dimensions: 36 ft wide, 22 ft eave-to-ridge in plan view, 26 ft slope length at 9/12 pitch.
Gross slope area: 936 sq ft.
After setbacks and dormers:
- Eave 18 inches: 54 sq ft
- Ridge 36 inches: 108 sq ft
- Rakes 18 inches each: 60 sq ft
- Pathway 36 inches: 78 sq ft
- Two dormers (footprint + setbacks + shadow exclusions): 220 sq ft
Net: 936 − 520 = 416 sq ft, or 44 percent usable.
Module count: 19 modules at 21 sq ft each, but only 18 fit cleanly in the strips between dormers. Total system: 7.9 kW at 440 W modules.
Stringing: Three independent strips of 4, 6, and 5 modules above the dormers, plus 3 modules in the dormers themselves on shed-dormer roofs (not present here, so skip). Use a string inverter with three MPPT inputs.
Configuration 2: Colonial with One Large Shed Dormer
House: 2,400 sq ft Colonial, 2.5 stories, south-facing front, one shed dormer running 18 ft wide and 8 ft deep across the rear slope.
Front slope dimensions: 40 ft wide, 28 ft eave-to-ridge in plan view, 31 ft slope length at 7/12 pitch. The shed dormer is on the back slope.
Front slope after setbacks (no dormer): 40 × 31 = 1,240 sq ft gross. After eave, ridge, rake, pathway: 1,000 sq ft net. Fits 47 modules at 21 sq ft each, or 20.7 kW. Realistically capped at residential interconnection limits.
Shed dormer roof: 18 × 8 = 144 sq ft at 15-degree pitch, south-facing. After 18-inch perimeter setback: 108 sq ft. Fits 5 modules at 2.2 kW.
Total system potential: 22.9 kW front + dormer, capped at 10 to 13 kW by typical residential interconnection limits.
This configuration is the easiest to design around because the dormer is on a different slope from the main array.
Configuration 3: Tudor with Three Hip Dormers
House: 2,200 sq ft Tudor, 2 stories, south-southwest facing front, three small hip dormers (4 by 4 ft each) evenly spaced across the front slope.
Front slope dimensions: 38 ft wide, 24 ft eave-to-ridge plan view, 28 ft slope length at 8/12 pitch. Gross slope area: 1,064 sq ft.
After setbacks and dormers:
- Perimeter and pathway: 280 sq ft
- Three hip dormers (footprint + multiple hip-line setbacks + shadow exclusions): 360 sq ft
Net: 1,064 − 640 = 424 sq ft, or 40 percent usable.
Module count: 20 modules cleanly fit in landscape orientation in the strips. Total system: 8.8 kW at 440 W.
Stringing: This is the case where MLPE almost always wins. The three hip dormers create five small strips, each too short for string length. Microinverters are the right call.
Software Workflow: From Address to Proposal in 30 Minutes
The four-hour manual layout is a relic. A modern solar design platform workflow on a dormer-heavy roof:
1. Address Entry and Aerial Capture (3 minutes)
Type the address. The tool fetches satellite imagery, parcel boundaries, and roof outline. A LiDAR-enabled tool also pulls the 3D roof model with dormer geometry to within 6 inches.
2. Roof Plane Auto-Detection (4 minutes)
The tool segments the roof into individual planes and assigns pitch and azimuth to each. The designer reviews and corrects. Dormers are flagged as separate planes.
3. Obstruction and Setback Application (3 minutes)
Chimneys, vents, skylights are auto-detected. Setbacks are applied per the AHJ rule set (the tool should know the local rule, or default to the IFC). The designer adjusts dormer wall setbacks if they disagree with the auto-applied ones.
4. Module Auto-Placement (5 minutes)
The tool fills each plane with the maximum module count at the chosen orientation. The designer reviews and removes modules that fail aesthetic or shading thresholds.
5. Shading Study (5 minutes)
The 3D shading model runs across hourly time-steps for a typical year. Per-module annual production is computed. Modules below a threshold (commonly 90 percent of unshaded production) are flagged.
6. Inverter and Stringing (5 minutes)
The designer selects inverter topology. Auto-stringing assigns modules to MPPT inputs respecting voltage and current limits. For microinverter systems, each module is assigned an inverter automatically.
7. BOM, Single-Line, and Proposal (5 minutes)
The tool generates the bill of materials, single-line electrical diagram, and customer-facing proposal with annual production, payback period, and 25-year cash flow.
Total: about 30 minutes for a roof with three dormers. Compared to the manual workflow’s four hours, the software path is 8 times faster and produces a more accurate kW estimate because every step uses the same underlying geometry.
For installers building this kind of workflow into their day-to-day, the generation and financial tool handles the production modeling, payback analysis, and 25-year cash flow generation directly inside the design.
Common Roof Types Where Dormers Compound the Problem
Dormers rarely show up alone. They appear on specific roof types where the geometry already makes solar design harder.
Hip-and-Valley Roofs with Dormers
The compound case. Hip lines already steal area through their own setbacks, and dormers add another layer. A hip-and-valley roof with two dormers on the front face often retains less than 50 percent of gross slope as usable. The solar panel layout hip roof guide covers the underlying hip-roof problem; add dormer setbacks on top.
Mansard Roofs with Dormers
Mansard roofs put dormers on the steep lower slope, which creates a different problem: the lower slope is often too steep to be solar-viable (60 degrees or more), so the dormers do not interfere with the array on the upper, flatter slope. Mansard with dormers is sometimes easier than mansard without, because the dormers occupy the unusable lower slope.
Gambrel Roofs with Dormers
Gambrel roofs (barn-style) usually have shed dormers on the upper slope. The upper slope is the prime solar slope. Shed dormers on a gambrel almost always create exactly the layout problems discussed in this guide.
Cross-Gable and L-Shaped Roofs with Dormers
The cross-gable creates valley intersections that limit string length. Add dormers and the strips become too short for any string-inverter design. MLPE is almost always required. See the residential solar system design guide for layouts on these roof types.
Townhouse and Multi-Story Shared Roofs
Townhouse roofs often have shared ridgelines and shared eaves with neighbors, which limits where pathways can run. Dormers on a townhouse compound the constraint. Our multi-story townhouse design guide covers shared-roof considerations.
Slate, Tile, and Metal Roofs: Material-Specific Dormer Considerations
Roof material changes the racking attachment strategy and therefore the cost of working around dormers.
Slate Roofs
Slate is brittle and expensive. Penetrating attachments require dedicated slate hooks that lift the slate above the rail. Around a dormer, the wall flashing complicates hook placement, and many installers leave a 36-inch buffer instead of 18 inches simply to keep racking out of the flashing zone. The solar panels slate roof design guide covers slate-specific install considerations.
Tile Roofs
Tile hooks or replacement-tile mounts are needed. Around dormers, tile cuts at the wall flashing are the most common leak point on a residential install. Plan for 24 to 30 inches of buffer instead of 18 inches if the installer is not certain of their tile-cut technique.
Standing Seam Metal
Standing seam is the easiest dormer-adjacent roof material because clamps attach to the seam without penetrating the roof. Around a dormer wall, the clamp can sit within 12 inches of the wall flashing without leak risk. The standing seam metal roof mounting guide covers clamp selection.
Asphalt Shingle
The default residential material. Standard flashing kits work around dormers but require careful sealing at the wall step flashing. Most issues are install-quality issues, not design issues.
Conclusion
Dormers are not a reason to walk away from a residential solar project. They are a reason to design carefully and use the right tools. Three concrete next steps for designers facing a dormer-heavy roof:
- Run a 3D hourly shading study before you finalize the layout. Flat-plane approximations underestimate dormer shadow loss by 30 to 50 percent, and that error becomes a homeowner complaint six months after install.
- Default to module-level power electronics on slopes with two or more dormers. The 8 to 15 percent equipment cost premium pays back through 5 to 12 percent higher annual production and removes string-length design risk.
- Confirm the AHJ setback rule in writing before plan submission. State amendments and local interpretations of the IFC vary enough that a design built to literal IFC code can still get rejected. Five minutes of pre-application research saves a week of plan-review rejection.
A residential project with dormers is not a 30-minute job in the way a clean gable roof is, but with the right software workflow, it does not have to be a four-hour job either. The difference is in the shading model, the setback automation, and the stringing logic.
Frequently Asked Questions
How close can solar panels be to a dormer window?
Most US authorities having jurisdiction require 18 to 36 inches of clearance between the array edge and any dormer wall, gable, or hip line. The International Fire Code defaults to 18 inches when array coverage stays under 33 percent of the roof slope and 36 inches above that threshold. Egress dormers, meaning dormers that contain a bedroom escape window, often trigger an additional 36-inch firefighter access pathway from eave to ridge on at least one side of the dormer.
Can you put solar panels on a dormer roof itself?
Yes, on shed and gable dormers with sound rafters and a roof pitch of at least 15 degrees, but only if the surface is large enough to fit two or more modules after edge setbacks. Flat-roof dormers in the UK and parts of Northern Europe are usually unsuitable because penetrating the membrane risks leaks and the rafter spacing is rarely engineered for ballast or rail loads. The main slope around the dormer almost always produces more energy than the dormer roof itself. For the latest details on UK, see Battery Solar System Design UK. For UK-specific information, see Heritage Building Solar Case Study. For United Kingdom-specific compliance details, see United Kingdom comparisons/mcs-vs-non-mcs.
How much yield does a dormer cost a residential solar array?
A single dormer on a south-facing slope typically removes 8 to 15 percent of usable roof area through setbacks alone and casts shading that costs another 3 to 8 percent of annual production on adjacent modules. The combined hit on a 6 kW system is roughly 600 to 1,400 kWh per year, depending on dormer size, height, and orientation. Module-level power electronics recover about half of the shading loss when modules are wired through them.
Do you need a 36-inch pathway around every dormer?
No. The 36-inch firefighter access pathway is required from eave to ridge on each roof slope where it is needed for ventilation access, not around every individual dormer. The pathway can run alongside a dormer and use the dormer wall as one of its boundaries. Egress dormers and dormers above bedrooms are the most common reason an AHJ requires the pathway to follow a specific route.
Should panels next to a dormer use microinverters or string inverters?
Modules within roughly two module heights of a dormer wall are at risk of partial shading at low sun angles and benefit from module-level power electronics. Microinverters or DC optimizers prevent a single shaded module from cutting the production of the entire string. On systems with three or more dormers, MLPE almost always pays back faster than the alternative of leaving shaded modules off the array.
How do you calculate setbacks around a dormer with a hip roof?
Apply the standard 18-inch setback from each hip line of the dormer roof, 18 inches from the dormer eave, and 18 inches from the wall where the dormer meets the main slope. Add the local edge setback to the main slope itself, which is typically 18 inches from the eave and 36 inches from the ridge. The result is a wedge-shaped exclusion zone that runs from the dormer base outward along the main slope.
Can solar panels go above a dormer window on the main slope?
Yes, and the area directly above a dormer is often the highest-yield section of the roof because it sits between the dormer base and the ridge with no further obstructions. The catch is that this strip is usually narrow, often only one or two module rows deep, and string design has to account for it being a separate orientation if it sits above a forward-pitched dormer.
How many panels fit on a roof with two dormers?
A typical 1,800 to 2,200 square foot single-story home with two south-facing dormers fits 12 to 18 modern 400 to 440 watt modules after setbacks and shading exclusions. That is a 4.8 to 7.9 kW system, roughly 25 percent smaller than the same house without dormers. The exact number depends on dormer width, height, spacing, and how strictly the AHJ enforces fire access pathways.
Further Reading
- UpCodes — Roof Access and Pathways for the codified IFC and IRC R324 setback requirements
- Larimer County 2026 Residential Solar Array Roof Layout Guide for one of the better-documented AHJ implementations
- Aurora Solar — Shading Losses in PV Systems and Techniques to Mitigate Them for the production-side impact of partial shading
- SMA ShadeFix Documentation for one approach to inverter-side shading optimization


