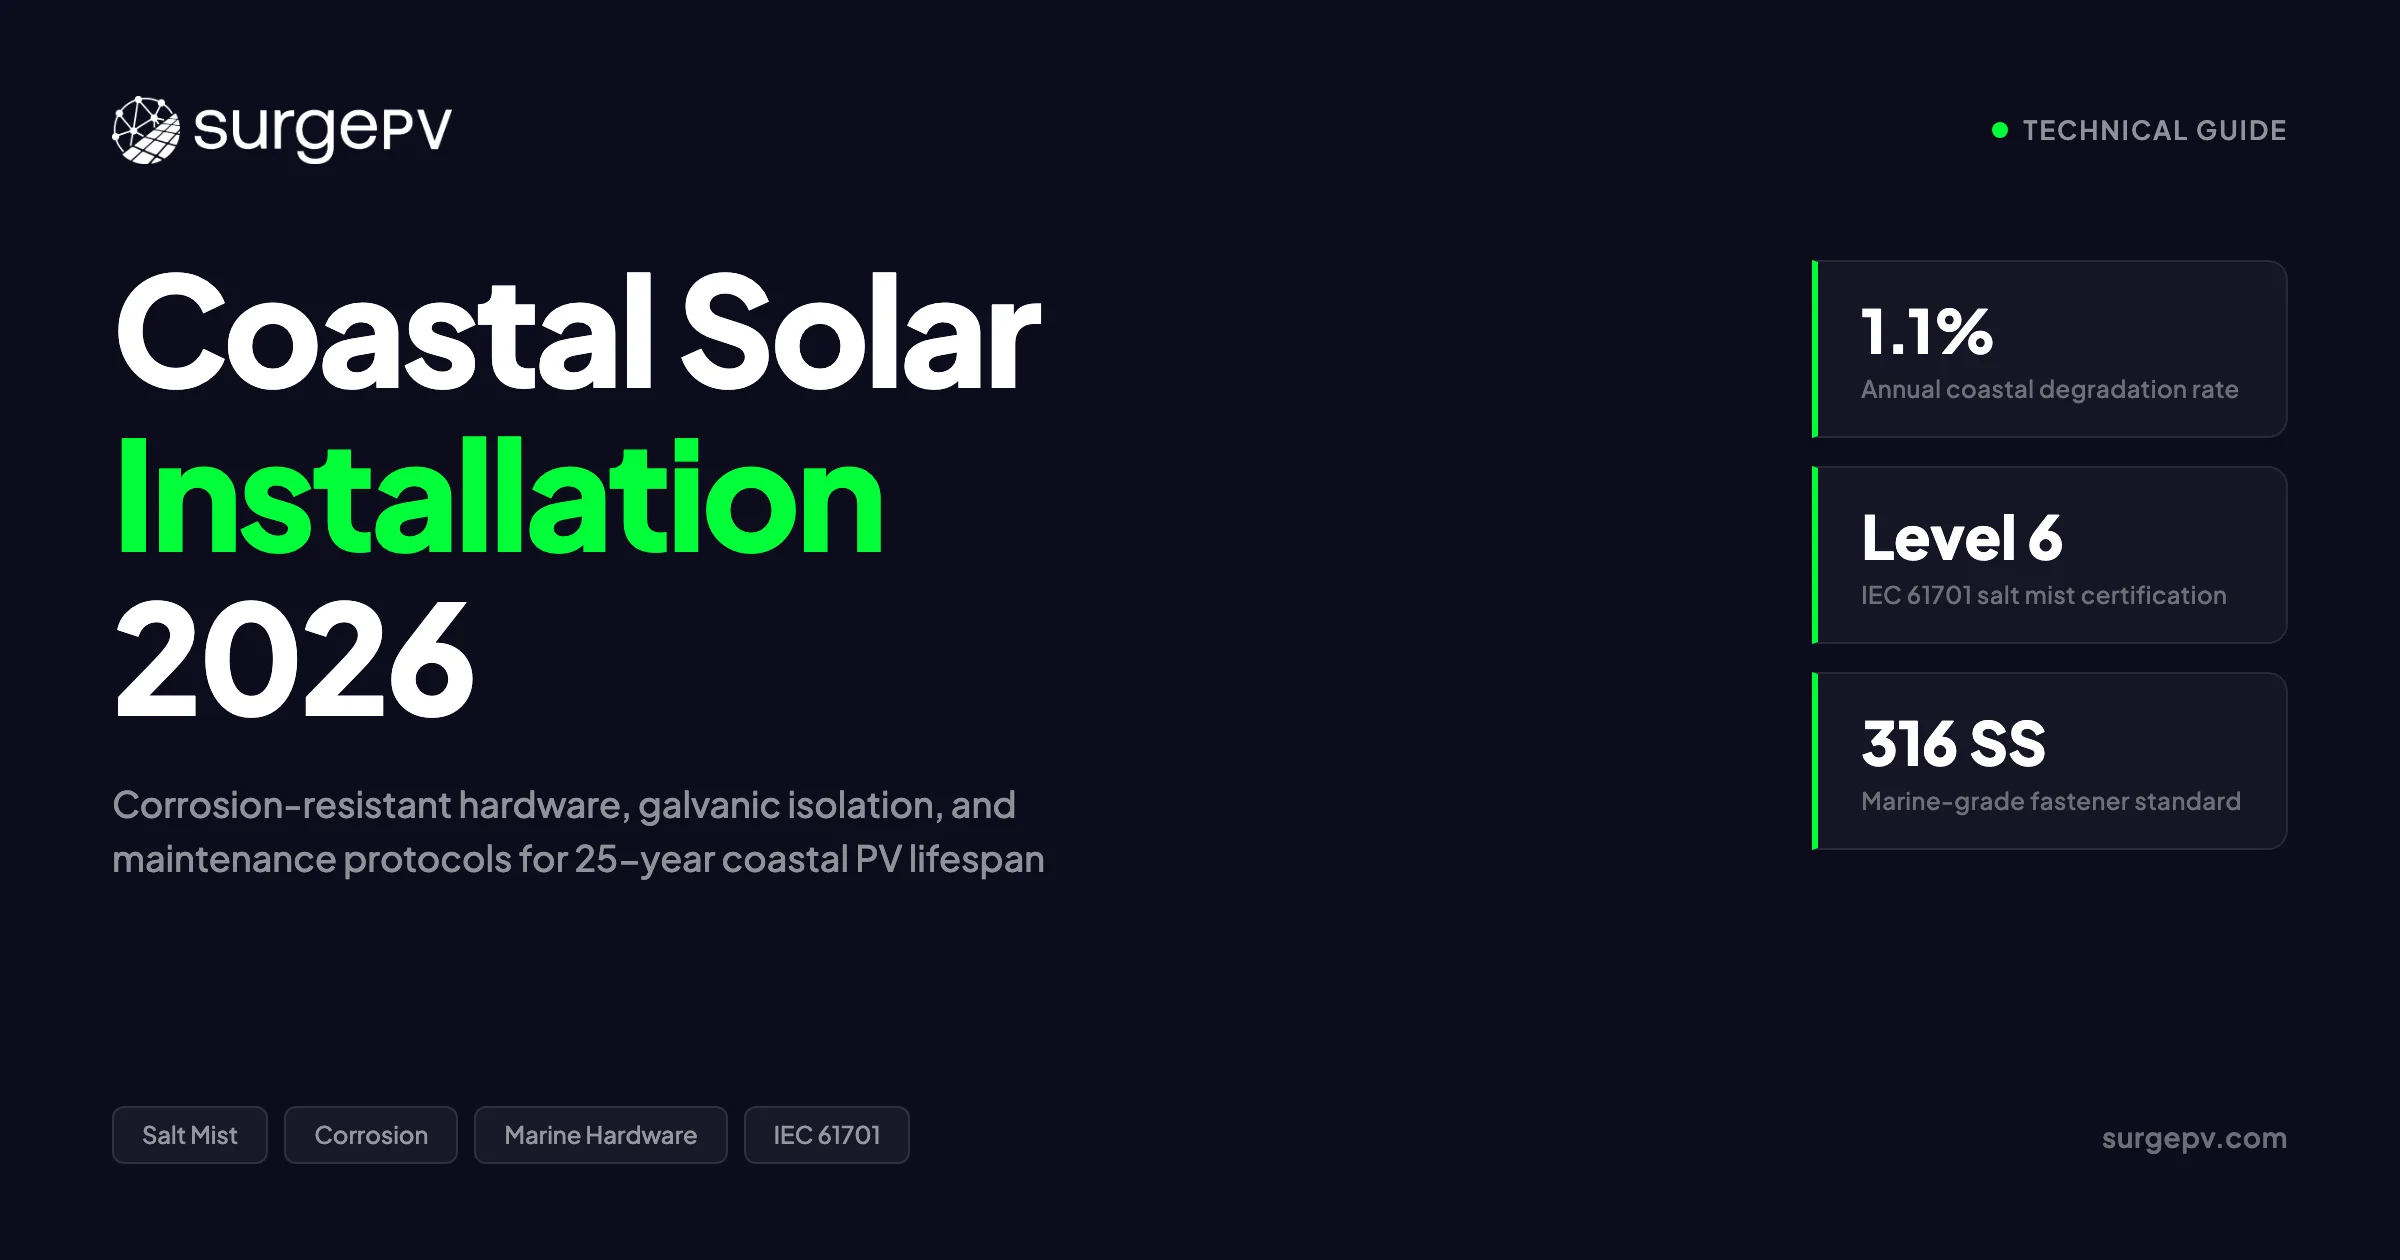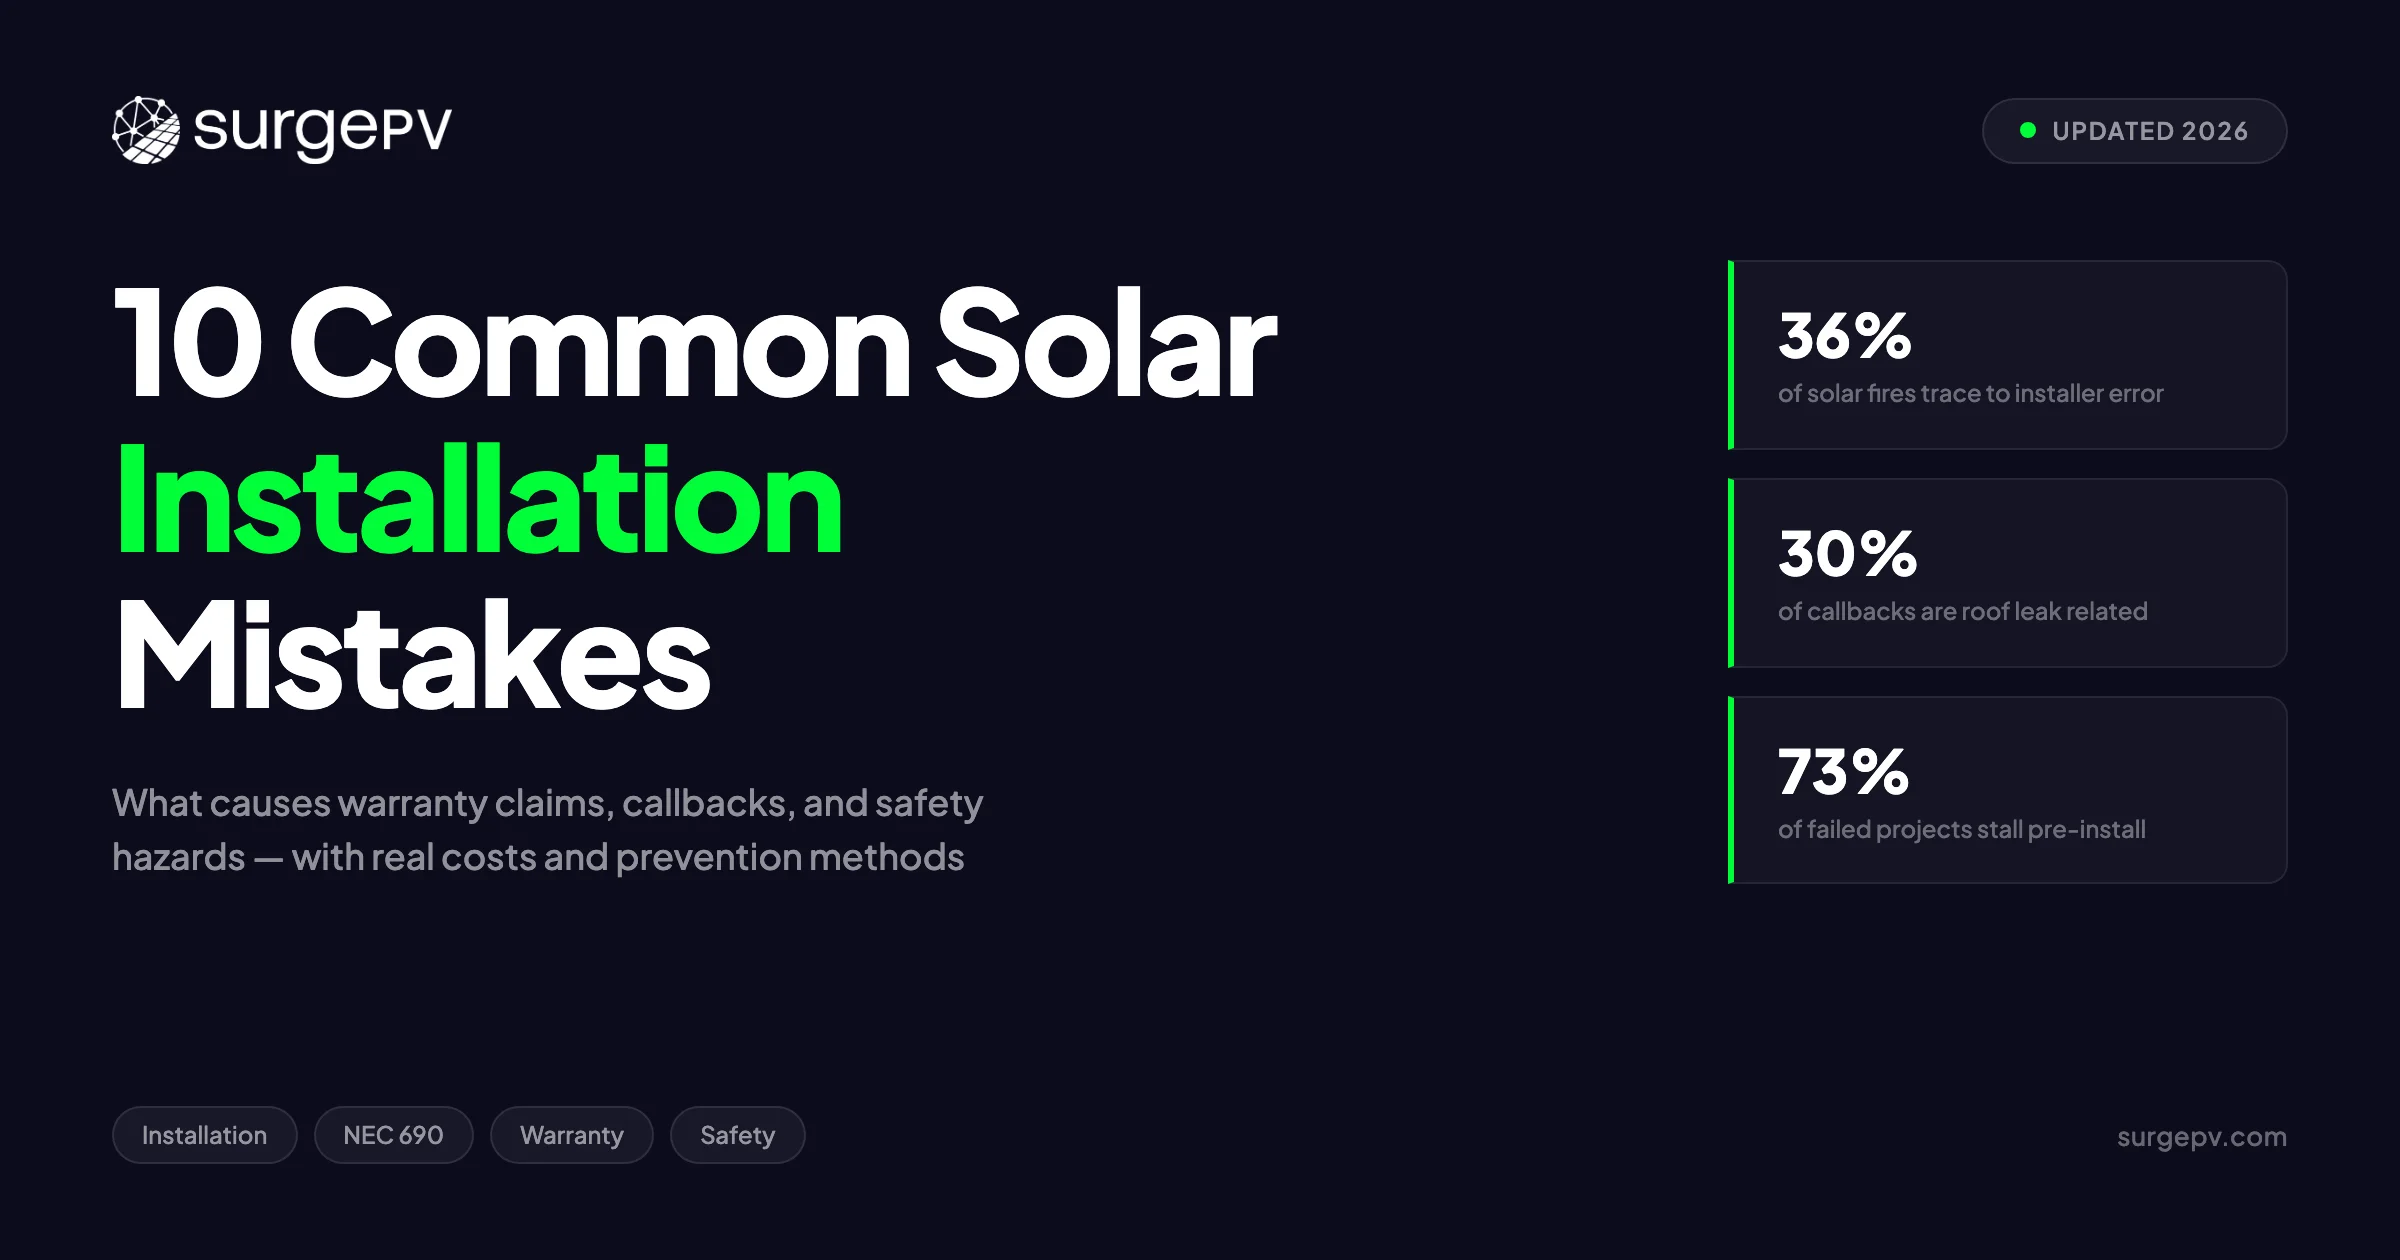
The solar industry installed over 500 GW globally in 2025. Behind that number sits a quieter statistic: 36% of solar PV fires trace directly to installer error, according to a UK government BRE report that analyzed 50+ incidents. NREL found that 7.8% of installations carry incorrect latitude-longitude metadata, causing over 20% variation in expected energy output. And in residential solar, roughly 30% of all post-installation callbacks involve roof leaks — a problem that is almost entirely preventable. See our guide on Battery Solar System Design UK for more. For the latest details on UK, see Heritage Building Solar Case Study.
These are not edge cases. They are systemic failures that repeat across markets, climates, and installer experience levels. This guide covers the 10 most common solar installation mistakes that lead to warranty claims, callbacks, and safety hazards in 2026. Each mistake includes the specific failure mode, the real cost in dollars or hours, and the prevention method that actually works. For a deeper look at string design specifically, see our guide on solar string design mistakes.
Quick Answer
The 10 most common solar installation mistakes are: wrong inverter sizing, improper grounding, roof penetration leaks, shading miscalculation, MC4 connector failures, string sizing errors, tilt and azimuth mistakes, missing interconnection paperwork, rapid shutdown non-compliance, and documentation gaps. Together they account for the majority of warranty claims, callbacks, and safety incidents across residential and commercial solar projects.
In this guide you will learn:
- Which mistake causes 30% of all post-installation callbacks
- Why 36% of solar fires trace to installer error — and which three components fail most
- How a 5% shaded area can destroy 40% of system production
- The real dollar cost of each mistake, from $500 fixes to $15,000+ rebuilds
- Prevention methods that work in the field, not just on paper
How Common Are Solar Installation Mistakes?
Mistakes are more common than most installers admit. NREL’s metadata validation study found that 7.8% of installed systems could not be located via satellite imagery because coordinates were wrong. The same study found incorrect mounting configurations causing over 20% variation in expected output. These are not minor paperwork errors. They are design and installation failures that directly affect performance.
The UK BRE report commissioned by BEIS analyzed 50+ fire incidents and attributed 36% to problematic installations. The most common failing components were DC isolators (18 incidents), DC connectors (10 incidents), and inverters (7 incidents). Even when components failed, the root cause was often improper placement or connection by the installer. For United Kingdom-specific compliance details, see United Kingdom comparisons/mcs-vs-non-mcs. For United Kingdom-specific compliance details, see United Kingdom comparisons/solar-design-software.
| Mistake Category | Share of Callbacks | Average Repair Cost | Source |
|---|---|---|---|
| Roof penetration leaks | ~30% | $2,000–$5,000+ | Industry surveys |
| Electrical/wiring errors | ~20% | $500–$3,000 | NEC inspection data |
| Inverter/shading underperformance | ~18% | $1,500–$8,000 | NREL metadata study |
| Grounding/bonding issues | ~12% | $800–$4,000 | BRE fire report |
| Documentation gaps | ~10% | $0–$2,000 (warranty denial) | SEIA best practices |
| Rapid shutdown non-compliance | ~5% | $1,000–$5,000 (retrofit) | NEC 690.12 |
| Other (mounting, labeling, etc.) | ~5% | $200–$1,500 | Field data |
NREL’s residential solar contract study found a 51% overall rate of unsuccessful projects in medium-to-large installer datasets. 73% of those failures stalled in the pre-submission phase — meaning the project never even reached installation due to paperwork, design, or interconnection errors. Using solar design software with built-in validation catches many of these errors before submission.
Pro Tip
Track your callback rate by category. Installers who categorize callbacks by root cause see patterns within 6 months. The most successful firms we work with run a monthly “failure review” where every callback gets traced to a specific design or installation decision.
Mistake 1: Wrong Inverter Sizing
Inverter sizing errors are the most expensive silent mistake in solar. An undersized inverter clips energy during peak production hours. An oversized inverter wastes capital and operates below its efficiency sweet spot for most of the day. Both errors are common. Both are preventable.
What happens: When DC output from panels exceeds the inverter’s rated AC capacity, the inverter “clips” — it caps output at its maximum and discards the excess. This is called inverter clipping. It sounds like a minor loss, but on a 10 kW system with a 1.3 DC/AC ratio in a cold climate, clipping can mask soiling losses entirely. A 2-3% soiling problem becomes invisible because the inverter was already capping output.
An oversized inverter has the opposite problem. Inverters reach peak efficiency near their rated capacity. A 15 kW inverter running a 10 kW array spends most of its day at 60-70% load, where efficiency drops 2-4% below the rated peak. Over 25 years, that inefficiency costs more than the savings from buying a smaller inverter. Modern solar design software automatically flags both undersizing and oversizing before the design is finalized.
The cost: Undersized inverters cost 1-5% in annual energy loss. On a $30,000 system generating $2,000/year in savings, that is $20-$100 per year — $500-$2,500 over the system life. Oversized inverters waste $500-$1,500 in upfront capital and bleed 2-4% in efficiency losses. The real damage is reputational: homeowners see production below estimates and blame the installer.
Real story: In 2023, a commercial installer in Gujarat sized a 500 kWp array with 400 kW inverters — a 1.25 DC/AC ratio. The design looked conservative on paper. But the site sat at 1,200m elevation with cold, clear winters. In January, module voltage stayed elevated while irradiance hit 1,100 W/m². The inverters clipped for 3-4 hours daily. Annual loss: 4.2%, or $3,800 in forgone revenue. The installer had to credit the client and resize the inverters at full replacement cost.
How to prevent it:
- Size DC-to-AC ratio between 1.1 and 1.25 for most climates
- Use 1-minute irradiance data, not monthly averages — peaks above 1,100 W/m² drive clipping
- Account for temperature coefficients: a 40V module at -10°C reaches 44.9V
- Maintain 50-100V safety margin below inverter maximum DC input
- Run P50/P90 yield simulations with actual weather files for the site
Key Takeaway
A small amount of clipping (0-3%) is intentional and economically sound. Excessive clipping or significant oversizing both degrade system economics. The critical factor is using high-resolution irradiance data — not averages that hide peak conditions.
Mistake 2: Improper Grounding and Earthing
Grounding errors are the most dangerous mistake on this list. A failed ground path does not show up on a performance monitor. It does not trigger an alarm. It waits — sometimes for years — until a fault condition creates an arc, a fire, or a shock hazard.
What happens: NEC 690.43 requires all exposed non-current-carrying metal parts of PV systems to be grounded. This includes module frames, racking, conduit, and inverter enclosures. When grounding is missing, loose, or uses the wrong conductor type, a ground fault can energize the entire metal framework of the array. A person touching the frame completes the circuit. A loose connection can arc. An arc in a DC system above 80V is self-sustaining and can ignite surrounding materials.
The UK BRE report found grounding and bonding deficiencies in multiple fire incidents. In the US, NEC 690 violations account for 30-40% of all solar permitting rejections, and grounding errors are among the most common violations cited by inspectors. A proper solar design platform includes grounding verification in its design checks.
The cost: A grounding retrofit on an existing system runs $800-$4,000 depending on array size and accessibility. If a ground fault causes a fire, the damage can reach $50,000-$200,000 plus liability exposure. Insurance may deny claims if the installation did not meet code.
Real story: A residential installer in Arizona skipped the equipment grounding conductor on a 8 kW system because the racking manufacturer claimed their rail was “self-grounding.” Three years later, a lightning strike induced a surge. Without a proper ground path, the surge traveled through the inverter and into the home’s electrical panel. The inverter was destroyed. The homeowner’s insurance denied the claim because the installation lacked proper grounding per NEC 690.43. Total out-of-pocket cost: $4,200 for inverter replacement plus $1,800 for the grounding retrofit.
How to prevent it:
- Run a dedicated equipment grounding conductor to every module frame
- Use listed grounding lugs and washers — not self-tapping screws into aluminum rail
- Verify continuity with a low-resistance ohmmeter after installation
- Bond all racking sections with listed bonding jumpers
- Never rely on “self-grounding” claims without manufacturer documentation
What Most Guides Miss
Most grounding guides focus on the inverter ground lug. The real failure point is the module-to-rail connection. A Weeb washer or grounding clip that is not fully seated creates a high-resistance joint. Thermal cycling loosens it further. After 3-5 years, the connection fails. Annual thermal imaging catches these before they become dangerous.
Mistake 3: Roof Penetration Leaks
Roof leaks are the number one cause of post-installation callbacks across every market we have data for. They are also the most preventable mistake on this list. Every mounting bolt that passes through the roof membrane is a potential leak. The difference between a watertight penetration and a callback is attention to detail at the moment of installation.
What happens: Solar mounting systems require lag bolts or standoff posts that penetrate the roof deck. Each penetration must be sealed with proper flashing, sealant, and waterproofing compatible with the roofing material. Common failures include: using the wrong sealant for the roof type (silicone on EPDM, for example), skipping the flashing entirely and relying on caulk, over-tightening bolts that crack the sealant bead, and installing on roofs that are already near end-of-life.
The cost: A single leak repair with panel removal runs $2,000-$5,000. Multiple leaks on a large system can reach $10,000-$15,000. Water damage to interior ceilings, insulation, and electrical systems adds thousands more. The installer typically bears this cost under workmanship warranty. Also see: Us Residential Solar Market Trends 2026.
Real story: In 2024, a Florida installer mounted a 12 kW system on a tile roof using standard composite shingle flashing. Tile roofs require raised flashing that accommodates the tile profile. The first heavy rain sent water under the tiles and through the penetration points. The homeowner discovered staining on the ceiling within 48 hours. The installer had to remove all 32 panels, replace the flashing with proper tile mounts, repair the drywall, and repaint the ceiling. Total cost: $8,400. The original job margin was $4,200. The callback erased two years of profit from that customer.
How to prevent it:
- Inspect roof condition before quoting — reject roofs with under 10 years of remaining life
- Use manufacturer-certified flashing for the exact roof type (shingle, tile, metal, membrane)
- Apply sealant in a continuous bead, not dots or patches
- Torque bolts to manufacturer spec — over-tightening cracks sealant
- Water-test every penetration before panel installation
- Document roof condition with photos before, during, and after installation
- Read our roof penetration waterproofing guide for detailed flashing methods
Pro Tip
Take a photo of every penetration from underneath the roof deck before sealing. If a leak develops years later, this photo proves whether the flashing was installed correctly. It has saved our team from false claims three times in the past two years.
Mistake 4: Shading Miscalculation
Shading is the most underestimated performance killer in solar design. A small shadow from a chimney or a tree that will grow 20 feet in the next decade can destroy production numbers that looked solid on paper. The non-linear nature of shading losses makes this mistake particularly costly.
What happens: On a string inverter system, one shaded panel acts as a bottleneck for the entire string. A shaded area covering just 5% of an array can cause 20-40% production drop. This is the “Christmas light effect” — one dark bulb dims the whole strand. Tree growth is the most commonly underestimated factor. A 15-foot tree today can reach 35-40 feet within a decade. Fast-growing species like eucalyptus or certain pines are especially problematic.
Chimney shadows are another frequent miscalculation. Chimneys cast hard, narrow shadows that rotate with the sun. Winter shadows extend farther due to lower sun angles. A chimney that causes no shade in June can block panels for 3-4 hours in December. Solar shadow analysis software models these seasonal variations automatically.
The cost: A 10-20% unexpected production loss on a 6 kW system translates to $150-$400 in lost annual savings. Over 25 years, that is $3,750-$10,000 in forgone revenue. If the homeowner financed the system based on inflated production estimates, the shortfall triggers payment stress and warranty claims.
Real story: A sales team in Portland sold a 7.2 kW system based on satellite imagery from 2021. The imagery showed a small maple tree 30 feet from the roof. By 2024, the tree had grown to 45 feet with a canopy that shaded the southeast array from 9 AM to noon from April through October. Annual production came in 18% below estimate. The installer had to add a power optimizer to the affected string at $1,800 and issue a production guarantee credit of $2,400. The design team now requires a physical site visit for every quote within tree canopy range.
How to prevent it:
- Design for mature tree height, not current size
- Model winter sun angles — worst-case conditions, not peak summer
- Use LiDAR or 3D shade analysis tools for bankable quotes
- Account for the 80% rule — avoid sites with over 20% shading loss
- Verify satellite imagery dates — trees grow
- Consider microinverters or DC optimizers for partially shaded arrays
- Use solar shadow analysis software for bankable shade reports
- See how shading affects solar panels for the full technical breakdown
Key Takeaway
Shading losses are disproportionate to the shaded area. A 5% shaded area can cause 20-40% production drop on string inverters. Always model worst-case winter conditions, not just peak summer sun.
Mistake 5: MC4 Connector Failures
MC4 connectors are the weakest link in most solar installations. They cost about $1 each. A single failed connector can shut down a string, trigger a ground fault, or start a fire. Roughly 60% of string-level insulation faults trace back to a single MC4 connector, with improper crimping being the most common cause.
What happens: MC4 connectors fail in three main ways. First, improper crimping creates high-resistance joints that overheat. Second, water ingress through compromised seals causes corrosion that wicks down the copper strands. Third, mixing connector brands creates dimensional mismatches that loosen over time and arc. The failure cascade is predictable: poor crimp leads to heating, heating degrades the seal, seal degradation allows water ingress, corrosion increases resistance further, and eventually the connection arcs or fails completely.
The cost: A single connector replacement on a rooftop array costs $200-$500 in labor. If corrosion has spread down the cable, the entire home run may need replacement at $800-$2,000. Arc faults from connector failures have caused fires with damage exceeding $100,000.
Real story: In 2022, a large EPC in Rajasthan installed 2 MW of rooftop solar across 12 industrial buildings. The installation team used generic “MC4-compatible” connectors to save $0.40 per pair. Within 18 months, thermal imaging revealed 23 connectors running 15-40°C above ambient. Five connectors had visible burn marks. The root cause: dimensional tolerance differences between the generic connectors and the panel OEM connectors caused pin pressure to relax under thermal cycling. The EPC had to replace 180 connectors across all sites at a cost of $12,000 in materials and labor — plus the reputational damage of explaining to 12 clients why their systems needed emergency maintenance.
How to prevent it:
- Use manufacturer-certified crimp tools with correct dies
- Never mix connector brands — even “MC4-compatible” parts
- Verify IP67/IP68 rating on every connector
- Apply proper torque with a calibrated wrench
- Conduct annual thermal imaging to catch developing faults
- Never reuse water-damaged connectors — replace the entire pair
- See our MC4 connector crimping best practices for a step-by-step guide
What Most Guides Miss
Most MC4 guides focus on crimping technique. The bigger issue is connector brand mixing. Two “MC4-compatible” connectors from different manufacturers have different pin dimensions, O-ring compression profiles, and locking mechanisms. They mate on day one. They loosen over 2-3 years of thermal cycling. Use genuine, same-brand connectors throughout the system.
Mistake 6: String Sizing Errors
String sizing is where theoretical design meets real-world temperature swings. A string that works perfectly at 25°C can overvoltage and shut down the inverter at -10°C. Or it can undervoltage and fail to start on a hot, humid morning. Both errors are common. Both are entirely preventable with proper calculation.
What happens: Module open-circuit voltage (Voc) increases as temperature drops. The temperature coefficient is typically -0.35% per degree Celsius. A module rated at 40V Voc at 25°C reaches 44.9V at -10°C. A string of 12 modules goes from 480V to 538.8V. If the inverter’s maximum DC input is 550V, that leaves only an 11.2V margin — easily consumed by a slightly colder morning or measurement tolerance.
On the low end, module maximum power voltage (Vmp) decreases as temperature rises. A string that starts reliably at 25°C may fall below the inverter’s startup threshold on a 40°C afternoon. The inverter sits idle while the sun shines.
The cost: An overvoltage shutdown costs the day’s production — $10-$50 per event depending on system size and electricity rates. Repeated shutdowns trigger warranty claims and damage the inverter’s input circuitry. Undervoltage failures are harder to detect: the system simply underperforms, and the homeowner blames the panels.
Real story: A Minnesota installer designed a 10 kW residential system with 14 modules per string. The modules had a Voc of 41.3V. At the design temperature of -22°F (-30°C), the corrected Voc per module was 48.2V. Fourteen modules reached 674.8V. The inverter maximum was 600V. The system passed inspection in summer. The first cold snap in November triggered overvoltage faults that shut the inverter down for 6 hours daily. The installer had to restring the array into shorter strings and add a second MPPT input. Total cost: $3,200 in labor and materials, plus a winter of angry phone calls.
How to prevent it:
- Always apply temperature correction for the coldest expected site temperature
- Maintain 50-100V safety margin below inverter maximum DC input
- Verify Vmp at hot temperatures falls within the MPPT operating window
- Use manufacturer string sizing tools — they account for local climate data
- Design for 10-year temperature lows, not average conditions
- See our solar wire sizing guide for NEC 690.8 compliance
In Simple Terms
Solar panels produce more voltage when it is cold. A string that is safe in summer can overvoltage and shut down in winter. Always calculate for the coldest morning, not the average day.
Mistake 7: Tilt and Azimuth Mistakes
Tilt and azimuth errors are subtle but cumulative. A few degrees off optimal tilt costs a percent or two. A 45-degree azimuth error costs 5-8%. Combined with other losses, these errors push systems below production guarantees and trigger warranty claims.
What happens: The optimal tilt angle for a fixed array is roughly equal to the site’s latitude. The optimal azimuth is true south in the northern hemisphere (true north in the southern hemisphere). Common errors include using magnetic south instead of true south (magnetic declination varies by up to 30 degrees depending on location), installing at the roof pitch without calculating whether that pitch is optimal, and ignoring seasonal variations.
Each degree of azimuth error costs approximately 0.34% in annual generation. Each degree of tilt error costs approximately 0.69%. A 6.7° tilt error plus 10.9° azimuth error combines for roughly 8.3% total annual energy loss.
The cost: An 8% production loss on a 6 kW system generating $1,500/year in savings costs $120 annually — $3,000 over 25 years. If the system was sold with a production guarantee, the installer pays the shortfall.
Real story: A crew in southern Spain installed a 5 kW system on a west-facing roof at 15° tilt. The sales team had modeled south-facing at 30° tilt. The actual azimuth was 105° west of south. Annual production came in 12% below the guarantee. The homeowner demanded compensation. The installer discovered the error during a site audit: the crew had followed the roof line without checking the compass heading. The panels were physically installed correctly but oriented 105° from the design assumption. The installer paid $1,800 in guarantee credits and learned to verify azimuth with a digital compass before the first panel went up. Also see: Spain net metering. Read more about Hotel Solar + EV Charging Case Study.
How to prevent it:
- Use true south, not magnetic south — check declination for the site
- Calculate optimal tilt for the specific latitude and load profile
- Verify azimuth with a digital compass before installation
- Model east-west layouts separately if the roof requires split orientations
- Document actual tilt and azimuth in the as-built drawings
Pro Tip
East-west split arrays are increasingly common on residential roofs. Model each orientation separately. A west-facing array produces less total energy but more afternoon energy — which may better match the homeowner’s consumption pattern and improve self-consumption economics.
Mistake 8: Missing Interconnection Paperwork
Interconnection paperwork is the invisible infrastructure of solar. A system can be physically perfect and electrically safe, but if the paperwork does not match the utility’s requirements, it does not get permission to operate. The delays cost money. The errors cost reputation.
What happens: Common paperwork mistakes include: inverter model on the one-line diagram does not match the cut sheets, battery shown on the electrical sheet differs from the equipment schedule, missing rapid shutdown labels, incomplete one-line diagrams that do not show the point of interconnection, and site plans missing setbacks or access pathways. Utilities kick back applications that do not match their specific checklist. AHJs reject permits for missing labels or incorrect disconnect sizing. Read AC Disconnect Sizing for Solar for a complete walkthrough.
NREL’s residential solar contract study found that 73% of unsuccessful projects stalled in the pre-submission phase. The paperwork was wrong, incomplete, or mismatched — and the project never reached installation.
The cost: A paperwork rejection delays PTO (Permission to Operate) by 2-8 weeks. During that delay, the homeowner is making loan payments on a system that is not producing. A January 2026 Justia legal Q&A described a homeowner considering suing their installer for incorrect interconnection paperwork that caused utility notices, financial losses, and system activation delays.
Real story: A commercial installer in Texas submitted interconnection paperwork for a 250 kW system with a line-side tap shown on the one-line diagram. The actual installation used a load-side connection with a 400A breaker. The utility engineer flagged the mismatch during review. The installer had to redraw the one-line, submit revised plans, and reschedule the inspection. The delay cost 6 weeks. The client — a manufacturing facility — lost $8,000 in expected energy savings during the delay and threatened to withhold final payment. The installer absorbed the loss and implemented a pre-submission checklist that cross-references every document against the physical installation.
How to prevent it:
- Contact the local AHJ and utility early to confirm current requirements
- Cross-reference every document: one-line, equipment schedule, cut sheets, site plan
- Include all required labels and placards in the plan set
- Verify the point of interconnection method matches the utility’s voltage and phase requirements
- Conduct an internal audit before submission
Key Takeaway
73% of failed solar projects never reach installation because of pre-submission paperwork errors. A 15-minute internal audit before submission prevents 6-week delays and angry clients.
Mistake 9: Module-Level Rapid Shutdown Non-Compliance
Rapid shutdown is a life-safety requirement, not a performance feature. NEC 690.12 requires PV systems to reduce voltage to 80V or less within 30 seconds of shutdown initiation. Non-compliance is a code violation. It is also a liability exposure that most installers do not fully appreciate.
What happens: Before rapid shutdown requirements, a rooftop PV array remained energized whenever the sun shone — even if the main breaker was off. Firefighters responding to a building fire faced live DC conductors at 300-600V on the roof. NEC 690.12 fixes this by requiring controlled conductors to de-energize rapidly after shutdown initiation.
The 2023 NEC (maintained in 2026) requires: outside the array boundary, voltage must drop to 30V or less within 30 seconds. Inside the array boundary, voltage must drop to 80V or less within 30 seconds. Module-level power electronics (microinverters, power optimizers) or listed rapid shutdown devices achieve this automatically.
Common compliance failures include: missing rapid shutdown labels, using non-listed rapid shutdown devices, failing to verify inverter-optimizer communication, and installing systems without any rapid shutdown capability on buildings where it is required.
The cost: A rapid shutdown retrofit costs $1,000-$5,000 depending on array size and the retrofit method. Non-compliance can void permits, trigger AHJ red tags, and create liability if a first responder is injured. Insurance may deny claims if the system was not code-compliant. For installers, solar proposal software that includes NEC compliance checklists prevents these omissions at the quoting stage.
Real story: In 2024, an installer in California completed a 15 kW residential system without module-level shutdown devices. The AHJ inspector flagged the omission during final inspection. The system could not receive PTO. The installer had to return to the site, remove panels, install Tigo rapid shutdown devices behind each module, rewire the DC homeruns, and reschedule inspection. Three weeks of delay. $4,500 in retrofit labor and materials. The homeowner had already scheduled a pool party to show off the new system and posted a negative review before the issue was resolved.
How to prevent it:
- Verify which NEC edition the local AHJ has adopted
- Use listed rapid shutdown devices or module-level power electronics
- Install required labels at service equipment and initiation devices
- Test rapid shutdown function during commissioning
- Document compliance in the as-built package
- See our solar safety compliance checklist for a full NEC 690 review
What Most Guides Miss
Ground-mount systems are generally exempt from rapid shutdown if properly classified as “not on or attached to a building.” But carports attached to buildings, solar trellises over walkways, and canopy structures over parking areas may still require rapid shutdown. The AHJ has final authority — always confirm before assuming exemption.
Read Commercial Solar Carport Design Guide for a complete walkthrough.
Mistake 10: Documentation Gaps
Documentation gaps are the slowest-burning mistake on this list. A missing warranty registration or incomplete O&M manual does not cause a problem on day one. It causes a problem on day 1,825 — when the homeowner sells the house, files a warranty claim, or discovers a performance issue and cannot prove the system was commissioned correctly.
What happens: The SEIA Residential Installation Best Practices Guide lists the documents every homeowner should receive: signed site-specific warranty, manufacturer warranty registration, equipment data sheets, commissioning and testing reports, O&M manual, monitoring system credentials, and approved permit plan set. In practice, many installers deliver a subset of these and rely on verbal assurances.
The most critical gap is warranty registration. Many manufacturer warranties require registration within 60-90 days of installation. Unregistered warranties may be void or reduced. Transfer issues are equally serious: manufacturer warranties usually transfer but require formal notification within 30-90 days of closing, plus a transfer fee of $100-$300. Installer workmanship warranties typically do not transfer at all.
The cost: An unregistered warranty is worthless when a panel fails. A missing commissioning report makes it impossible to prove the system performed correctly at handover. A warranty transfer failure costs the new homeowner full replacement cost for a failed component. When installers go out of business — as Petersen Dean, Horizon, Sungevity, and Sullivan did — their workmanship warranties evaporate unless backup coverage was arranged.
Real story: A homeowner in Colorado bought a house with a 3-year-old 8 kW solar system. The previous owner had never transferred the manufacturer warranty. When two panels failed in year 4, the manufacturer denied the claim because the warranty was still registered to the original owner and the 90-day transfer window had closed. The new homeowner paid $1,200 out of pocket for panel replacement. The real estate agent who handled the sale had no idea warranty transfer was required. The installer had gone out of business two years prior. No one was accountable.
How to prevent it:
- Provide a complete document package at handover with a checklist signed by the homeowner
- Register manufacturer warranties within the required timeframe
- Include monitoring access credentials and basic training
- Provide written instructions for warranty transfer if the home is sold
- Maintain digital copies of all documents for at least the warranty period
Key Takeaway
Documentation gaps do not hurt on day one. They hurt on day 1,825. A complete handover package with warranty registration, commissioning report, and transfer instructions protects both the installer and the homeowner for the full system life.
Design Solar Systems That Avoid These Mistakes
SurgePV’s solar design software catches inverter sizing errors, string voltage miscalculations, and shading issues before they reach the roof.
Book a DemoNo commitment required · 20 minutes · Live project walkthrough
For a direct comparison, see Arka 360 vs SurgePV.
Myth: Cheap Installations Save Money
The most expensive solar installation is the one that needs to be fixed. A low bid that skips structural assessment, uses generic connectors, or omits proper flashing creates costs that dwarf the initial savings.
Consider the math. Installer A quotes $2.80/watt with proper flashing, certified connectors, and full documentation. Installer B quotes $2.40/watt by cutting corners. On a 6 kW system, the difference is $2,400 upfront. But Installer B’s roof leak costs $4,000 to repair. The generic connectors fail in year 3, costing $1,500. The missing warranty registration voids a panel replacement claim worth $1,200. Total cost of the “cheap” installation: $2,400 + $4,000 + $1,500 + $1,200 = $9,100 — versus $2,400 for the proper installation.
The cheap installation costs 3.8x more over the first 5 years. And that does not include the homeowner’s time, stress, and negative reviews.
The data supports this. The UK BRE report found that installer errors caused 36% of solar fires. NREL found 51% of residential projects fail before installation due to design or paperwork errors. The solar industry has a quality problem disguised as a cost problem. The solution is not cheaper installations. It is better installations.
Mistake Frequency and Cost Comparison
| Rank | Mistake | Frequency | Avg. Cost | Prevention Difficulty |
|---|---|---|---|---|
| 1 | Roof penetration leaks | ~30% of callbacks | $2,000–$5,000 | Easy |
| 2 | Electrical/wiring errors | ~20% | $500–$3,000 | Medium |
| 3 | Inverter sizing errors | ~18% | $1,500–$8,000 | Medium |
| 4 | Shading miscalculation | ~15% | $1,000–$5,000 | Medium |
| 5 | MC4 connector failures | ~12% | $200–$2,000 | Easy |
| 6 | Grounding deficiencies | ~12% | $800–$4,000 | Easy |
| 7 | String sizing errors | ~10% | $500–$3,500 | Medium |
| 8 | Documentation gaps | ~10% | $0–$2,000+ | Easy |
| 9 | Interconnection paperwork | ~8% | $500–$2,000 | Easy |
| 10 | Rapid shutdown non-compliance | ~5% | $1,000–$5,000 | Easy |
The pattern is clear. The most frequent mistakes — roof leaks, wiring errors, and connector failures — are also the easiest to prevent. They require attention to detail, not advanced engineering. The more technical mistakes — inverter sizing, string voltage, shading — require proper design tools and verification. None require luck. All require process.
How to Build a Mistake-Proof Installation Process
Preventing these mistakes requires a system, not just individual skill. Here is the process we use across 400+ projects:
Design phase:
- Run every design through solar design platform that validates string voltage, inverter sizing, and shading
- Cross-check all equipment specs against datasheets
- Model for worst-case temperature, not average conditions
- Use solar shadow analysis software to verify shading for every season
Pre-installation:
- Inspect roof condition and document with photos
- Verify structural capacity with a qualified engineer
- Confirm AHJ and utility requirements before submission
- Complete a pre-installation checklist signed by the lead installer
Installation:
- Use manufacturer-certified crimp tools and torque wrenches
- Water-test every roof penetration before panel installation
- Verify grounding continuity with a low-resistance ohmmeter
- Label every disconnect and rapid shutdown device
Commissioning:
- Test rapid shutdown function
- Verify monitoring system connectivity and data accuracy
- Compare actual production against modeled production for the first 7 days
- Complete a commissioning report with test results
Handover:
- Provide complete document package with checklist
- Register all manufacturer warranties
- Train homeowner on monitoring system use
- Provide written warranty transfer instructions
- Use our solar commissioning checklist as a handover template
Pro Tip
The most effective quality control is a second pair of eyes. Have a senior installer or designer review every plan set before submission and every installation before commissioning. The 30-minute review prevents the 30-day callback.
Conclusion
Solar installation mistakes are not inevitable. They are the result of skipped steps, unchecked assumptions, and processes that prioritize speed over accuracy. The 10 mistakes in this guide — from inverter sizing to documentation gaps — share one common thread: each is preventable with the right tools, training, and verification.
The data is unambiguous. 36% of solar fires trace to installer error. 30% of callbacks involve roof leaks. 73% of failed projects never reach installation because of paperwork errors. These are not statistics from a bad year. They are persistent patterns that define the gap between professional installation and amateur work.
The solar industry is growing at 25%+ annually. The installers who thrive in 2026 and beyond will be the ones who treat quality as a competitive advantage, not a cost center. A callback-free track record sells more systems than a low bid. A properly documented installation transfers cleanly to the next homeowner. A code-compliant system protects everyone — installer, homeowner, and first responder. For residential projects, tools like cloud solar design tool help catch errors before they become callbacks. For commercial work, solar proposal software ensures every quote includes proper compliance and documentation from day one.
Three actions to take now:
- Audit your last 20 installations against the mistake list in this guide. Categorize every callback by root cause. The pattern will show you where to focus.
- Implement a pre-submission checklist that cross-references every document against the physical installation. The 15-minute audit prevents the 6-week delay.
- Invest in the SurgePV platform that validates string voltage, inverter sizing, and shading before the design reaches the roof. Software catches errors that human review misses.
Frequently Asked Questions
What is the most common solar installation mistake?
Roof penetration leaks are the most common callback, accounting for roughly 30% of all post-installation service calls. Poor flashing, incorrect sealant selection, and skipping structural assessment are the root causes. The fix is simple: use manufacturer-certified flashing for the exact roof type, apply sealant in a continuous bead, and water-test every penetration before panel installation.
How much do solar installation mistakes cost?
Costs range from $500 for minor wiring fixes to $15,000+ for roof leak repairs with panel removal. The UK BRE found that 36% of solar fires trace directly to installer errors. NREL data shows 7.8% of installations have incorrect metadata that causes over 20% yield variation. A single grounding retrofit runs $800-$4,000. A rapid shutdown retrofit costs $1,000-$5,000.
What causes most solar panel fires?
According to a UK government BRE report analyzing 50+ fire incidents, 36% of solar PV fires were caused by installer errors. The most common failing components were DC isolators (18 incidents), DC connectors (10 incidents), and inverters (7 incidents). DC arc faults from loose connections are the leading ignition source. Proper crimping, grounding, and arc-fault protection prevent the vast majority of fire risks.
How do I avoid inverter sizing mistakes?
Size the inverter DC-to-AC ratio between 1.1 and 1.25 for most climates. Account for temperature coefficients on Voc — a 40V module at -10°C reaches 44.9V. Maintain a 50-100V safety margin below the inverter’s maximum DC input voltage. Use 1-minute irradiance data, not monthly averages, to catch peak clipping conditions.
What is rapid shutdown and why does it matter?
Rapid shutdown is a life-safety system required by NEC 690.12. It reduces PV system voltage to 80V or less within 30 seconds of shutdown initiation, protecting firefighters from shock hazards. Non-compliance can void permits and create liability. Module-level power electronics or listed rapid shutdown devices achieve compliance automatically.
How does shading affect solar production?
A shaded area covering just 5% of an array can cause 20-40% production drop on string inverter systems due to the bottleneck effect. Tree growth is the most underestimated factor — a 15-foot tree today can reach 35+ feet within a decade. Always model worst-case winter conditions and design for mature tree height, not current size.
What paperwork do I need for a solar installation?
Required documents include: signed site-specific warranty, manufacturer warranty registration, commissioning test reports, O&M manual, monitoring system credentials, approved permit plan set with AHJ stamp, and interconnection agreement with the utility. Missing any of these creates gaps that surface years later during warranty claims or home sales.
Can solar warranties transfer to new homeowners?
Manufacturer warranties usually transfer but require formal notification within 30-90 days of closing, plus a transfer fee of $100-$300. Installer workmanship warranties typically do NOT transfer and become worthless if the installer goes out of business. Provide written transfer instructions at handover to protect the homeowner.
What is the NEC 690 code for solar installations?
NEC Article 690 is the National Electrical Code section governing photovoltaic systems. It covers conductor sizing (690.8), grounding (690.43), arc-fault protection (690.11), rapid shutdown (690.12), and voltage calculations (690.7). Violations account for 30-40% of all solar permitting rejections. Every installer should have a current copy and verify which edition the local AHJ has adopted.
How do I prevent MC4 connector failures?
Use manufacturer-certified crimp tools with correct dies, never mix connector brands, verify IP67/IP68 rating, apply proper torque, and conduct annual thermal imaging. Roughly 60% of string-level insulation faults trace back to a single MC4 connector. The $200 investment in a proper crimp tool prevents thousands in callback costs.