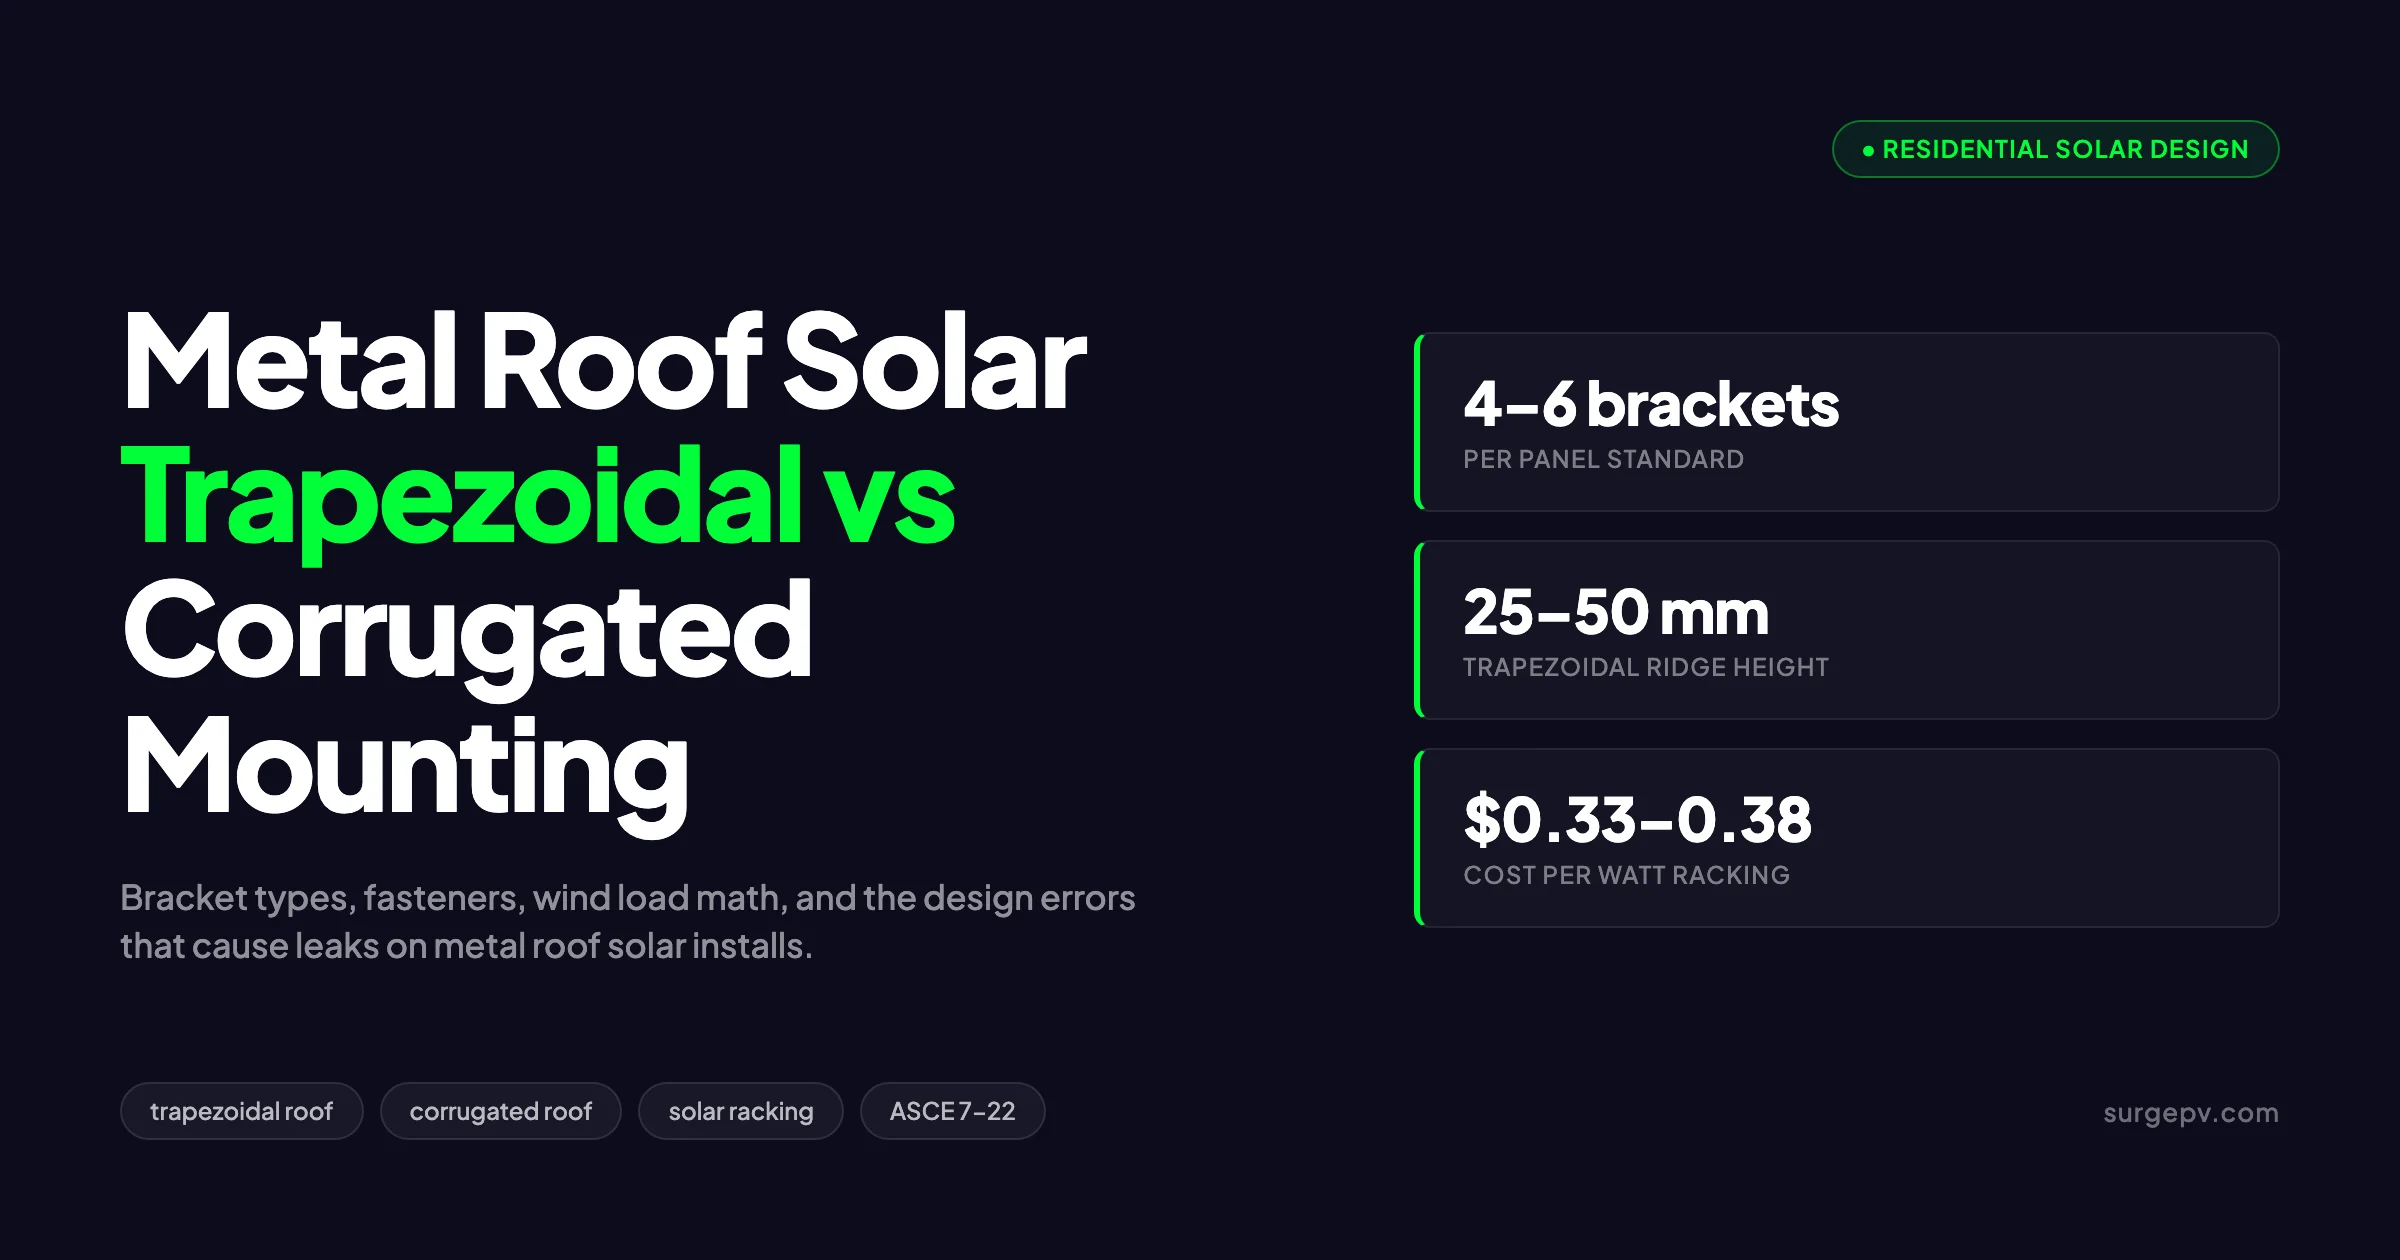
Quick Answer
The bracket shapes look similar in catalog photos, but the fastener pattern, waterproofing detail, and bracket spacing are not interchangeable. Wave spacing is much tighter than trapezoidal, usually 75 mm to 100 mm on center. The classic 8/3 profile (75 mm pitch, 19 mm depth) is the global default. Corrugated Ridge height. 25–50 mm. 16–25 mm Ridge spacing. 200–400 mm. 75–100 mm Cross-section.
Trapezoidal and corrugated metal roofs accept solar mounting differently. The bracket shapes look similar in catalog photos, but the fastener pattern, waterproofing detail, and bracket spacing are not interchangeable. A trapezoidal bracket installed on a corrugated profile, or vice versa, will leak within two winters and fail wind uplift inspection on the first review. For more on this topic, see Solar Racking Design Guide.
The bracket shapes look similar in catalog photos, but the fastener pattern, waterproofing detail, and bracket spacing are not interchangeable. Wave spacing is much tighter than trapezoidal, usually 75 mm to 100 mm on center. The classic 8/3 profile (75 mm pitch, 19 mm depth) is the global default. For Global-specific compliance details, see Global net-metering-by-country. For Global-specific compliance details, see Global solar-permitting-speed-by-country.
This guide compares the two mounting approaches side by side — when each one applies, the bracket types and fasteners that match each profile, the structural and waterproofing rules, and the design mistakes that send installers back for re-flashing. Read it before specifying brackets on any metal roof project.
TL;DR — Trapezoidal vs Corrugated Mounting
Trapezoidal roofs use wide flat-base brackets that span the valleys and fasten through the high crown into the purlin below. Corrugated roofs use narrower hangers that fasten through the wave crest with shorter self-tapping screws. Both require EPDM-sealed stainless fasteners landing in a structural member, never in the roof skin alone. Bracket spacing follows the racking manufacturer’s wind tunnel data, not generic ASCE tables.
What this guide covers:
- The visual and structural differences between trapezoidal and corrugated metal roof profiles
- Bracket types matched to each roof shape, with anchor pattern diagrams
- Fastener specifications, sealing methods, and roof manufacturer warranty rules
- Wind load math under ASCE 7-22 and how bracket spacing changes by zone
- Material compatibility — galvanic corrosion, coating systems, and dissimilar metals
- Cost comparison per kilowatt installed for both roof types
- Common design errors that fail inspection or void roof warranty
- A decision framework for choosing the right mounting approach
You can model both roof profiles, run the structural load math, and produce a permit-ready bracket layout inside solar design software like SurgePV, which handles roof segmentation, fastener spacing, and BOM generation in one workflow. For a direct comparison, see Arka 360 vs SurgePV.
Trapezoidal vs Corrugated Metal Roof Profiles
The two roof shapes look similar to a homeowner but behave differently under solar mounting hardware. Get the profile identification right before you order any brackets.
Trapezoidal Profile
Trapezoidal metal roofs feature tall, widely spaced ridges with flat valleys between them. The cross-section looks like a series of trapezoid shapes — narrow flat top, sloped sides, wider flat base. Ridge height typically ranges from 25 mm to 50 mm. Ridge spacing ranges from 200 mm to 400 mm on center.
Common trapezoidal profile names you will encounter:
- R-panel — 36-inch coverage, 1-inch ridge height, common in US commercial and agricultural construction
- PBR panel — similar to R-panel with a purlin bearing leg for structural roofs
- Kingspan KS1000 RW — European standing seam-style trapezoidal panel
- ArcelorMittal Tradiroof TR60 — European trapezoidal for industrial roofs
- 5-rib metal — 36-inch coverage, 5 evenly spaced ridges Also see: European Solar Incentives.
Trapezoidal panels are usually 0.5 mm to 0.7 mm steel or 0.7 mm to 1.0 mm aluminum, coated with a polyester or PVDF (Kynar 500) finish. The flat valley between ridges is wide enough to land a bracket base flat against the deck.
Corrugated Profile
Corrugated metal roofs feature a continuous sinusoidal wave pattern with no flat valleys. Wave height is typically 16 mm to 25 mm. Wave spacing is much tighter than trapezoidal, usually 75 mm to 100 mm on center. The classic 8/3 profile (75 mm pitch, 19 mm depth) is the global default.
Common corrugated profile names:
- 8/3 corrugated — 75 mm pitch, 19 mm depth, used in residential and agricultural buildings worldwide
- 3/4 inch corrugated — US residential standard
- Greca metal — Italian corrugated with shallow waves
- Onduline metal — bituminous-backed corrugated, common in DIY installs
Corrugated panels run 0.4 mm to 0.6 mm steel or 0.5 mm to 0.7 mm aluminum. The wave geometry means there is no flat surface for a bracket base to sit against. Mounting hardware must follow the wave shape or sit on the crest only.
Quick Identification Table
| Feature | Trapezoidal | Corrugated |
|---|---|---|
| Ridge height | 25–50 mm | 16–25 mm |
| Ridge spacing | 200–400 mm | 75–100 mm |
| Cross-section | Sharp trapezoid | Smooth sine wave |
| Flat valley | Yes, wide | No |
| Typical use | Commercial, industrial, modern residential | Agricultural, traditional residential, DIY |
| Bracket base | Flat, spans valley | Curved or wave-following |
Why the Profile Matters for Mounting
The bracket needs three things to perform: a flat or matched bearing surface, a fastener path through the skin into a structural member, and a watertight seal at the penetration. Trapezoidal profiles give you a wide flat valley to sit a bracket on. Corrugated profiles only give you the crest of each wave to land hardware on. The bracket geometry, fastener length, and sealing method all change as a result.
Bracket Types for Trapezoidal Metal Roofs
Trapezoidal bracket families divide into three groups based on where they fasten and how they bridge the profile.
Crown-Mount Brackets
Crown-mount brackets sit on the high ridge of the trapezoidal profile and fasten through the top of the ridge into the purlin below. The bracket has a flat or slightly curved base sized to match the ridge width.
Examples include the S-5! ProteaBracket (US market), Schletter Eco-A trapezoidal hook (European market), and the Mibet ART series (global). All three accept module clamps directly or carry a rail above for rail-based racking.
Pros:
- No penetration through the valley where water collects
- Single fastener pattern works across most trapezoidal panel widths
- Adjustable height for thermal expansion gaps under the rail
Cons:
- Concentrates load at one ridge — the bracket must align with a purlin underneath
- Crown can deform under heavy uplift if the ridge metal is thin or the fastener torques over
Crown-mount works best on R-panel, PBR, and Kingspan trapezoidal profiles where the ridge sits directly above a structural purlin every 600 mm to 1200 mm.
Valley-Mount Brackets (L-Feet)
Valley-mount brackets, often called L-feet or tin roof hooks, sit in the flat valley between ridges and fasten directly into the purlin or rafter through the valley. The bracket is L-shaped with a 50 mm to 100 mm flat base and a vertical leg that carries the rail clamp.
Pros:
- Direct load path into the structural member with no bridging
- Lower height profile, which keeps panels closer to the roof and reduces wind drag
- Easier to flash with butyl tape or EPDM membrane around the base
Cons:
- Penetrates the valley where water actively flows during rainfall
- Requires very precise sealing — any gap around the bracket base leaks within one season
- Must align with both a purlin underneath and a panel module clamp above, which limits placement flexibility
Valley-mount is the dominant approach in Europe for trapezoidal residential roofs, where roofs are flatter and water flow is more controlled. In North America, crown-mount dominates because installers prefer to avoid valley penetrations entirely.
Bridging Brackets
Bridging brackets span two or three ridges with a wider base, distributing load across multiple ridges. They look like a small platform with feet on either end. The advantage is reduced point load on any single ridge. The disadvantage is more fasteners per bracket and a heavier installed weight.
Bridging brackets matter on aluminum trapezoidal profiles where ridge metal is too soft to handle a single-point crown fastener, or on long-span structures where purlin spacing exceeds 1500 mm.
Trapezoidal Bracket Specifications Table
| Parameter | Crown-Mount | Valley-Mount (L-Foot) | Bridging |
|---|---|---|---|
| Base width | 50–80 mm | 60–100 mm | 200–400 mm |
| Fastener count | 2 per bracket | 2–4 per bracket | 4–6 per bracket |
| Fastener length | 60–80 mm | 50–70 mm | 50–70 mm |
| Sealing | EPDM washer at fastener | EPDM washer + butyl tape under base | EPDM washer + butyl tape under each foot |
| Typical wind rating | Up to 150 mph | Up to 130 mph | Up to 180 mph |
| Roof penetration count | Lowest | Medium | Highest |
Bracket Types for Corrugated Metal Roofs
Corrugated brackets are simpler in shape but require tighter installation tolerances because the wave geometry leaves no flat surface to land hardware on.
Crest-Mount Hangers
Crest-mount hangers sit on the top of one or two waves and fasten through the crest with a long self-tapping screw that bridges the air gap between the wave top and the rafter or purlin below. The bracket has a curved or stepped base that follows the wave crest profile.
Examples include EcoFasten CorruBracket (US), Magerack corrugated kits, and the Renusol ConSole+ corrugated hanger. All three are designed to sit on a single wave crest and fasten down through the crest into the rafter underneath.
Pros:
- Minimal contact area with the roof skin reduces galvanic corrosion risk
- Water sheds around the bracket because it sits on the highest point of the profile
- Fastener stays out of the wave valley where debris and water collect
Cons:
- Long fastener (75 mm to 100 mm) bridges an air gap between the wave crest and the rafter, which makes the screw flex under load
- The crest metal is thin and can dimple under bracket load if the wave geometry does not match the bracket base
- Bracket must align with both a wave crest above and a rafter below, which constrains placement
Hanger Bolt Systems
Hanger bolt systems use a double-threaded stud that screws into the rafter on one end and accepts a nut and washer on the other end. The stud passes through the corrugated skin, with an EPDM washer sealing the penetration. A clip or L-bracket sits over the stud above the roof and accepts the rail.
Hanger bolts are common in European installations on corrugated agricultural buildings. They are cheap, structurally simple, and easy to seal. The downside is height — the stud sticks out 80 mm to 150 mm above the roof, which adds wind drag and creates a more visible mounting profile.
Adjustable Tin Roof Hooks
Adjustable tin roof hooks combine an L-foot base with a height-adjustable vertical leg. They sit on the wave crest and accept rail clamps at varying heights. The adjustment compensates for uneven wave heights, which is useful on older corrugated roofs where the profile has deformed over time.
PV Mounts and similar manufacturers ship adjustable hooks specifically for trapezoidal and corrugated retrofits where the existing roof profile does not match a single bracket model.
Corrugated Bracket Specifications Table
| Parameter | Crest-Mount Hanger | Hanger Bolt | Adjustable Hook |
|---|---|---|---|
| Base width | 60–100 mm | N/A (single point) | 50–80 mm |
| Fastener count | 1 per bracket | 1 per bracket | 1 per bracket |
| Fastener length | 75–100 mm | 100–200 mm | 70–90 mm |
| Sealing | EPDM washer + butyl tape ring | EPDM washer + neoprene cone | EPDM washer + butyl tape |
| Typical wind rating | Up to 130 mph | Up to 110 mph | Up to 120 mph |
| Height above roof | 30–60 mm | 80–150 mm | Adjustable 30–80 mm |
Fasteners and Waterproofing
The bracket is only as good as the fastener and seal that holds it down. This is where most metal roof solar installs fail in year five or six.
Fastener Material
Stainless steel A2 (304) is the default fastener material for both trapezoidal and corrugated metal roof installs. A4 (316) stainless is required in coastal zones within 5 km of the ocean to resist chloride corrosion.
Aluminum and zinc-plated steel fasteners fail by galvanic corrosion when paired with aluminum brackets on coated steel roofs. The dissimilar metal contact creates a small electrical cell, and the less noble metal (usually the fastener) corrodes within 3 to 7 years. Always match fastener material to bracket material and roof coating.
Self-Drilling vs Pre-Drilled
Self-drilling screws have a hardened drill point that cuts through the roof skin and threads into the structural member in one motion. They are faster on site and reduce the risk of misalignment between the skin hole and the structural hole.
Pre-drilling is required when the structural member is hardwood, when the screw must engage a thick steel purlin (over 4 mm), or when the manufacturer specifies pilot drilling for warranty compliance. Pre-drilling is slower but produces a cleaner thread engagement and reduces the chance of stripping out under torque.
EPDM Washers
Every penetration through a metal roof skin must use a stainless steel screw with a bonded EPDM washer. The EPDM is a black rubber gasket vulcanized to the underside of a stainless cap washer. When the screw is torqued correctly, the EPDM compresses against the roof skin and forms a watertight seal that lasts the design life of the roof.
EPDM washers fail when:
- The screw is over-torqued and the EPDM cracks or extrudes out from under the cap
- The screw is under-torqued and the EPDM does not compress fully
- The EPDM ages out under UV exposure (typically 25 to 35 years)
- The screw shifts under thermal cycling and wears the EPDM seal
Use a torque-limiting driver set to the screw manufacturer’s spec — usually 10 to 14 Nm for 6.3 mm self-drillers. Visual inspection should show the EPDM compressed evenly around the screw head with no cracking and no overspread.
Butyl Tape and Flashing
For valley-mount trapezoidal brackets and any large-base bracket, a continuous butyl tape ring under the bracket base is mandatory. Butyl tape is a self-adhesive rubber strip that conforms to the roof profile and seals the gap between the bracket base and the roof skin.
For high-end installs, manufacturers like S-5! and EcoFasten ship pre-flashed brackets with a factory-applied butyl pad on the underside. These eliminate the field-applied tape step and reduce installation error.
Sealant Compatibility
Silicone sealant is not compatible with PVDF (Kynar 500) coated metal roofs. The acetic acid byproduct of silicone curing eats into the coating and creates a corrosion site within 2 years. Use butyl-based or polyurethane sealants only on coated metal roofs.
Polyester-coated steel tolerates a wider range of sealants, but butyl tape remains the safer default.
Pro Tip — Pre-Flashed Brackets Pay Back Fast
Field-applied butyl tape adds 30 to 60 seconds per bracket and depends entirely on installer skill for a watertight seal. Pre-flashed brackets with factory-applied butyl pads cost about 20 percent more per unit but eliminate the most common warranty claim on metal roof solar installs. On a 10 kW residential job with 40 brackets, the upgrade pays for itself in one avoided callback.
Wind Load and Bracket Spacing
ASCE 7-22 governs wind load calculations for solar mounting in the US. EN 1991-1-4 (Eurocode 1) governs in Europe. Both standards divide the roof into zones with different uplift pressures and require tighter bracket spacing in higher-pressure zones.
Roof Zones Under ASCE 7-22
A flat or low-slope roof under ASCE 7-22 has three pressure zones:
- Zone 1 (interior) — lowest uplift, covers the central area of the roof
- Zone 2 (perimeter) — moderate uplift, covers a strip along all roof edges
- Zone 3 (corner) — highest uplift, covers the corners of the roof
Pressure coefficients in Zone 3 can be 2 to 3 times higher than Zone 1. A bracket layout that uses 1200 mm spacing in the interior often needs 600 mm spacing at the corners.
Bracket Spacing Calculations
The required bracket spacing is calculated by dividing the bracket’s pull-out capacity by the design uplift pressure at that location. The pull-out capacity comes from the racking manufacturer’s wind tunnel report. The design uplift pressure comes from ASCE 7-22 or Eurocode 1 calculations for the specific site.
A typical mid-Atlantic US residential install on a trapezoidal roof might land at:
| Zone | Design uplift (psf) | Bracket spacing | Brackets per panel |
|---|---|---|---|
| Zone 1 (interior) | 18–22 | 1200 mm | 4 |
| Zone 2 (perimeter) | 28–34 | 900 mm | 4–6 |
| Zone 3 (corner) | 42–55 | 600 mm | 6 |
Corrugated roofs typically need tighter spacing than trapezoidal at the same pressure because the bracket pull-out capacity is lower. A bracket fastened with one screw bridging an air gap to the rafter has roughly 60 to 70 percent of the capacity of a bracket fastened directly into a purlin with two screws.
Why Manufacturer Wind Tunnel Data Matters
The ASCE 7-22 prescriptive method does not cover the aerodynamics of solar panels mounted parallel to a sloped metal roof. The standard tells designers to use wind tunnel data following ASCE 49 procedures or to apply manufacturer-tested values from the racking system.
Every major racking vendor publishes wind tunnel reports for their products on common roof profiles. Use the report values for the actual bracket and the actual roof type. Do not interpolate from generic ASCE tables — the values will be off by 20 to 40 percent in either direction.
For a deeper dive into the wind math, see our wind load calculation glossary entry, which covers the ASCE 7-22 procedure step by step. You can also automate the math inside SurgePV’s solar shadow analysis software, which integrates wind zone mapping into the roof segmentation workflow.
Material Compatibility and Galvanic Corrosion
Mixing aluminum brackets on a coated steel roof creates a galvanic cell at every contact point. The cell drives accelerated corrosion of one of the metals — usually the steel skin under the bracket base, sometimes the aluminum bracket itself.
The Galvanic Series
The galvanic series ranks metals from most noble (cathodic) to least noble (anodic). When two dissimilar metals contact in the presence of an electrolyte (rainwater), the anodic metal corrodes preferentially.
| Metal | Position |
|---|---|
| Stainless steel 316 | Most noble |
| Stainless steel 304 | Noble |
| Copper | Mid-noble |
| Brass | Mid |
| Aluminum (anodized) | Less noble |
| Aluminum (mill finish) | Anodic |
| Galvanized steel | Anodic |
| Zinc | Most anodic |
Aluminum brackets contacting a galvanized steel roof will accelerate corrosion of the zinc coating and eventually the steel beneath. The fix is either to use a non-conductive isolation pad (EPDM or HDPE) between the bracket base and the roof skin, or to specify aluminum-compatible roof coatings.
Coating Compatibility
PVDF (Kynar 500) coatings tolerate aluminum bracket contact when the coating is intact. Polyester coatings tolerate aluminum when the coating is at least 25 microns thick. Galvanized steel without a polymer topcoat should always have an isolation pad between bracket and roof.
Aluminum roofs accept aluminum brackets without isolation. Stainless brackets work on aluminum roofs but cost more. Carbon steel brackets should never be used on any metal roof regardless of bracket coating, because the carbon steel will rust within 5 years even under powder coat.
Design Metal Roof Solar Layouts in Minutes, Not Hours
SurgePV automates roof segmentation, bracket spacing, wind zone mapping, and BOM generation for trapezoidal and corrugated metal roofs. Run the structural and shading math in one workflow, then export a permit-ready proposal in under an hour.
Book a DemoNo commitment required · 20 minutes · Live project walkthrough
See Solar Shading Analysis Guide for detailed guidance.
Cost Comparison: Trapezoidal vs Corrugated Mounting
Material and labor costs differ between the two roof types. Trapezoidal is generally cheaper per kilowatt installed because the bracket count per panel is lower and the install time per bracket is faster.
Material Cost per Bracket (US, 2026)
| Bracket Type | Roof | Material cost (USD) | Notes |
|---|---|---|---|
| Crown-mount, generic | Trapezoidal | 8–12 | Most common in US retrofits |
| Crown-mount, pre-flashed | Trapezoidal | 14–20 | S-5!, EcoFasten quality |
| L-foot, valley | Trapezoidal | 10–15 | More common in Europe |
| Crest hanger | Corrugated | 9–14 | EcoFasten CorruBracket reference |
| Hanger bolt set | Corrugated | 6–10 | Cheap but more labor |
| Adjustable hook | Corrugated | 12–18 | For irregular profiles |
Installed Cost per Kilowatt
A typical 10 kW residential install with 25 panels and 100 to 150 brackets lands at:
| Roof type | Bracket cost | Labor (h) | Total racking + labor (USD) |
|---|---|---|---|
| Trapezoidal, crown-mount | 1,400 | 6–8 | 2,200–2,800 |
| Trapezoidal, valley L-foot | 1,500 | 8–10 | 2,500–3,200 |
| Corrugated, crest hanger | 1,600 | 10–12 | 2,800–3,600 |
| Corrugated, hanger bolt | 900 | 12–16 | 2,500–3,400 |
Corrugated installs run roughly 15 to 25 percent more in total cost than trapezoidal installs of the same size. The premium covers tighter bracket spacing for wind compliance, longer install time per bracket, and more flashing detail per penetration.
Lifetime Cost
Corrugated installs have a slightly higher lifetime cost from EPDM seal replacement at 25 to 30 years. The seal is the failure point on a long timeline, and the corrugated profile makes resealing more invasive than on trapezoidal. Budget an extra $300 to $500 per system for mid-life resealing on corrugated roofs.
You can model the full lifetime cost, including racking, labor, and reseal events, inside SurgePV’s generation and financial tool, which produces a 25-year cash flow projection for any system size and roof type.
Installation Process Compared
The bracket-by-bracket install steps differ in detail between the two roof types, even though the broad workflow is the same.
Trapezoidal Install Sequence
- Mark bracket positions on the roof using a chalk line, aligning to purlin locations beneath the deck
- Confirm purlin alignment with a stud finder or by lifting the roof skin at one location to verify
- Apply butyl tape ring around the planned fastener position (or skip if using pre-flashed brackets)
- Set the bracket on the crown or in the valley, depending on bracket type
- Drive the self-tapping screw with a torque-limiting driver to manufacturer spec
- Inspect EPDM compression — uniform ring, no cracking, no overspread
- Repeat for all bracket positions before installing rails
Corrugated Install Sequence
- Mark wave crests where brackets will land, using a chalk line aligned to rafter positions
- Confirm rafter alignment by tapping the underside or lifting the skin at one position
- Drive a 75 mm to 100 mm self-drilling screw through the wave crest, through the air gap, into the rafter
- Set the crest hanger over the screw and the wave
- Apply butyl tape around the bracket-to-roof contact zone
- Tighten the rail clamp on top of the hanger, with the rail seated correctly
- Repeat across the array
The corrugated sequence is slower because the long fastener takes more time to drive through the air gap and engage the rafter cleanly. A skilled crew can install 50 to 70 trapezoidal brackets per day per installer. The same crew installs 35 to 50 corrugated brackets per day.
Common Installation Mistakes
These errors show up on inspection across both roof types:
- Bracket not aligned with purlin or rafter — fastener engages the skin only and pulls out under wind load
- Over-torqued screws cracking the EPDM washer
- Silicone sealant on PVDF-coated panels causing coating failure within 2 years
- Aluminum brackets on galvanized steel without isolation pad causing galvanic corrosion
- Bracket spacing too wide in corner zones where ASCE 7-22 demands tighter pattern
- Mixing bracket models across the same array, which voids the wind tunnel report
- Skipping butyl tape on valley-mount L-feet because the installer assumed EPDM washer would seal alone
For a broader look at racking design across roof types, see our [solar mounting structure types guide](/blog/solar-mounting-structure-types-guide).
Choosing the Right Mounting Approach
The decision tree below covers most residential and small commercial scenarios.
When to Use Trapezoidal Mounting
- The roof has clearly defined trapezoidal ridges with flat valleys between
- Ridge spacing matches the bracket base width (typically 200–400 mm)
- Purlins below align with ridge crests for crown-mount, or with valleys for L-foot
- Wind zone is moderate (under 130 mph design wind speed)
- Project budget allows for pre-flashed brackets
When to Use Corrugated Mounting
- The roof has a continuous wave pattern with no flat valleys
- Wave spacing is 75–100 mm with shallow depth
- Rafters below are spaced 600 mm or wider (typical residential)
- Wind zone is moderate
- Installer is experienced with long-fastener crest mounting
When to Reconsider the Mounting Approach
- The roof is older (over 30 years) with deformed or corroded panels — replace the roof first
- Purlin or rafter spacing exceeds 1500 mm — use bridging brackets or add structural blocking
- Roof has visible rust through the coating — repair or recoat before fastening
- High-wind zone (over 150 mph) and the racking manufacturer cannot certify the bracket for that pressure — switch to a higher-rated system or different bracket type
- Roof manufacturer has not approved any solar bracket for warranty compliance — switch roof, switch bracket, or accept the warranty void in writing
Decision Quick Reference
| Question | Trapezoidal | Corrugated |
|---|---|---|
| Bracket cost | Lower | Higher |
| Install speed | Faster (50–70/day) | Slower (35–50/day) |
| Wind load capacity | Higher | Lower |
| Penetration count | Lower | Lower per bracket but more brackets |
| Reseal at 25 years | Easier | Harder |
| Warranty alignment | Strong | Strong with approved brackets only |
You can model both mounting approaches on the same roof inside SurgePV’s solar software and compare bracket count, fastener count, and cost-per-watt before committing to a quote. The platform also generates a solar proposal software ready PDF with bracket BOM, layout drawings, and energy yield in one export.
Roof Manufacturer Approval and Warranty
Most major metal roof manufacturers maintain an approved bracket list for solar mounting. Using an approved bracket preserves the roof warranty. Using an unapproved bracket, or installing an approved bracket incorrectly, voids it.
Major Manufacturer Approvals
| Roof Manufacturer | Approved Bracket Brands | Notes |
|---|---|---|
| Englert | S-5!, EcoFasten | Standing seam and trapezoidal both covered |
| McElroy Metal | S-5!, AceClamp | R-panel and trapezoidal |
| Kingspan | Schletter, K2 Systems | European trapezoidal panels |
| ATAS International | S-5!, EcoFasten | Multiple profiles approved |
| ArcelorMittal | Approved per project | Submit bracket spec for individual approval |
The general rule: contact the roof manufacturer with the bracket model and installation detail before ordering hardware. Manufacturers usually respond within 5 to 10 business days with approval, conditional approval, or rejection.
Warranty Documentation
Keep these records for the lifetime of the system:
- Roof manufacturer’s written approval of the bracket model
- Bracket installation manual with torque specs
- Photos of each bracket showing EPDM compression and butyl tape application
- Wind tunnel report from the racking manufacturer covering the actual bracket and roof profile
- Permit drawings showing bracket spacing per ASCE 7-22 zone
This documentation is the only defense if a leak develops in year 8 or year 12 and the roof manufacturer questions whether the install caused the failure.
For more on the structural side, see our solar panel mounting on standing seam metal roof guide, which covers the clamp-on alternative for the third major metal roof type.
Real-World Cost and Yield Examples
Two reference systems show how the trapezoidal vs corrugated choice plays out on real projects.
Example 1: 8 kW Residential, R-Panel Trapezoidal Roof
- Location: Austin, Texas (zone 2 wind, 115 mph design wind speed)
- Panels: 20 × 400 W modules
- Brackets: 80 × S-5! ProteaBracket crown-mount, pre-flashed
- Bracket spacing: 1200 mm interior, 900 mm perimeter
- Material cost: $1,280 brackets + $400 rails + $300 clamps = $1,980
- Labor: 8 hours total install for 2-person crew = $640
- Total racking + labor: $2,620
- Annual yield: 12,800 kWh
- Cost per watt (racking only): $0.33
Example 2: 8 kW Residential, 8/3 Corrugated Roof
- Location: rural Tuscany, Italy (zone 1 wind, 95 mph design wind speed)
- Panels: 20 × 400 W modules
- Brackets: 100 × Renusol ConSole+ corrugated hanger
- Bracket spacing: 900 mm uniform (tighter for corrugated)
- Material cost: $1,400 brackets + $400 rails + $300 clamps = $2,100
- Labor: 12 hours total install for 2-person crew = $960
- Total racking + labor: $3,060
- Annual yield: 11,200 kWh (lower irradiance than Texas)
- Cost per watt (racking only): $0.38 Also see: solar panel ROI in Italy.
The corrugated install runs $0.05 per watt higher because of more brackets and slower install time. On a 10-year cash flow, the difference is roughly $400 — a small fraction of system economics, but real money on a competitive bid.
Conclusion
Three actions to take from this guide:
- Identify the metal roof profile precisely (trapezoidal ridges with flat valleys, or continuous corrugated waves) before specifying brackets, because the wrong bracket family fails wind testing and voids roof warranties
- Match fastener material, sealing method, and bracket coating to the roof system using the manufacturer’s approved bracket list, then document every installation detail with photos for warranty defense
- Run wind load math against the racking manufacturer’s wind tunnel report, not generic ASCE tables, and tighten bracket spacing in perimeter and corner zones to meet ASCE 7-22 compliance
Frequently Asked Questions
What is the difference between trapezoidal and corrugated metal roof solar mounting?
Trapezoidal mounting uses brackets that span the flat valleys between tall, widely spaced ridges and fasten through the high crown of the profile. Corrugated mounting uses smaller hangers that follow the continuous wave pattern and fasten through the ridge crests with EPDM-sealed self-tapping screws into the purlin below. The bracket geometry, fastener count per panel, and waterproofing detail are different even though both attach into the same underlying structural deck.
Can you mount solar panels on a corrugated metal roof without drilling?
No, you cannot reliably mount panels on a corrugated metal roof without penetration. Standing seam roofs accept clamp-on attachments because the raised seam gives a structural grip point, but corrugated and trapezoidal profiles do not have a raised seam strong enough for clamps. Every code-compliant install on these roof types uses self-tapping screws into the purlin or rafter, sealed with EPDM washers and butyl tape.
How many solar mounting brackets do I need per panel on a metal roof?
Most residential and small commercial installs use 4 brackets per panel — 2 along each long edge, spaced to land on a structural purlin or rafter. High-wind zones, corner zones under ASCE 7-22, and panels longer than 2 meters often require 6 brackets per panel. Bracket count is set by the wind tunnel data from the racking manufacturer, not by panel count alone.
What is the best fastener for trapezoidal metal roof solar mounting?
The standard fastener is a 6.3 mm or 1/4 inch self-drilling stainless steel screw with a bonded EPDM washer, sized to penetrate 2 to 3 threads beyond the underside of the structural purlin. Length varies from 50 mm for thin steel decks to 100 mm where the bracket sits on top of insulation. Aluminum-bodied screws fail by galvanic corrosion when paired with aluminum brackets on coated steel roofs, so stainless A2 or A4 is the default.
Do solar panels void a metal roof warranty?
Most major metal roof manufacturers honor the warranty if the install uses an approved attachment system, follows the manufacturer’s penetration spacing rules, and uses sealants compatible with the roof coating. Generic brackets fastened without flashing or with silicone sealant on a Kynar-coated panel typically void the warranty. Always check the roof manufacturer’s approved list before specifying brackets.
How much weight can a metal roof hold for solar?
Most modern trapezoidal and corrugated metal roofs handle 3 to 6 pounds per square foot of added solar dead load without reinforcement, which covers a flush-mounted panel array. The structural limit is set by the purlin spacing and gauge of the deck, not the roof skin. A structural engineer must confirm capacity for any system over 4 psf or any older barn-style structure where purlin gauge is unknown.
What is the minimum metal roof thickness for solar mounting?
The roof skin should be at least 0.4 mm thick for steel and 0.5 mm for aluminum to hold a self-drilling screw without tear-out. Thinner skins flex around the fastener under wind load and cause the EPDM seal to fail within 5 to 10 years. The structural fastener must always pass through the skin and engage a purlin or rafter beneath — the skin is not the load path.
Can I install solar on a metal roof in high-wind areas?
Yes, but the bracket spacing tightens significantly above 130 mph design wind speed. Corner zones under ASCE 7-22 may need brackets every 600 mm instead of the standard 1200 mm spacing, and the racking manufacturer’s wind tunnel report must cover the specific exposure category. Hurricane and cyclone zones often require additional structural blocking under each bracket position.


