Quick Answer
Solar shading analysis identifies obstructions that reduce panel output. Methods include on-site surveys, drone imagery, 3D modeling software, and satellite data. Even 10% shading can reduce string output by 30–50%. [Shadow analysis software](/shadow-analysis) creates accurate 3D models to optimize placement.
Shading is the single most predictable cause of solar underperformance — and the most frequently ignored during pre-sales site visits. A 2024 study in Nature confirmed what field engineers have known for decades: shading just 40% of a single cell can slash module output by over 30%. The financial damage scales from annoying to catastrophic. Annual energy losses reach 20–30% on urban rooftops. Post-commissioning disputes spike when shading exceeds pre-install estimates. Financiers now reject PPA applications without independent shade audits.
Solar shading analysis identifies obstructions that reduce panel output. Methods include on-site surveys, drone imagery, 3D modeling software, and satellite data. Even 10% shading can reduce string output by 30–50%.
Solar shading analysis identifies obstructions that reduce panel output. Methods include on-site surveys, drone imagery, 3D modeling software, and satellite data. Even 10% shading can reduce string output by 30–50%. Shadow analysis software creates accurate 3D models to optimize placement.
This guide covers the full technical stack. You will learn the physics of series-string current mismatch and bypass diode behavior. You will see real industry data from IEA-PVPS, NREL, and PVEL. We compare every major shading analysis method and software platform on accuracy, price, and workflow fit. We define exact ROI kill thresholds by project type. And we walk through a complete step-by-step shading analysis protocol that satisfies IEC 62446-1:2016.
If you design, sell, or commission PV systems, this guide is for you. Installers need it to avoid post-install yield disputes. EPC engineers need it to hit performance guarantees. Sales professionals need it to set honest production expectations before the contract is signed. Every section is built around verified data, not marketing claims.
TL;DR
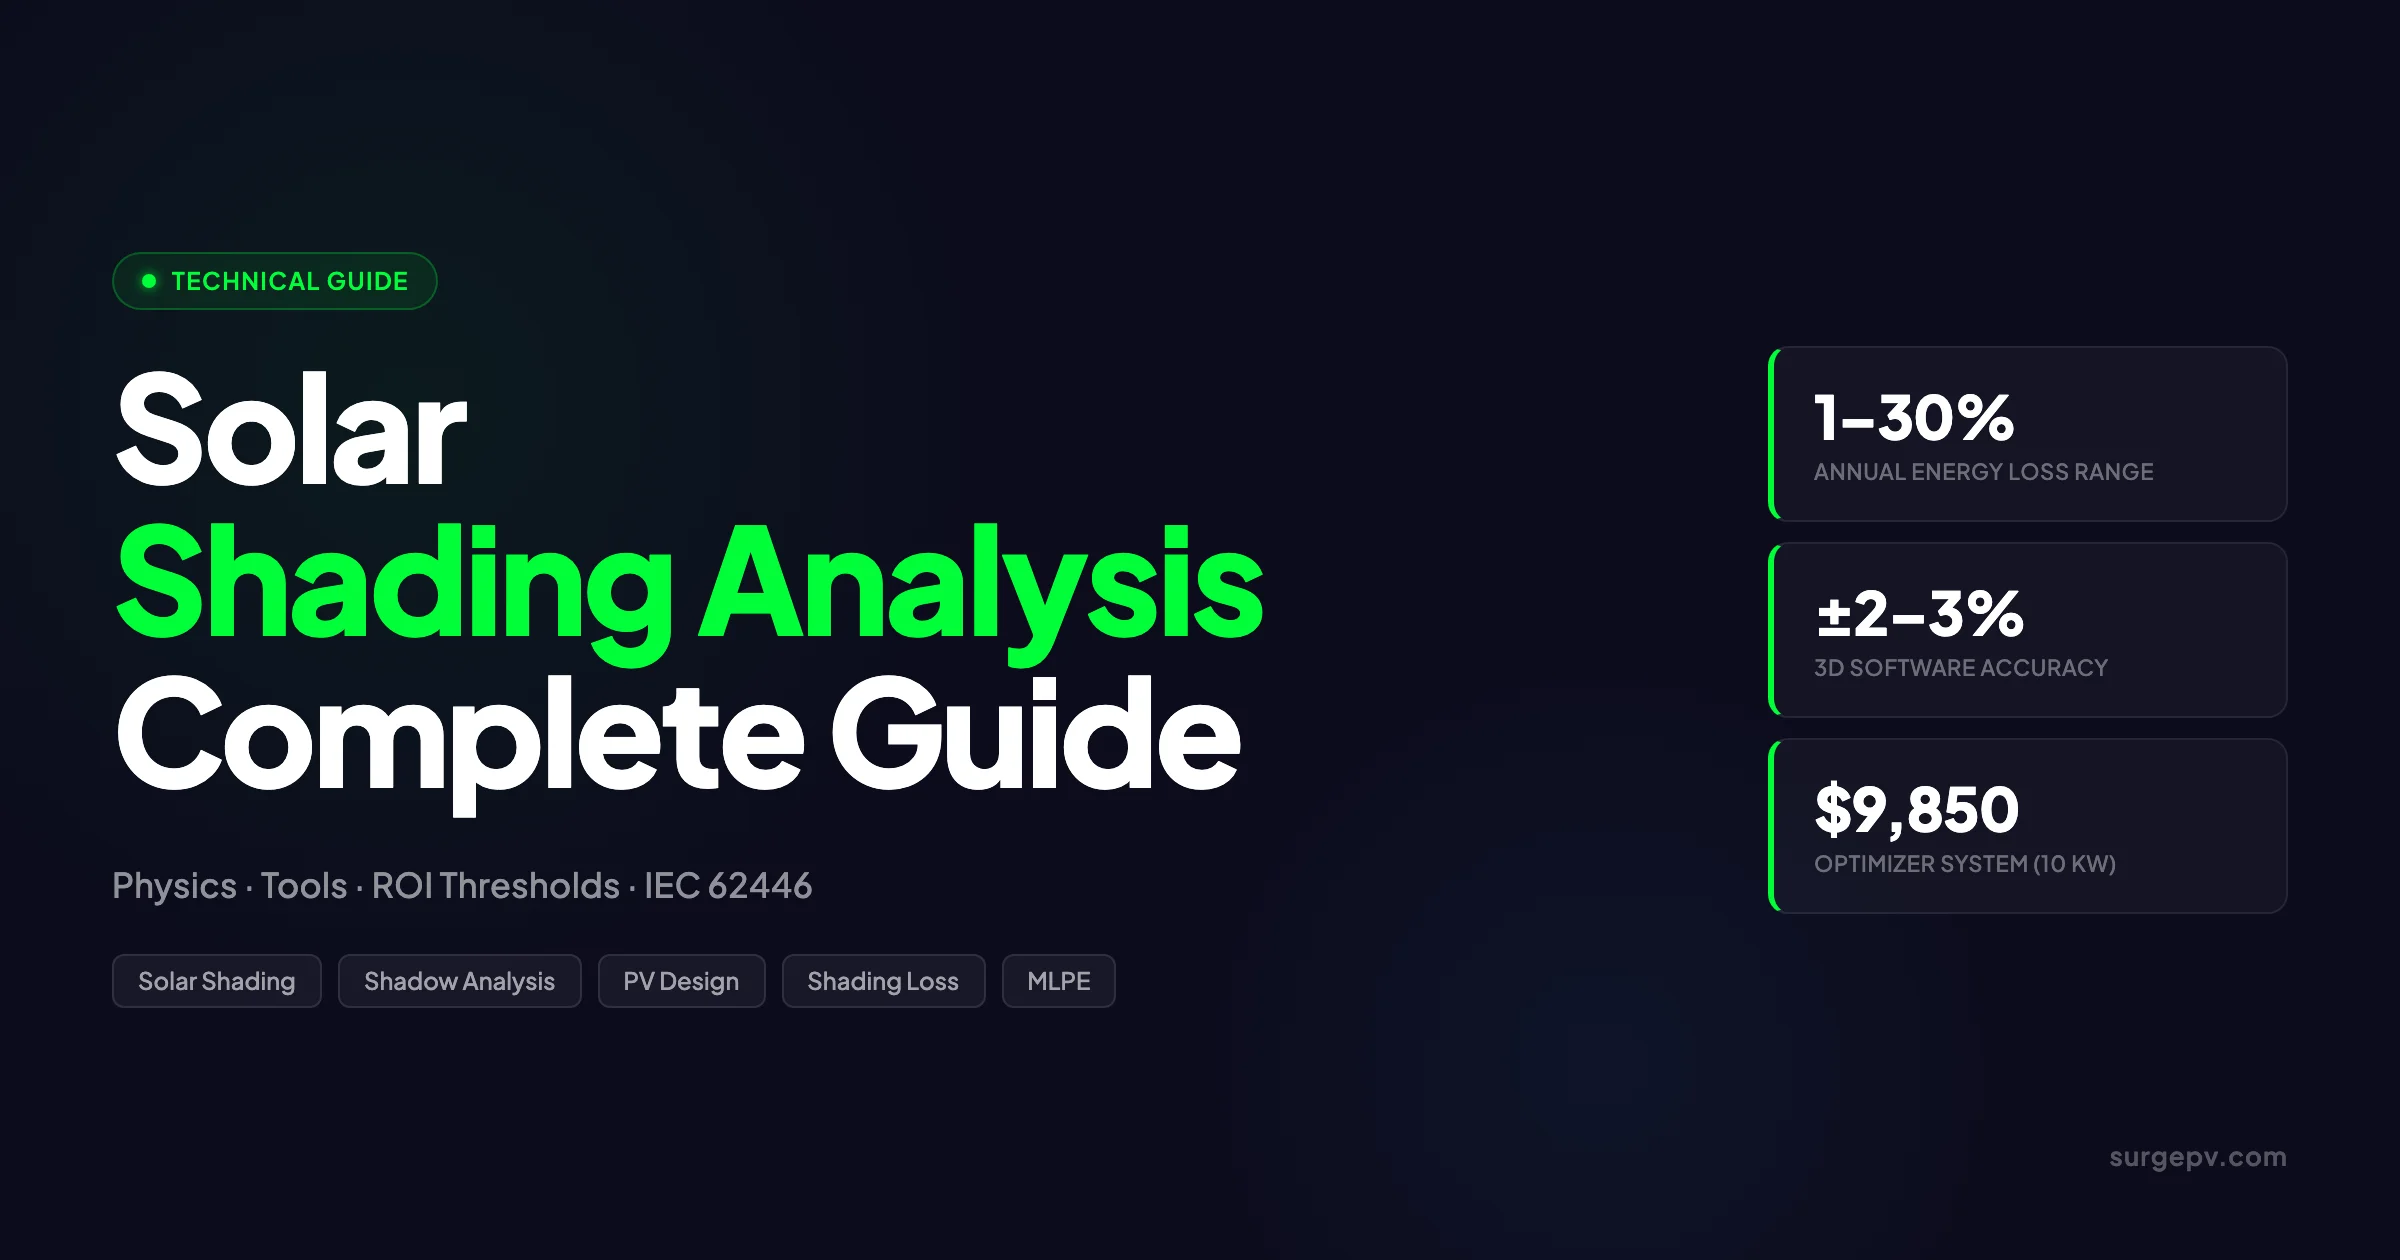
Solar shading analysis quantifies how obstructions reduce PV system output. Annual losses range from 1–5% for unobstructed sites to 20–30% for urban rooftop and facade systems. IEC 62446-1:2016 explicitly requires shade evaluation. Modern 3D tools (SurgePV, Aurora, HelioScope) achieve ±2–3% accuracy. When shading exceeds 4% (utility) or 5% (C&I), redesign, deploy module-level power electronics (MLPE), or walk away.
In this guide:
- The physics of series-string current mismatch and bypass diode loss
- Real energy loss benchmarks from IEA-PVPS, NREL, and peer-reviewed studies
- A complete comparison of shading analysis methods and tools
- Exact ROI kill thresholds by project type
- Optimizer vs. microinverter recovery data from PVEL
- A 10-step pre-site checklist and full analysis protocol
- Real-world residential, commercial, and industrial shading scenarios
- IEC 62446-1 documentation requirements most installers miss
- How to read a shading report and spot red flags
What Is Solar Shading Analysis?
Defining Shading in PV Systems
Shading in photovoltaics is not binary. An array can suffer five distinct shading types. Each operates on different physical principles and demands different modeling approaches.
| Shading Type | Source | Scale | Effect on Array |
|---|---|---|---|
| Far shading | Horizon, distant mountains | Greater than 10x field size | Reduces diffuse irradiance across entire array; uniform loss |
| Near shading | Adjacent buildings, trees, chimneys | Local, object-specific | Creates complex current mismatch; non-uniform loss |
| Self-shading | Inter-row spacing, tilt angles, frame edges | Within array geometry | Predictable; solvable through layout optimization |
| Diffuse shading | Reduced sky dome visibility | Atmospheric and horizon | Lowers diffuse component; often missed in simple models |
| Partial shading | Any obstruction covering a cell or substring | Most destructive | Disproportionate power loss; hotspot risk; multiple MPP |
Far shading affects the whole array simultaneously. A distant mountain ridge blocks the morning sun for every module in the field. The loss is easy to model but impossible to fix without moving the site.
Near shading is the practical enemy of rooftop installers. Chimneys, parapets, and neighbor buildings cast moving shadows that create electrical mismatch between series-connected cells. This is where bypass diodes earn their keep — and where most energy is lost.
Self-shading is the only type the designer fully controls. Row spacing, tilt angle, and module orientation determine how much the array shades itself in winter. Good solar design software flags self-shading before a single module is ordered.
Partial shading deserves special attention. A leaf covering 20% of one cell can trigger an 11.6% power drop across the module. The effect is non-linear and counter-intuitive. We cover the physics in the next section.
Shading also splits into static and dynamic categories. Static shading comes from permanent structures. Dynamic shading moves: deciduous trees, seasonal sun angles, and construction cranes. Dynamic shading demands time-series simulation across 8,760 hours, not a single snapshot.
The Financial Stakes
Shading is the leading cause of post-commissioning performance disputes. Homeowners see production shortfalls. EPC contractors face warranty claims. Financiers watch debt service coverage ratios slip.
Independent shade audits are now standard for PPA and lease underwriting. Banks want confidence that the P50 production estimate is realistic. A 2% shading estimation error shifts P90 down by 2–5% (industry-observed range). That shift can kill project finance.
For installers, the risk is liability. If a system underperforms because shading was underestimated, the installer often absorbs the cost. A $1,500 shading report is cheap insurance against a $50,000 arbitration.
Smart teams build shading analysis into their pre-sales workflow. They use solar design software to model obstructions before the site visit. They catch deal-killers early. They walk away from bad roofs instead of eating losses later.
How Shading Destroys Solar Panel Output
Series-String Current Mismatch
PV modules in a string connect in series. Current flows through every cell like water through a pipe. The flow rate is limited by the most restricted point. Shade one cell, and you restrict the entire string.
A single shaded cell can drag string output down by 30–50%. The unshaded cells are capable of full current. The shaded cell acts as a load instead of a generator. It dissipates power as heat. The string current collapses to the shaded cell’s reduced capability.
This is not a wiring fault. It is fundamental physics. Series connections maximize voltage and minimize conductor cost. But they create a dependency chain. One weak link breaks the whole chain.
The severity depends on where the shaded cell sits. A shaded cell in a three-bypass-diode module affects only its substring. But that substring is still one-third of module power. In a string of 20 modules, one shaded cell can erase production from 6–7 modules through the bypass diode mechanism.
Bypass Diodes — Protection with a Penalty
Modern modules include bypass diodes to prevent hotspot damage. These devices activate when a cell’s reverse bias exceeds approximately -12 volts. The diode creates a low-resistance path around the shaded substring. Current flows through the diode instead of the blocked cells.
This protects the shaded cell from thermal runaway. But it comes at a steep cost. The bypassed substring stops producing entirely. In a typical 60-cell module with three bypass diodes, each diode protects one-third of the cells. Activate one diode, and you forfeit one-third of module power for the duration of the shade.
Common misconception: bypass diodes prevent output loss. They do not. They prevent cell damage. The output loss is permanent for every minute the diode is active. The choice is simple: lose one-third of the module, or risk a fire.
IV Curve Collapse and Multiple MPP
Partial shading distorts the current-voltage (IV) curve of a string. A uniform string produces a single smooth curve with one maximum power point. Shade part of the string, and the curve develops local peaks and valleys.
Standard maximum power point tracking (MPPT) algorithms hunt for the highest point on the curve. Many inverters use hill-climbing or perturb-and-observe methods. These algorithms can lock onto a local maximum. They miss the global maximum. The array runs at a suboptimal operating point for hours. For more on this topic, see Solar Racking Design Guide. For Global-specific compliance details, see Global net-metering-by-country.
This is why shading losses often exceed the physical obstruction ratio. A small shaded area can cause disproportionately large energy loss. The gap comes from IV curve distortion and MPPT trapping. Advanced inverters with global MPPT reduce this gap. But they cannot eliminate it entirely.
Hotspots — Temperature, Damage, and Fire Risk
When a shaded cell blocks current, the unshaded cells push against it. The shaded cell enters reverse bias. Without a bypass diode, it dissipates power as heat. The temperature rises fast.
A 2024 Nature study on mono PERC modules measured the relationship between shading severity and thermal risk. The data is stark.
| Cell Shading % | Module Power Loss % | Hotspot ΔT | Risk Level |
|---|---|---|---|
| 20% | 11.6% | +30.6°C | Moderate — elevated degradation rate |
| 40% | 30.4% | Estimated above 50°C | High — potential delamination |
| 60% | ~36.2% | Severe | Very High — fire risk if no bypass diode |
| 100% (with bypass diode) | ~33% substring loss | Normal | Managed — diode protects cell |
At 20% shading, the hotspot runs 30.6°C above ambient. That accelerates cell degradation. Delamination risk rises at 40%. By 60% without bypass protection, fire risk becomes real. This is why NEC and IEC codes mandate specific safety margins.
Every installer should model bypass diode behavior in their solar shadow analysis software. Software that ignores diode activation overstates predicted output. Software that models it correctly gives accurate loss figures.
For more on how shading affects panel physics, read our dedicated post on how shading affects solar panels.
Industry Data — How Much Energy Does Shading Actually Cost?
Global Loss Benchmarks
How much energy does shading steal? The answer depends on geography, system type, and obstruction density. Peer-reviewed studies and industry reports provide consistent ranges.
| Source | System Type | Typical Annual Loss | Severe Case |
|---|---|---|---|
| IEA-PVPS Task 13 | Ground-mount | 1–5% | up to 20–30% (facade/rooftop) |
| Deline et al. 2012 | Urban rooftop | 7–19% | 25% (heavy shading) |
IEA-PVPS Task 13 sets the baseline. Well-sited ground-mount arrays lose 1–5% annually to horizon shading and self-shading. Rooftop and facade systems in dense urban environments suffer far more. The 20–30% figure is not an outlier. It is a measured reality for poorly sited city installations.
Deline et al. (2012) categorized urban rooftop shading into three tiers. Light shading caused 7% annual loss. Moderate shading hit 19%. Heavy shading reached 25%. These figures come from measured performance data, not simulation. The bottom line: shading is not a rounding error. It is a primary determinant of project economics.
P50/P90 Shading and Project Finance
Project finance runs on probability curves. P50 is the median expected yield. P90 is the yield exceeded 90% of the time. Lenders base debt sizing on P90.
Shading uncertainty compresses the P90 downward. A 2% shading estimation error shifts P90 down by 2–5% (industry-observed range). That shift can breach debt coverage ratios. A breach kills financing.
Bankable PPA structures now require independent shade audits. The auditor validates software models against site photography and obstruction measurements. They check tree growth assumptions. They verify horizon profiles. A system with unresolved shading risk above 4% rarely clears underwriting.
Installers who use integrated financial platforms can run P50/P90 sensitivity analysis during pre-sales. They show clients exactly how shading uncertainty affects returns. This transparency builds trust and reduces post-install disputes.
PVsyst Acceptability Thresholds
PVsyst is the validation benchmark for solar yield modeling. Every other tool compares against it. PVsyst users apply informal but widely accepted shading thresholds by system scale.
| System Scale | Best-in-Class | Acceptable | Unacceptable |
|---|---|---|---|
| Utility-scale | under 1% | 1–4% | above 4% |
| C&I rooftop | under 2% | 2–5% | above 5% |
| Residential | under 3% | 3–8% | above 8% |
Utility-scale offtake contracts demand near-zero shading. Above 4%, most power purchase agreements become unbankable. C&I rooftop tolerates slightly more, but above 5% triggers mandatory redesign. Residential has the widest band. Homeowners accept 8% if the payback still works. But above 8%, even residential NPV turns negative in most markets.
Types of Shading Analysis Methods
Methods Comparison Matrix
Not all shading analysis methods deliver the same accuracy. The right method depends on budget, project complexity, and risk tolerance.
| Method | Accuracy (annual) | Equipment Cost | Time per Site | Skill Level | Best Use Case |
|---|---|---|---|---|---|
| Sun path diagram | ±15–25% | Free | 30–60 min | Low | Educational or quick estimate |
| Solar Pathfinder | ±10–15% | $300–400 | 15–30 min | Medium | Field surveys, rural residential |
| SunEye or fisheye | ±8–12% | $1,500–2,500 | 15–30 min | Medium | Professional site audits |
| Satellite imagery | ±5–10% | Free or subscription | Instant | Low | First-pass site screening |
| 3D software (SurgePV, Aurora) | ±2–3% | Subscription | 10–30 min | Medium | Professional design and proposals |
| LiDAR | ±1–2% | $500–2,000 per site | 1–4 hours | High | Commercial, complex terrain |
| Drone photogrammetry | ±1–5 cm GSD | $500–1,500 per site | 1–4 hours | High | Ground-mount, utility-scale |
Sun path diagrams are free and educational. They teach the concept of solar azimuth and altitude. But they rely on manual obstruction plotting. Human error dominates. Accuracy is poor.
Solar Pathfinder tools improved field measurement with reflective domes. They are affordable and fast. But they struggle with diffuse shading estimation. And they require the operator to stand at array height, which is not always safe or possible.
SunEye and fisheye cameras digitized the dome concept. They capture a 180° sky view and calculate shaded sky dome percentage. Accuracy reaches ±8–12%. Field use of dedicated fisheye tools is declining as 3D software improves.
Satellite imagery from Google, Bing, or specialized solar databases provides instant first-pass screening. Accuracy is ±5–10%. It misses new construction, tree growth, and small obstructions. Use it to filter bad leads before sending a truck.
3D software modeling is now the professional standard. Platforms like SurgePV and Aurora Solar combine terrain data, building geometry, and module orientation in ray-tracing simulations. Hourly 8,760-step calculations replace annual averages. Accuracy reaches ±2–3%. For software options, see 7 Best Aurora Solar Alternatives in.
LiDAR surveys deliver the highest accuracy. Vertical precision hits 2–3 cm. LiDAR penetrates tree canopy to map ground elevation. It captures parapet heights and HVAC equipment. Cost is $500–2,000 per site. For commercial projects above 500 kW, LiDAR is standard.
Drone photogrammetry creates centimeter-accurate 3D meshes. Ground sample distance reaches 1–5 cm. Drones map ground-mount sites faster than survey crews. But they require FAA or local aviation permits. And they are overkill for most residential roofs.
3D Software Modeling
3D software builds a digital twin of the project site. Terrain models, building extrusions, and tree placements create a virtual environment. Ray-tracing algorithms simulate sun paths for every hour of the year.
The software calculates plane-of-array irradiance at the module level. It accounts for direct beam, diffuse sky, and ground-reflected albedo. It models self-shading from row spacing. It tracks shadow movement across the array hour by hour.
Modern solar software runs these simulations in under a minute. Users adjust module tilt, row spacing, and obstruction geometry in real time. The output is an annual shading loss percentage with monthly breakdowns.
LiDAR and Drone Surveys
LiDAR data comes from airborne laser scanning or ground-based tripod units. Point clouds contain millions of elevation measurements. Processing software converts points into 3D surfaces.
The 2–3 cm vertical accuracy of LiDAR changes shading analysis for complex sites. LiDAR eliminates height errors that simple models miss.
Drone surveys use photogrammetry, not laser scanning. The drone captures overlapping photos. Software stitches them into a 3D mesh. Accuracy depends on ground control points and camera quality. With proper calibration, drones match LiDAR for ground-mount projects.
For most residential and small commercial jobs, 3D software with satellite terrain is sufficient. Commission LiDAR or drones when the project exceeds $500,000 or when terrain is irregular.
Legacy and Baseline Methods
Satellite data is the first-pass filter. Run a satellite-based horizon analysis on every lead. If shading looks acceptable, proceed to 3D modeling. If shading looks marginal, schedule a site visit with laser measurement.
The best practice is method stacking. Start with satellite imagery. Build a 3D model. Validate critical obstructions with on-site photography. For high-value commercial jobs, add LiDAR. Each layer adds confidence and reduces uncertainty.
Solar Site Analysis Tools — Detailed Comparison
Full Tool Comparison Matrix
| Tool | Pricing | G2 Rating | Shading Accuracy | Best For | Key Limitation |
|---|---|---|---|---|---|
| SurgePV | $1,899 per year (3 users) (as of May 2026) | N/A | ±3% vs PVsyst | Integrated design-to-proposal workflow | Newer brand with less market tenure than Aurora |
| Aurora Solar | $159–259 per user per month (as of May 2026) | 4.7/5 | ±3% SAV with LiDAR (NREL) | US residential, financing integration | Per-seat pricing is expensive for large teams |
| HelioScope | $159–259 per month (as of May 2026) | 4.5/5 | Within 1% of PVsyst (DNV) | C&I layout, large-scale engineering | Less polished for proposal generation |
| PVsyst | CHF 650–700 per year (as of May 2026) | 4.6/5 | Validation benchmark | Utility-scale, bankable yield | Desktop-only; no proposal output |
| OpenSolar | Free core | 4.6–4.8/5 | Within 8% (claimed) | Residential startups, free-tier users | Limited C&I depth; accuracy below premium tools |
| PV*SOL | €585–845 per year (as of May 2026) | 4.2/5 | Not independently validated | European regulatory compliance | Dated UI; limited cloud workflow |
| PVcase | Contact vendor | 4.7/5 | 0.24–2.4% vs PVsyst (Black & Veatch) | Utility-scale ground-mount, trackers | AutoCAD plugin with limited cloud or web access |
For a deeper evaluation of platforms, see our best solar design software guide.
SurgePV — Integrated Shadow Analysis
SurgePV handles the full project lifecycle in one platform. Users design arrays, run shadow analysis, size strings, model finances, and generate client proposals without switching tools.
Shading simulation runs at the module level across 8,760 hours. The methodology follows IEC-compliant practices. Accuracy is ±3% against PVsyst validation cases.
The pricing model favors small and mid-sized teams. Three users cost $1,899 per year (as of May 2026). Equivalent Aurora Solar seats run $5,724–$9,324 per year for three users (as of May 2026). That cost gap matters for installer margins.
Built-in features include 3D design, shadow analysis, string sizing, financial modeling, and proposal generation. Teams that currently use PVsyst for yield plus Excel for finance plus PowerPoint for proposals can consolidate into SurgePV. For more on this topic, see String Sizing Solar PV System.
For teams that need solar shadow analysis software tied directly to proposal output, SurgePV is the purpose-built choice.
Aurora Solar — LiDAR-Validated Residential Standard
Aurora Solar commissioned an NREL blind study in 2016. The results established its credibility. With LiDAR data in Denver, Aurora achieved ±3 SAVs accuracy. Without LiDAR in Los Angeles, accuracy was ±5 SAVs. SAVs are shading analysis values. This is a publicly available third-party validation of a web-based solar design tool.
Aurora’s AI roof detection saves time. It automatically traces roof planes from satellite imagery. But G2 user reviews note that the AI still misses trees and irregular obstructions. Manual cleanup is often required.
Financing integration is Aurora’s other strength. The platform connects to loan and lease providers common in the US residential market. For US-centric residential dealers, Aurora remains the default choice.
HelioScope — The C&I Engineering Standard
DNV GL validated HelioScope against PVsyst. When modeling assumptions were aligned, HelioScope was within 1% of PVsyst. That is engineering-grade accuracy.
HelioScope excels at commercial and industrial scale. It handles systems up to 5 MW without performance degradation. Row-to-row shading, parapet obstruction, and complex rooftop geometry are native features.
G2 reviews flag proposal generation as a weakness. HelioScope outputs engineering reports, not sales documents. High-volume C&I teams often export HelioScope data into custom proposal templates. Project caps on some plans can also surprise growing teams.
PVsyst — The Validation Benchmark
PVsyst has defined solar yield modeling for over two decades. It contains 25+ loss categories. It runs P50, P75, P90, and P99 simulations. It includes Monte Carlo uncertainty analysis.
Every other tool on this list validates against PVsyst. That fact alone makes PVsyst the reference standard. If a project requires bankable yield documentation, PVsyst is often specified in the term sheet.
The limitations are workflow. PVsyst runs on Windows desktops only. It has no cloud collaboration. It generates no client proposals. It is a pure engineering tool.
OpenSolar — When Free Is Enough
OpenSolar offers a free core platform with optional paid upgrades. G2 ratings are strong at 4.6–4.8. The claimed accuracy is within 8% for shading.
For straightforward residential projects with minimal shading, 8% is acceptable. Basic sales presentations do not need PVsyst-grade precision. OpenSolar delivers fast roof layouts and simple financing quotes.
Complex commercial roofs and heavily shaded residential projects need more. When shading drives layout decisions, upgrade to a premium tool. OpenSolar’s C&I depth is limited.
Choosing the Right Tool for Your Project Mix
Match the tool to your typical project:
- Simple residential plus low budget: OpenSolar
- Residential complex or proposal-focused: SurgePV
- US residential with financing integration: Aurora Solar
- C&I rooftop engineering: HelioScope or SurgePV
- Utility-scale bankable yield: PVsyst plus PVcase
Your solar design platform choice determines how accurately you predict losses. It also determines how fast you move from site visit to signed contract. Pick the tool your team will actually use on every project, then standardize your shading workflow around it.
See Shading Analysis in Your Design Workflow
Model obstructions, calculate hourly shading losses, and generate client-ready proposals — all in one platform.
Book a DemoNo commitment required · 20 minutes · Live project walkthrough
When Does Shading Kill ROI?
Quantitative Kill Thresholds
Shading becomes fatal at specific thresholds. These thresholds vary by project type and financing structure.
| Project Type | Red Line | Required Action | Exception |
|---|---|---|---|
| Utility-scale ground-mount | above 4% annual | Unacceptable for offtake contracts | Redesign or decline |
| C&I rooftop | above 5% | Mandatory redesign or module-level power electronics (MLPE) deployment | MLPE plus re-analysis |
| Residential | above 8% | Reconsider system size or technology | Battery shading tolerance is lower |
| PPA or lease-financed | above 5% on any string | Financing likely to be denied | MLPE required before re-submission |
Utility-scale projects face the tightest constraints. Offtake contracts contain liquidated damages clauses. A 5% production shortfall can trigger penalties that erase profit margins. Above 4% shading, most developers redesign or abandon the site.
C&I rooftop has more flexibility. Roof geometry often forces compromise. But above 5%, the economics break. Financiers require module-level power electronics or layout changes. The extra hardware cost must fit the budget.
Residential tolerates up to 8% in most markets. Homeowners care about payback, not perfection. But above 8%, even generous net metering cannot save the project. Sales teams should disqualify these leads early.
PPA and lease structures are unforgiving. Third-party owners need guaranteed yields. Above 5% on any single string, underwriters reject the application. MLPE installation is often the only path to approval.
Case Study — Melbourne Residential NPV Collapse
A Melbourne installer sold a 6.6 kW residential system with 3% pre-install shading. The neighbor’s property was a single-story bungalow. The production estimate looked solid. The homeowner signed.
Six months post-install, the neighbor began construction of a second story. The new wall raised shading from 3% to 14%. Annual production dropped by over 800 kWh. The 25-year NPV flipped from positive to negative.
The installer had no shading easement. No planning portal check was performed. The contract contained no clause for third-party construction. The dispute landed in mediation.
The lesson is simple. Pre-install shading is not enough. Check planning portals for pending applications. Model worst-case future shading. Document the analysis. Protect your business from neighbor-driven surprises.
Case Study — 2DegreesKelvin C&I Retrofit
A commercial building in Sydney suffered 18% shading loss from rooftop HVAC units. The original installer used string inverters with no MLPE. The system underperformed consistently. Read more about Solar Energy in Australia. For Australia-specific compliance details, see Australia comparisons/lgc-vs-stc.
2DegreesKelvin audited the site. They identified that only 6–7% of strings carried the majority of the loss. They retrofitted SolarEdge optimizers on those strings only. The rest of the array remained unchanged.
The result: a 2–3% yield increase across the entire system. The optimizer hardware paid back in 18 months. The previously unacceptable system became profitable.
Targeted MLPE beats blanket replacement. Software that pinpoints string-level shading allows surgical fixes. This is where integrated generation and financial tool analysis proves its value. Model the retrofit cost against recovered revenue before touching a panel.
When to Walk Away
Some sites cannot be saved. Use this checklist:
- Shading exceeds the project-type threshold
- No budget for MLPE hardware
- No redesign space on the roof or field
- Financing requires shading below the threshold
If all four conditions are true, decline the project. Document the decision. Record the shading analysis, the threshold, and the reason for rejection. This protects against future liability claims.
Update your pre-sales qualification checklist to include these four shading filters. Train your sales team to run them before every proposal.
Optimizer vs. Microinverter in Shaded Systems
PVEL Recovery Data
Module-level power electronics (MLPE) recover significant energy in shaded conditions. The PVEL and NREL study provides hard numbers.
| MLPE Type | Annual Energy Recovery vs String | vs Competitor | Best Shading Scenario |
|---|---|---|---|
| SolarEdge optimizers | +24.8% | +1.9% to +8.4% vs Enphase | Moderate to severe shading |
| Enphase microinverters | +23.2% | — | Complex roofs, safety priority |
| Half-cut cell string | +5–10% (industry-observed range) | — | Light, predictable shading |
SolarEdge optimizers edge out Enphase in head-to-head recovery. The margin is 1.9% under light shading and 8.4% under heavy shading. Both crush string inverter performance. But optimizers extract slightly more from moderate to severe shading conditions.
Enphase microinverters still win on complexity. Each panel has its own inverter. There is no single point of failure above the panel level. For roofs with scattered shading from multiple chimneys and vents, microinverters simplify design.
Half-cut cell modules offer a middle path. They split each cell into two sub-cells wired in parallel. Shading affects only half the cell. This is built into the module at no extra hardware cost. Recovery is 5–10% (industry-observed range) versus standard string. It is not MLPE-level recovery. But it is free.
Cost Reality — Dollars per kW Installed
Hardware cost determines breakeven. A 10 kW system illustrates the gap.
SolarEdge optimizer system: approximately $9,850 (as of May 2026) Enphase microinverter system: approximately $12,900 (as of May 2026)
The delta is $3,050. That is $305 per kW premium for microinverters.
Breakeven depends on shading severity and electricity rates. In California at $0.30 per kWh, a 24% energy recovery on a 10 kW system yields roughly 2,400 extra kWh per year. Value is $720 per year. The $3,050 microinverter premium pays back in 4.2 years. In Texas at $0.12 per kWh, payback stretches to 10.5 years.
Decision Matrix
| Scenario | Recommendation | Rationale |
|---|---|---|
| Light, predictable shading plus budget constraint | Half-cut cell string | Lowest cost mitigation; acceptable for under 5% loss |
| Moderate shading plus monitoring priority | SolarEdge optimizers | Best energy recovery per dollar; module-level data |
| Heavy or complex shading plus long-term ownership | Enphase microinverters | Maximum resilience; no single point of failure above substring |
| C&I with string inverter already specified | Retrofit optimizers | Cost-effective; no inverter replacement needed |
| Rapid shutdown or fire safety critical | Either; check local NEC 690.12 | Both qualify; choose by economics |
Half-Cut Cell Modules
Half-cut cell technology is now standard on most premium modules. The manufacturing process slices each cell in half. Current paths are shorter. Resistance losses drop. More importantly for shading, each half-cell operates somewhat independently.
A standard module has three bypass diodes protecting cell groups. A half-cut module has six. Shading that would trigger one bypass diode in a standard module might only affect half the substring in a half-cut design. The other half continues producing.
This is not a cure-all. But it is a no-cost improvement. When specifying modules for shaded roofs, confirm half-cut architecture. Model the benefit in your solar shading analysis tool. Most modern cloud solar design tool includes half-cut cell substring layouts.
Step-by-Step: Conducting a Solar Shading Analysis
Pre-Site Visit Preparation
Preparation prevents wasted trips. Complete these ten items before leaving the office.
- Pull satellite imagery and run a preliminary horizon profile
- Check planning portals for pending neighbor construction applications
- Identify tree preservation orders and conservation zones
- Request building plans for parapet heights and rooftop equipment
- Confirm sun-path azimuth range for the project’s latitude
- Calibrate measurement equipment including laser rangefinder, compass, and camera
- Schedule the visit for solar noon plus or minus two hours for clear shadow tracing
- Prepare an obstruction measurement log template
- Confirm roof access with the client ahead of the visit
- Load a preliminary layout in 3D solar design software
Item 2 is critical. The Melbourne case study shows why. A pending development application can turn a good roof into a disaster. Most planning portals are free to search. Spend ten minutes. Save ten months of dispute.
Item 10 accelerates the site visit. Load the satellite image into SurgePV’s design suite. Sketch a preliminary array. Identify obvious conflicts. The site visit then validates the model instead of starting from zero.
On-Site Data Collection
Arrive with the right tools. A laser rangefinder measures obstruction heights from the module plane. A compass records azimuth angles. A camera captures every obstruction from the perspective of the array.
Stand at array height, not ground level. A chimney that looks minor from the driveway can block two hours of morning sun from the roof. Photograph every obstruction with a time stamp. Record the species of every tree. Deciduous trees lose leaves in winter. Evergreens shade year-round.
Estimate seasonal variation. A tree that is harmless in summer may dominate in winter when the sun is low. Ask the homeowner about pruning history. Check for tree preservation orders. Verbal agreements to prune are unenforceable.
3D Model Setup and Simulation
Back in the office, import terrain, buildings, and trees into your modeling platform. Set module-level simulation parameters. Specify bypass diode count and substring layout. Modern modules use three or six diodes depending on cell architecture.
Run hourly shading tables. Identify worst-case months. In the northern hemisphere, December and January typically show peak shading. In the southern hemisphere, June and July dominate. Validate the software output against your site photographs. If the model says no shading in December but your photo shows a long chimney shadow, the model is wrong. Fix the obstruction geometry.
Interpreting Results for Client Reports
Translate technical output into client language. Shading loss percentage means nothing to a homeowner. Convert it to kilowatt-hours and dollars.
A professional report contains five elements. First, a horizon diagram showing the angular obstruction profile around the array. Second, a shading loss percentage by month. Third, the annual total shading loss. Fourth, a string-level breakdown showing which strings suffer most. Fifth, an irradiance heatmap overlaid on the module layout.
Use these visuals in your solar proposals. Proposals with shading diagrams build trust. They show the client you did the work. They reduce post-install disputes.
String layout optimization comes next. Relocate heavily shaded strings to less affected roof sections. Stagger module placement around obstructions. Consider shorter strings to isolate shaded zones.
IEC 62446-1 Documentation Requirements
IEC 62446-1:2016 explicitly includes shade evaluation as a mandatory inspection item. Most installers do not know this. The standard requires documentation of shading obstacles, satellite-based shading reports, and seasonal shadow assessments.
Inspectors look for more than CAD drawings. They want photographic evidence with time and date stamps. They want seasonal shadow descriptions. They want digital records retained for warranty and insurance claims.
Compliance is not optional. A failed inspection delays commissioning. It voids incentive eligibility in some markets. Build IEC 62446-1 documentation into your standard workflow.
Real-World Shading Scenarios
Residential Shading Scenarios
Residential roofs are obstacle courses. Each obstruction demands a specific response.
| Obstruction | Seasonality | Typical Loss Range | Mitigation | Cost Impact |
|---|---|---|---|---|
| Chimney | Year-round (morning or evening) | 3–8% per string | Relocate modules; MLPE on affected string | Low to medium |
| Trees | Seasonal (winter worst) | 7–25% annual | MLPE; pruning schedule; species growth analysis | Medium |
| Neighboring buildings | Year-round | 10–30% | 3D horizon modeling; tilt optimization | Low at design phase |
| HVAC or vents on roof | Year-round | 5–15% | Elevated racking; module layout split | Medium |
| Skylights or roof penetrations | Year-round | Layout gap | Walk-around layout; smaller module fill | Low |
Chimneys are predictable. Their shadows trace consistent paths. Move modules out of the path. If space is tight, add optimizers to the affected string.
Trees behave differently. Growth rates vary by species. Fast-growing species can add 1–2 meters per year. Slow-growing ornamentals add far less. Design for mature height, not current height. Document the species in your report.
Neighboring buildings are permanent. 3D horizon modeling identifies the kill zone before sales time. If a neighboring wall blocks 30% of the roof, do not propose a system on that section.
Commercial and Industrial Shading Scenarios
C&I roofs introduce new obstruction classes.
| Obstruction | Typical Height | Loss Range | Mitigation | Design Change Required |
|---|---|---|---|---|
| Parapet walls | 0.5–1.5 m | 5–20% on row 1 | Setback rules; elevated tilt | Yes — layout revision |
| Neighboring multi-story buildings | 10–30 m | 15–35% on affected rows | 3D modeling; site-specific layout; easement review | Yes — possibly decline |
| Inter-row shading | Within array | 5–15% (winter) | Pitch optimization; tracker backtracking | Yes — row spacing |
| Rooftop HVAC or exhaust | 1–3 m | 8–20% on adjacent rows | Equipment relocation vs MLPE analysis | Case-by-case |
| Future roof additions | Unknown | Unpredictable | Reserve zones; shading easement agreements | Yes — pre-planning |
Parapet walls are the most common C&I surprise. A one-meter parapet casts a long shadow in December. First-row modules suffer most. Setback rules or elevated tilt frames solve the problem. But they change the module count.
Future roof additions are the C&I version of the Melbourne case. Building owners expand. Tenants install new equipment. Reserve clear zones in your initial design. Write shading easement agreements into the contract.
The Tree Preservation Order Risk
Tree preservation orders (TPOs) exist in the UK, EU, and many US municipalities. Protected trees cannot be removed or heavily pruned without council approval. Homeowners may promise to prune. That promise is worthless if the tree is protected. See our guide on Battery Solar System Design UK for more. Read more about Heritage Building Solar Case Study.
Design every system for worst-case mature canopy height. Check municipal databases for TPO status. Photograph the tree and its tag. Record the species and estimated mature height. Include all protected trees in the shading analysis report.
If a protected tree makes the project uneconomic, decline it. Do not rely on future pruning. Courts and arbitrators side with tree protection laws, not solar production guarantees.
Frequently Asked Questions
What Is Solar Shading Analysis?
Solar shading analysis is the process of quantifying how shadows from surrounding objects reduce solar irradiance reaching a PV array over time. It combines on-site measurement or 3D modeling with hourly irradiance simulation. The output predicts annual energy losses and guides layout optimization before installation.
How Much Energy Loss Does Shading Cause?
According to IEA-PVPS Task 13, typical annual shading losses range from 1–5% for well-sited systems. They can reach 20–30% for urban rooftop and facade installations. Deline et al. (2012) measured 7% loss for lightly shaded urban sites, 19% for moderately shaded, and 25% for heavily shaded environments.
Which Is the Best Solar Shading Analysis Software?
The best tool depends on your project mix. SurgePV is the strongest option for teams that design, shade-analyze, and propose in one platform. It achieves ±3% accuracy versus PVsyst at $1,899 per year for three users (as of May 2026). Aurora Solar ($159–259 per user per month, as of May 2026) leads for US residential with LiDAR-validated accuracy. HelioScope ($159–259 per month, as of May 2026) is the C&I engineering standard, validated within 1% of PVsyst by DNV.
Do Solar Panels Work in Partial Shade?
Yes, but output drops significantly. In a series string, a shaded cell limits current for the entire string. Bypass diodes activate to protect cells from hotspot damage. But this forfeits all production from the bypassed substring. That substring is typically one-third of module power. Module-level power electronics such as optimizers or microinverters mitigate this. They recover 23–25% of the shading losses that string inverters suffer.
What Is IEC 62446 and Does It Require Shading Analysis?
IEC 62446-1:2016 is the international standard for grid-connected PV system documentation, commissioning tests, and inspection. It explicitly includes shade evaluation as a mandatory inspection item. The standard requires documentation of shading obstacles, satellite-based shading reports, and seasonal shadow assessments. Most installers do not know this requirement exists.
How Accurate Is Software-Based Shading Analysis?
Accuracy depends on the method. Satellite imagery alone achieves ±5–10%. 3D software modeling with proper obstruction geometry achieves ±2–3%. LiDAR-derived models achieve ±1–2%, with 2–3 cm vertical accuracy. The NREL-validated Aurora Solar study found ±3 SAVs accuracy with LiDAR in Denver and ±5 SAVs without LiDAR in Los Angeles.
Should I Use Microinverters or Optimizers on a Shaded Roof?
Both outperform string inverters on shaded roofs. The PVEL and NREL study found SolarEdge optimizers recover 24.8% of shading losses versus string baseline. Enphase microinverters recover 23.2%. For a 10 kW system, hardware cost is approximately $9,850 for an optimizer system versus $12,900 for microinverters (as of May 2026). Optimizers are better for moderate shading on a budget. Microinverters suit complex shading, safety-priority installations, or where rapid shutdown is required.
How Do I Read a Solar Shading Report?
A professional shading report includes five elements. First, a horizon diagram showing the angular obstruction profile around the array. Second, shading loss percentage by month. Third, annual total shading loss percentage. Fourth, a string-level breakdown showing which strings are most affected. Fifth, an irradiance heatmap overlaid on the module layout. Red flags include shading losses above 5% on any single string, horizon obstructions above 20° at key azimuths from 90–270°, and tree species that grow faster than the design assumes.
For a dedicated walkthrough, read our guide on how to read a solar shade report. Solar proposal software generates professional quotes in minutes.


