A 500 kWp rooftop project in Gujarat passed every factory test. The panels arrived with certificates. The installer mounted them in three days. Two years later, yield sat 12% below the performance model. An EL scan revealed microcracks in 23% of the modules. Most cracks traced to a single handling error: the crew had carried panels glass-side-down across the roof edge. The frame had flexed. The cells had cracked. No one noticed until the numbers told the story.
This is not a rare case. Microcracks are the most common hidden defect in solar panels. They form during manufacturing, transport, installation, and years of thermal cycling. They are invisible to the eye. Standard flash tests miss them. And once they propagate, the damage is permanent. The only fix is replacement.
This guide covers what microcracks are, how they form, how to detect them, and — most importantly — how to prevent them. Every installer, EPC, and asset manager needs this knowledge in 2026.
Quick Answer
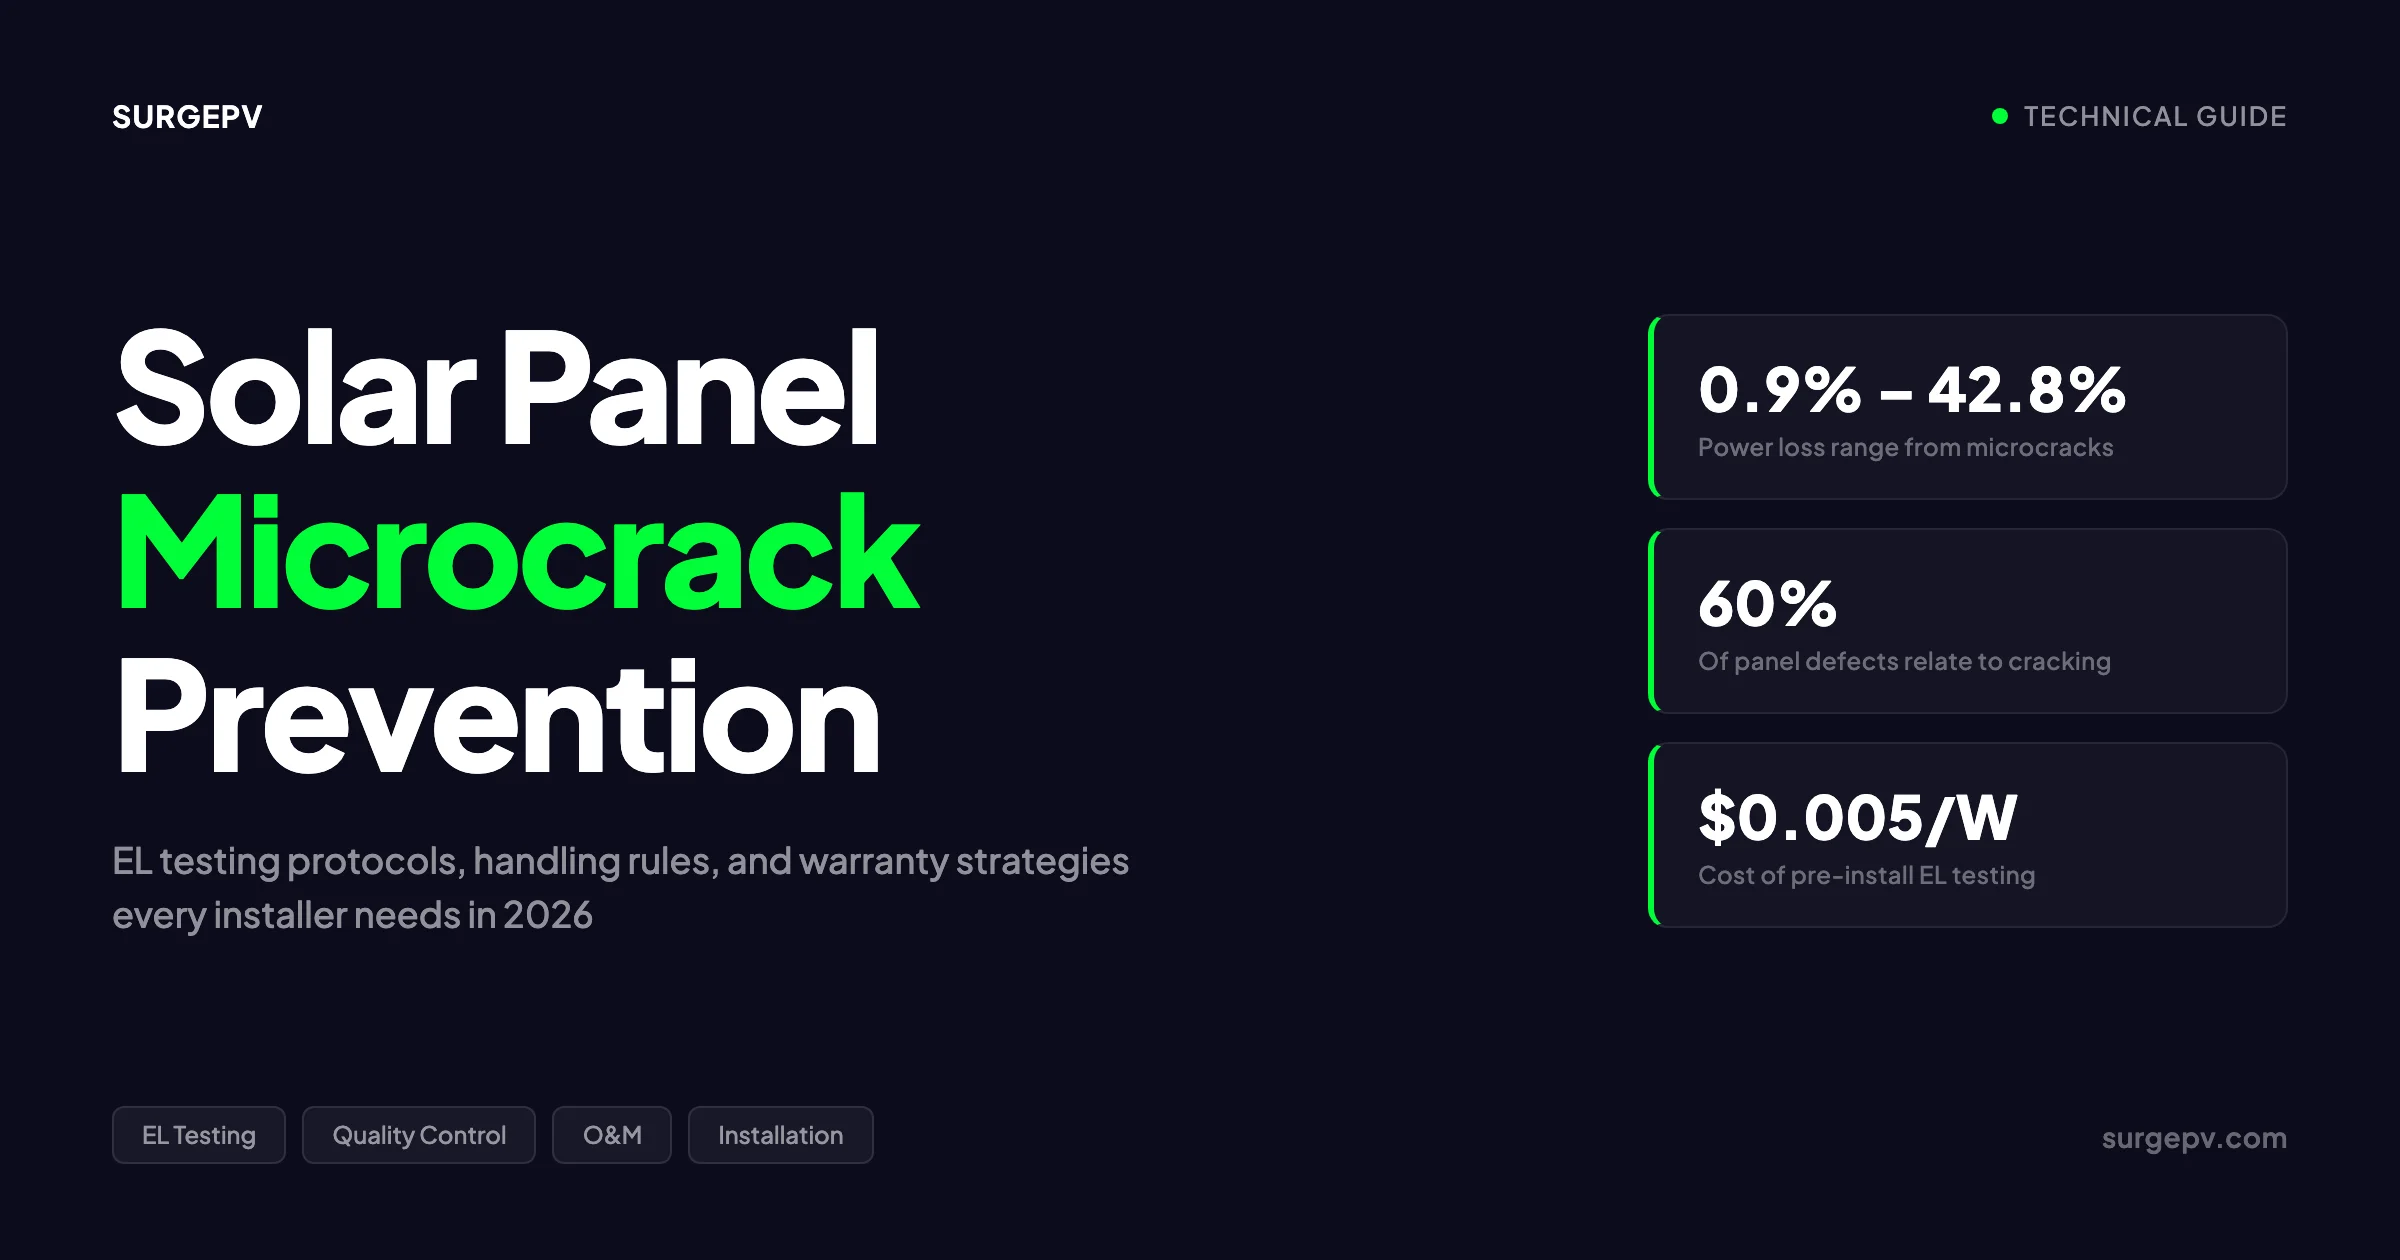
Solar panel microcrack prevention combines three lines of defense: pre-installation electroluminescence (EL) testing to catch factory defects, strict handling protocols during transport and mounting, and annual thermal imaging during O&M. Microcracks reduce output by 0.9% to 42.8% depending on severity. They are permanent. Prevention costs pennies per watt. Replacement costs dollars per watt.
In this guide you will learn:
- What microcracks are and why they matter
- How microcracks form at every stage of a panel’s life
- How electroluminescence testing works and what it costs
- When thermal imaging fills the gap EL testing cannot reach
- Handling rules that every installer must enforce
- Installation practices that prevent crack formation
- How wind and snow loads correlate with microcrack risk
- What solar panel warranties actually cover
- Why IEC 61215 testing has a blind spot
- How cell technology choices affect crack resilience
- Real case studies with EL findings and financial outcomes
- How microcracks show up during O&M inspections
- The 25-year NPV impact of undetected microcracks
What Are Microcracks in Solar Panels?
A microcrack is a microscopic fracture in the silicon wafer of a solar cell. These cracks range from 10 to 100 micrometres wide and can extend several centimetres in length. They are far too small to see without magnification. A human hair is roughly 70 micrometres thick. Most microcracks are thinner than that. For the latest details on Italy, see Commercial Rooftop Solar Case Study Italy.
Microcracks break the electrical pathways inside a cell. Solar cells generate current through a grid of thin metal fingers that collect electrons and feed them into thicker busbars. A crack that severs a busbar or multiple fingers creates a “dead zone.” Current cannot flow through the fractured area. The cell produces less power.
The severity depends on three factors: the crack’s orientation, its location, and how much cell area it isolates.
| Crack Characteristic | Impact on Power Output |
|---|---|
| Crack parallel to busbar, minor | 0.55% – 2.5% loss |
| Crack on both sides of busbar | Up to 60% loss |
| Crack isolating under 8% of cell area | Minimal loss |
| Crack isolating over 8% of cell area | Significant degradation |
| Multiple intersecting cracks | 0.9% – 42.8% loss range |
| Severe finger separation (crack width over 7 μm) | Up to 80.7% loss |
Data: Dhimish et al. (2020), analysis of 4,000 polycrystalline cells
Cracks parallel to busbars cause the worst damage. The busbar is the main highway for current. Cut it, and large sections of the cell go dark. Cracks perpendicular to busbars are less damaging because current can still reach the busbar through alternative paths.
Key Takeaway
Microcracks are not all equal. A hairline crack in the corner of a cell may cost 1% output. A crack across the busbar can cost 60%. The orientation and location matter more than the crack’s visible size.
Types of Microcracks
Microcracks fall into four categories based on their origin and pattern:
Cell-level fractures are cracks that run through the silicon wafer itself. They form during wafer cutting, cell processing, or mechanical stress. These are the most common type.
Busbar cracks sever the thick metal strips that collect current from the cell. A single busbar crack can disable an entire cell section. In older panels with 3-5 busbars, this is catastrophic. Modern panels with 9-16 busbars offer redundancy.
Corner cracks start at the edges of cells where mechanical stress concentrates. They are common after improper clamping or frame flexure. Corner cracks often propagate inward over time.
Finger interruption cracks break the thin metal fingers that spider across the cell surface. These cause localized power loss. The impact is smaller than a busbar crack but still measurable.
How Microcracks Differ from Other Defects
Microcracks are not the same as snail trails, potential induced degradation (PID), or delamination. Each defect has a different signature and different prevention strategy.
| Defect Type | Visible? | Detectable by EL? | Reversible? |
|---|---|---|---|
| Microcrack | No | Yes (dark lines) | No |
| PID | No | Yes (dark edges) | Sometimes |
| Delamination | Sometimes | Yes | No |
| Snail trails | Yes | Partial | No |
| Hotspot | Yes (thermal) | Yes | No |
| Solder joint failure | No | Yes | No |
Microcracks are unique because they are permanent, invisible, and progressive. A panel with microcracks will degrade faster than its warranty promises. The crack acts as a stress concentrator. Each thermal cycle widens it slightly. Each wind load flexes it further. Over 25 years, a minor crack can become a major failure.
How Microcracks Form: The Full Lifecycle
Microcracks can form at any point from the factory floor to the 20th year of operation. Understanding where and how they form is the first step toward prevention.
Manufacturing Stage
Silicon wafers start as fragile discs roughly 160-180 micrometres thick. Modern wafers are thinner than ever to cut material costs. Thinner wafers are more brittle. They crack more easily.
The manufacturing steps that introduce microcracks include:
Wafer cutting. Diamond wire sawing slices silicon ingots into wafers. Imperfect tension or wire wear creates micro-notches along the cut edge. These notches become crack initiation points under later stress.
Cell processing. Thermal processes, screen printing, and firing can introduce thermal stress. Rapid temperature changes cause differential expansion between the silicon and the metal contacts. This creates internal stress that may crack the cell.
Stringing and tabbing. Connecting cells with soldered ribbons applies mechanical force. Excessive pressure or misalignment can crack cell edges. Automated stringing machines reduce but do not eliminate this risk.
Lamination. The lamination process heats the module to 150°C while applying vacuum pressure. Uneven pressure distribution or thermal gradients can stress cells. Research shows that zebra-pattern EVA encapsulants reduce lamination-induced cracks by 3.6% compared to standard EVA.
Quality control gaps. Not every factory runs 100% EL inspection. Some inspect only a sample batch. A cracked cell can slip through and get laminated into a finished module. By the time the crack is discovered, the panel is already built.
Transport and Handling
This is where most preventable microcracks occur. Panels leave the factory intact. They arrive at the site damaged.
Improper stacking. Panels should ship vertically in their original packaging. Horizontal stacking puts weight on the glass. The glass bows. The cells flex. Cracks form.
Shock and vibration. Road transport subjects panels to constant vibration. Potholes, speed bumps, and hard braking create shock loads. Without proper cushioning, these shocks transfer directly to the cells.
Temperature swings during transit. A container crossing a desert in summer can reach 70°C interior temperature. At night, it drops to 20°C. The daily thermal cycle of 50°C stresses every cell. Over a two-week sea voyage, cells experience 14 thermal cycles before they ever see sunlight.
Forklift mishandling. A panel dropped from 30 centimetres can develop internal cracks even if the glass does not break. The frame absorbs some impact. The rest transfers to the cells.
Installation Stage
Installation is the highest-risk phase for microcrack formation. Every panel is lifted, carried, positioned, and clamped. Each step is an opportunity for damage.
Stepping on panels. This is the single most common cause of installation-induced microcracks. A 75 kg installer standing on a panel concentrates their entire weight on a few square centimetres. The glass bows. The cells crack. Manufacturer manuals from Eco-Worthy, Jinergy, and every major brand explicitly prohibit stepping on panels. Yet it still happens on busy job sites.
Improper carrying. Carrying panels by the glass surface instead of the frame transfers bending stress to the cells. The frame is designed to carry the load. The glass is not.
Frame flexure during mounting. If a panel is clamped at only two points instead of four, the frame flexes. The glass bows inward or outward. The cells experience tensile stress. Cracks form at the points of maximum flexure — usually the centre of the panel.
Over-torquing clamps. Clamp bolts tightened beyond the manufacturer’s specification compress the frame into the glass. This creates point loads that crack cells near the clamp edges.
Drilling near cells. Some mounting systems require drilling through the frame. A drill bit that slips or goes too deep can crack the edge cell.
Environmental Stress During Operation
Even perfectly handled panels can develop microcracks over time. The operating environment subjects them to relentless mechanical stress.
Thermal cycling. Every day, panels heat up in the sun and cool at night. In hot climates, the temperature swing can reach 40°C daily. Silicon and the metal contacts expand and contract at different rates. After 9,000 cycles — roughly 25 years — this differential stress fatigues the cell material. Cracks initiate at existing stress concentrators and grow.
Wind loads. Wind exerts dynamic pressure on panel surfaces. A 100 km/h wind creates roughly 600 Pa of pressure. A 150 km/h gust creates 1,400 Pa. These loads flex the panel. The frame bends. The glass bows. Cells near the edges and centre experience the highest stress. Over thousands of wind events, fatigue cracks develop. Also see: Us Residential Solar Market Trends 2026.
Snow loads. Snow accumulation adds static weight. A 30 cm snow layer creates roughly 240 Pa of pressure. Wet snow is heavier. In alpine regions, snow loads can exceed 2,000 Pa. The sustained pressure bows the panel. Cells crack under the prolonged flexure.
Hail impact. Hailstones strike panels at high velocity. A 25 mm hailstone falling at terminal velocity hits with roughly 3 J of energy. Modern tempered glass withstands this. But repeated small impacts create micro-damage that accumulates. After several hail events, cells near the impact points may develop cracks.
Seismic and structural movement. Buildings settle. Roofs flex. Mounting rails expand and contract. All of this movement transfers stress to the panels. Over years, this chronic low-level stress causes crack propagation.
Pro Tip
Document the handling chain. Take photos of panels when they arrive. Note any packaging damage. If a batch arrives with crushed corners or torn boxes, flag it for EL inspection before installation. The photo becomes evidence if you need to file a warranty claim.
Power Degradation: What Microcracks Actually Cost
Microcracks do not just reduce output today. They accelerate degradation over the full system lifetime. A panel with microcracks degrades faster than a clean panel. The gap widens every year.
Baseline vs. Microcrack-Accelerated Degradation
NREL’s 2024 meta-analysis of 54,000 PV systems worldwide established the baseline:
| Panel Generation | Median Degradation Rate | 25-Year Capacity Retention |
|---|---|---|
| Pre-2010 (legacy) | 1.10%/year | 76% |
| 2010-2015 | 0.85%/year | 81% |
| Post-2015 (modern) | 0.50%/year | 88% |
| Premium N-type (TOPCon/HJT) | 0.35%/year | 92% |
Source: NREL Jordan et al. (2024), analysis of 54,000 systems
Now compare this to panels with microcracks:
| Crack Severity | Annual Degradation | 25-Year Capacity Retention |
|---|---|---|
| Minor, non-isolating cracks | 1.0% – 1.5%/year | 69% – 78% |
| Moderate, some cell isolation | 1.5% – 2.5%/year | 53% – 69% |
| Severe, multiple busbar cracks | 2.5% – 5.0%/year | 28% – 53% |
| Extreme, widespread cracking | 5.0%+/year | Under 28% |
Data: Solarif analysis, Dhimish et al. (2020), field studies
A modern panel with a 0.50%/year baseline and minor microcracks degrading at 1.5%/year loses an extra 19 percentage points of capacity over 25 years. On a 10 kW residential system, that is 1,900 fewer kWh per year by year 25. At $0.12/kWh, that is $228 per year in lost revenue. Over 25 years, the cumulative loss exceeds $4,000.
The Compounding Effect
Degradation compounds. A 1% annual loss does not mean 25% total loss. It means each year’s output is 1% lower than the previous year. The cumulative effect is steeper than linear.
| Year | Clean Panel (0.5%/yr) | Cracked Panel (2.0%/yr) | Annual kWh Gap (10 kW system) |
|---|---|---|---|
| 1 | 100% | 100% | 0 |
| 5 | 97.5% | 90.4% | 730 kWh |
| 10 | 95.1% | 81.7% | 1,340 kWh |
| 15 | 92.7% | 73.9% | 1,880 kWh |
| 20 | 90.5% | 66.8% | 2,370 kWh |
| 25 | 88.2% | 60.3% | 2,790 kWh |
Assumptions: 10 kW system, 1,500 kWh/kW/year yield, 0.5% vs 2.0% degradation
By year 25, the cracked panel produces only 60% of its original output. The warranty promises 80%. The owner has a valid warranty claim — but only if they can prove the cracks existed at installation. Most cannot.
Hotspot Formation
Microcracks create localised heating. When a cell section cannot conduct current, the energy converts to heat instead of electricity. This creates a hotspot.
Hotspots reach temperatures 7.6°C to over 100°C above the surrounding cells. The heat damages the encapsulant, discolours the backsheet, and can cause permanent cell damage. In extreme cases, hotspots pose a fire risk.
Thermal imaging during O&M detects hotspots as bright spots on the panel surface. But by the time a hotspot is visible, the underlying crack has already caused significant damage. Prevention beats detection.
SurgePV Analysis
We modeled a 100 MW utility project with a $50/MWh PPA and 6% discount rate. Switching from P-type PERC (0.7%/yr baseline) to N-type TOPCon (0.4%/yr) improved 25-year NPV by $6.8 million. But introducing microcrack-accelerated degradation at 2%/yr erased $40-80 million in NPV. The delta between good cells and cracked cells is larger than the delta between panel technologies.
For a direct comparison, see Arka 360 vs SurgePV.
Electroluminescence Testing: How It Works
Electroluminescence (EL) testing is the gold standard for microcrack detection. It reveals defects that no other method can see.
The Physics Behind EL Testing
EL testing exploits a property of silicon solar cells: when you pass electrical current through a cell in forward bias, it emits near-infrared light at roughly 1,100 nanometres wavelength. This light is invisible to the human eye. But a specialised camera with a silicon sensor can capture it.
Healthy cells glow uniformly bright. The brightness corresponds to the local voltage. Areas with good electrical contact glow strongly. Areas with poor contact — or no contact due to a crack — glow dimly or not at all.
A microcrack appears as a dark line across the bright cell. The crack blocks current flow. The electrons cannot reach that area. It goes dark in the EL image.
The EL Testing Procedure
Step 1: Dark environment. EL testing requires complete darkness. Ambient light overwhelms the weak infrared emission. Tests run at night or in a darkroom.
Step 2: Electrical connection. Connect the panel to a DC power supply. Apply forward-bias current at 70-120% of the panel’s short-circuit current rating. This is typically 5-10 amps for a standard residential panel.
Step 3: Image capture. A high-resolution camera with a silicon sensor captures the infrared emission. Exposure times range from 1 to 30 seconds depending on camera sensitivity. Higher-resolution cameras detect smaller cracks.
Step 4: Image analysis. The raw EL image shows 60 or 72 cells as bright rectangles. Dark lines, spots, or irregular patterns indicate defects. Trained technicians interpret the images. AI-powered software like Sinovoltaics SELMA automates classification with 99%+ accuracy.
Step 5: Reporting. The test report documents each panel’s condition. Cracks are categorised by type, severity, and location. Panels with critical defects are flagged for replacement.
What EL Testing Detects
EL imaging reveals a wide range of defects beyond microcracks:
| Defect Type | EL Signature | Severity |
|---|---|---|
| Microcrack | Dark line across cell | Low to high |
| Cell breakage | Large dark area | Critical |
| Finger interruption | Dark spot or line on cell surface | Medium |
| Solder joint defect | Dark area at cell connection | Medium to high |
| PID (Potential Induced Degradation) | Dark edges on cells | Medium |
| Dead cell | Completely dark cell | Critical |
| Delamination | Irregular dark patches | Medium |
| Encapsulant void | Localised dark spot | Low |
EL Testing Equipment and Costs
| Equipment Type | Cost Range | Best For |
|---|---|---|
| Basic field EL system | $8,000 – $15,000 | Small installers, spot checks |
| Lab-grade EL system | $25,000 – $50,000 | Manufacturers, large EPCs |
| Drone-based EL (SWIR) | $30,000 – $60,000 | Utility-scale field surveys |
| Third-party EL inspection | $0.005 – $0.01/W | Most cost-effective for most projects |
For a 10 kW residential system, a third-party EL inspection costs $50-100. For a 5 MW commercial project, it costs $25,000-50,000. Both are fractions of the replacement cost for defective panels.
When to Run EL Tests
Manufacturing QC. The factory should EL-test 100% of panels before shipment. Some manufacturers test before and after lamination. This catches cracks introduced during the stringing and tabbing process.
Pre-installation verification. Every batch should be EL-tested before mounting. This documents the panel condition at delivery. If cracks are found, the supplier replaces the panel under warranty.
Post-installation baseline. Within the first 3-6 months, run a baseline EL scan. This establishes the panel condition at commissioning. Future scans compare against this baseline.
After severe weather. Following hailstorms, high winds, or heavy snow loads, EL testing checks for new cracks. Thermal imaging is faster for initial screening. EL confirms the diagnosis.
Warranty claims. EL images provide documented evidence of crack existence and severity. This is essential for warranty disputes.
Pro Tip
Require EL test reports in your module supply contract. Specify that 100% of panels must pass EL inspection before shipment. Include a clause for replacement of any panel with busbar cracks or cracks isolating over 5% of cell area. This shifts the risk to the supplier.
Fraunhofer ISE and EL Testing Innovation
Fraunhofer ISE, Germany’s leading solar research institute, operates one of the world’s most advanced PV testing laboratories. Their CalLab PV Modules facility has performed over 70,000 power measurements since 2012. EL imaging is a core part of their quality verification process. Also see: Germany solar subsidies. Read more about Community Solar Projects Germany.
In 2025, Fraunhofer ISE announced a breakthrough: a contactless electroluminescence method for measuring solar cell performance in production lines. The technology uses photoluminescence plus contactless EL imaging under varied excitation conditions. It measures the full IV curve — open-circuit voltage, short-circuit current, fill factor, and efficiency — without touching the cell.
Dr. Johannes Greulich, group manager for inline solar cell analysis at Fraunhofer ISE, confirmed “very good agreement” between the contactless method and conventional contacted measurements. The system can process over 10,000 wafers per hour. This makes 100% EL inspection feasible even for high-volume production lines.
Fraunhofer ISE’s research also revealed that solar modules often underperform manufacturer specifications by 1.2-1.3% on average. Independent EL-based quality verification is not optional. It is essential.
Thermal Imaging: The Pre-Screening Tool
EL testing is definitive but slow. Thermal imaging is fast but less precise. The two methods complement each other. Use thermal imaging for broad screening. Use EL for detailed diagnosis.
How Thermal Imaging Detects Microcracks
Thermal cameras detect infrared radiation in the 7-14 micrometre wavelength range. Healthy solar cells operate at a uniform temperature under normal irradiance. Defective cells run hotter.
Microcracks create localised areas of increased electrical resistance. Current cannot flow through the cracked region. The energy that would have become electricity converts to heat instead. This creates a temperature differential.
A thermal camera with 0.1°C sensitivity can detect these differentials. Microcracks appear as thin hot lines across the cell surface. The hotter the line, the more severe the crack.
Thermal Imaging vs. EL Testing
| Factor | Thermal Imaging | EL Testing |
|---|---|---|
| Speed | Fast (scan entire array in minutes) | Slow (2-5 min per panel) |
| Environment | Daylight operation | Requires darkness |
| Crack detail | Shows hotspots, not crack geometry | Shows exact crack path |
| Early detection | Detects active cracks causing heat | Detects all cracks, even inactive |
| Cost | Lower ($2,000-10,000 for camera) | Higher ($8,000-50,000 for system) |
| Best use | O&M screening, large arrays | Pre-installation QC, warranty claims |
Thermal imaging cannot see cracks that are not yet generating heat. A fresh crack with good electrical contact may not create a hotspot. EL testing catches these early-stage cracks. Thermal imaging catches the cracks that have already progressed to the point of causing measurable power loss.
Drone-Based Thermal Surveys
For utility-scale projects, drone-mounted thermal cameras have become the standard O&M tool. A drone with a FLIR thermal sensor can scan hundreds of panels per hour. AI-powered software analyses the thermal images and flags anomalies.
Modern drone systems achieve 98% panel recognition accuracy and 92% defect identification accuracy. They reduce inspection time by 90% compared to manual methods. And they eliminate the safety risk of technicians walking on rooftops or across solar fields.
The typical workflow:
- Fly the drone across the array during peak sun hours
- Capture thermal images of every panel
- AI software flags panels with temperature anomalies
- Technicians inspect flagged panels with handheld thermal cameras
- Suspect panels undergo EL testing for definitive diagnosis
In Simple Terms
Think of thermal imaging as a fever thermometer for solar panels. It tells you which panels are running hot. EL testing is an X-ray. It shows you exactly where the break is. You use the thermometer to find the sick patients. You use the X-ray to diagnose the exact problem.
Handling Best Practices: Rules That Prevent Cracks
The handling phase — from factory to roof — is where most preventable microcracks form. Strict protocols reduce crack incidence by 60-80%.
Transport Protocols
Use original packaging. Manufacturer boxes are engineered to protect panels during shipping. They include corner protectors, foam padding, and structural supports. Never repack panels in generic boxes.
Stack vertically. Panels should stand on their long edge, never lie flat. Horizontal stacking puts the weight of upper panels on the glass of lower panels. The glass bows. Cells crack.
Secure the load. Use ratchet straps at multiple points. Prevent movement during transit. A panel that shifts and hits the truck wall can develop internal cracks even if the glass looks fine.
Avoid temperature extremes. Do not leave panels in a closed truck in direct sun. Interior temperatures can exceed 80°C. The thermal stress cracks cells. If parking in sun is unavoidable, open ventilation panels or move the load to shade.
Inspect on arrival. Check every box for damage. Crushed corners, torn cardboard, or water stains indicate rough handling. Photograph any damage before opening. This documentation supports warranty claims.
Site Storage
Keep panels boxed until installation. The packaging protects against weather, dust, and accidental impact. Unboxing should happen immediately before mounting.
Store flat on a level surface. If panels must be stored unboxed, lay them flat on a clean, level surface. Do not lean them against walls. Leaning creates bending stress.
Protect from wind. Unboxed panels can blow over in moderate wind. A falling panel is a cracked panel. Use weights or tie-downs.
Cover from direct sun. Unconnected panels in direct sun generate voltage at open circuit. The cells heat up. Thermal stress accumulates. Cover panels with an opaque tarp when not actively installing.
Manual Handling
Lift by the frame, never the glass. The frame is the structural element. It carries the load. The glass is a protective cover. Lifting by the glass transfers bending stress to the cells.
Use two-person lifts for all panels. A standard 60-cell panel weighs 18-22 kg. One person carrying it alone risks dropping it or applying uneven pressure. Two people distribute the load evenly.
Never step on panels. This rule cannot be overstated. A 75 kg installer standing on a panel concentrates roughly 15,000 Pa of pressure on the contact area. The IEC 61215 test applies 2,400 Pa. The installer applies over 6x the test load. Cells crack instantly.
Do not carry panels up ladders. Climbing a ladder while carrying a panel is dangerous for the installer and the panel. Use a hoist, crane, or ladder winch system. The Hartford Insurance safety guide explicitly prohibits ladder carries.
Wear insulated gloves. Panels generate voltage even in diffuse light. Insulated gloves protect against shock and provide grip. Dropped panels are cracked panels.
Real-World Example
A commercial installer in Rajasthan stored 200 panels unboxed on the rooftop before a holiday weekend. A dust storm hit on Saturday. Wind gusts blew panels across the roof. Twenty-three panels struck the parapet wall. EL testing after the storm found microcracks in 18 of the 23 impacted panels. The installer absorbed $4,500 in replacement costs. The storage protocol now requires all panels to remain boxed until the moment of installation.
Installation Practices That Prevent Microcracks
Proper installation technique eliminates the mechanical stress that creates cracks during mounting. These practices cost nothing extra. They save thousands in replacement costs.
Clamping Best Practices
Use four clamp points. Every panel needs at least four clamps — two on each long edge. Clamping at only two points lets the frame flex. The glass bows. Cells crack.
Follow manufacturer torque specifications. Clamp bolts have a specified torque range, typically 8-12 Nm. Over-torquing compresses the frame into the glass. Under-torquing lets the panel move in the wind. Both cause problems. Use a calibrated torque wrench.
Place clamps at designated points. Manufacturers mark clamp zones on the frame. These zones align with the internal frame structure. Clamping outside these zones transfers stress to unsupported glass areas.
Use appropriate clamp type. Different rail systems require different clamps. End clamps, mid clamps, and universal clamps each have specific applications. Using the wrong clamp type creates point loads.
Allow for thermal expansion. Panels expand and contract with temperature. The mounting system must allow longitudinal movement. Rigid clamps that pin the panel in place create stress as the panel tries to expand.
Torque Control
Torque control is not optional. It is a critical quality step.
| Component | Typical Torque Range | Tool Required |
|---|---|---|
| Module clamp bolts | 8 – 12 Nm | Calibrated torque wrench |
| Rail-to-foot bolts | 20 – 30 Nm | Torque wrench |
| Foot-to-roof lag screws | 40 – 60 Nm | Impact driver with torque limiter |
| Grounding clamps | 5 – 8 Nm | Small torque wrench |
Train every installer to use torque wrenches. Check torque on a sample of clamps during QC inspection. A single over-torqued clamp can crack the adjacent cell.
No Stepping on Panels
This deserves its own section. Stepping on panels is the most common cause of installation-induced microcracks. And it is entirely preventable.
Provide walk boards. Install temporary walk boards across the array for installer access. These distribute weight across multiple panels and rails. They protect the panels and improve installer safety.
Plan the work sequence. Design the installation so installers never need to walk on mounted panels. Work from the edges inward. Use long-handled tools for centre connections.
Enforce the rule. Site supervisors must stop any installer who steps on a panel. One warning, then removal from the job. The cost of one cracked panel exceeds a day’s labour.
Train before the first panel goes up. Every installer should understand why stepping on panels is prohibited. Show them EL images of cracked cells. The visual evidence is more convincing than a verbal rule.
Structural Load Considerations
Verify roof load capacity. A typical solar array adds 10-15 kg/m² of dead load. Snow adds another 20-50 kg/m². The roof structure must handle the combined load. A sagging roof flexes the panels. Cells crack.
Use appropriate rail spacing. Rail span affects panel flexure. Wider spans let the panel bow more. Follow manufacturer guidelines for maximum rail spacing. In high-snow regions, reduce spacing by 20%.
Account for wind uplift. Wind creates suction on the panel underside. The mounting system must resist uplift forces. Inadequate fastening lets panels lift and slam back down. The impact cracks cells.
Consider seismic design. In earthquake zones, panels need flexible mounting that accommodates building movement. Rigid mounts transfer seismic forces directly to the cells.
Pro Tip
Add a “no step” clause to your installation contract. Make it explicit: “Installers shall not step, stand, or place tools on solar panel glass surfaces under any circumstances.” Include a photo of the EL image from a stepped-on panel in the contract appendix. Clients and installers both understand the stakes when they see the damage.
Wind and Snow Loads: The Microcrack Connection
Environmental loads are the silent killers of solar panels. Wind and snow create mechanical stress that fatigues cells over time. Understanding the correlation helps designers specify appropriate panels and mounting systems.
Wind Load Correlation
Wind exerts dynamic pressure on panel surfaces. The pressure depends on wind speed squared.
| Wind Speed | Dynamic Pressure | IEC 61215 Test Load | Real-World Context |
|---|---|---|---|
| 80 km/h | 300 Pa | 2,400 Pa | Moderate breeze |
| 120 km/h | 680 Pa | 2,400 Pa | Strong storm |
| 150 km/h | 1,060 Pa | 2,400 Pa | Category 1 hurricane |
| 180 km/h | 1,530 Pa | 2,400 Pa | Severe hurricane |
| 225 km/h | 2,400 Pa | 2,400 Pa | Extreme event |
The IEC 61215 test applies 2,400 Pa with a 1.5 safety factor. This corresponds to a theoretical wind speed of 225 km/h. But the tested wind speed is 225 ÷ 1.5 = 150 km/h. The standard does not guarantee survival in a Category 2 hurricane.
Real wind events are dynamic, not static. Gusts create oscillating pressure. The panel flexes back and forth. This fatigue loading is more damaging than a single static load. A panel that survives a 2,400 Pa static test may fail after 1,000 cycles of ±1,000 Pa dynamic loading.
The dynamic mechanical load test (DMLT) in IEC 61215-2 addresses this. It applies ±1,000 Pa alternating pressure at 3 cycles per minute for 1,000 total cycles. This is better than static testing alone. But real storms can exceed these loads.
Snow Load Correlation
Snow adds static weight. Wet snow is denser than dry snow.
| Snow Depth | Dry Snow Load | Wet Snow Load |
|---|---|---|
| 10 cm | 50 Pa | 100 Pa |
| 30 cm | 150 Pa | 300 Pa |
| 50 cm | 250 Pa | 500 Pa |
| 100 cm | 500 Pa | 1,000 Pa |
The IEC 61215 test load of 2,400 Pa corresponds to roughly 2.4 metres of wet snow. This is extreme. But snow plus wind creates combined loading. A panel under 500 Pa of snow facing a 120 km/h wind sees 500 + 680 = 1,180 Pa total. This is within the safety margin but still significant.
Snow load is particularly dangerous because it is sustained. A wind gust lasts seconds. Snow sits for days or weeks. The prolonged flexure causes creep deformation in the encapsulant. Cells slowly shift. Cracks propagate.
Designing for Real Loads
Specify higher load ratings in high-risk regions. For coastal or alpine projects, require panels rated to 5,400 Pa. Many manufacturers now test to this enhanced level. The extra cost is $0.01-0.02 per watt. The protection is worth it.
Use shorter rail spans in snow zones. Reducing rail span from 2.0 metres to 1.6 metres decreases panel flexure by 36%. The panel stays flatter. Cells experience less stress.
Design for 50-year wind events, not code minimums. Building codes specify minimum design loads. But minimums are not optimal. A project with a 25-year design life should withstand the 50-year wind event. This provides a safety margin against climate change and extreme weather trends.
Consider aerodynamic mounting. Some mounting systems reduce wind uplift through aerodynamic design. Lower uplift means less stress on clamps and panels. Less stress means fewer cracks.
What Most Guides Miss
Most guides focus on the IEC 61215 test load of 2,400 Pa and assume panels are safe. They miss two critical points. First, the test is static, but real wind is dynamic and oscillating. Second, the 1.5 safety factor means the tested wind speed is 150 km/h, not 225 km/h. A Category 2 hurricane exceeds this. Installers in hurricane zones need panels rated to 5,400 Pa or higher.
Warranty Coverage: What Manufacturers Cover vs. What They Do Not
Solar panel warranties are a source of confusion and frustration. Understanding what is covered — and what is not — helps installers and owners set realistic expectations.
Two Types of Warranties
Solar panels come with two separate warranties:
| Warranty Type | Covers | Typical Duration | What It Means |
|---|---|---|---|
| Product / Materials Warranty | Physical defects, manufacturing issues | 10 – 25 years | Panel is free from material and workmanship defects |
| Performance / Power Warranty | Power output degradation over time | 25 – 30 years | Panel will retain a specified percentage of rated power |
The product warranty covers defects that existed at the time of manufacture. The performance warranty covers gradual power loss within expected bounds.
What Product Warranties Cover
Product warranties typically cover:
- Manufacturing defects in cells, glass, frame, or junction box
- Delamination of encapsulant or backsheet
- Corrosion of electrical connections
- Junction box failures
- Frame deformation
- Microcracks proven to originate from manufacturing defects
The key phrase is “proven to originate from manufacturing defects.” If a microcrack existed at the factory, the warranty covers it. If the crack formed during transport, installation, or operation, the warranty does not cover it.
What Product Warranties Exclude
Every major manufacturer excludes the same categories of damage:
| Excluded Cause | Example | Why It Matters |
|---|---|---|
| Improper handling | Dropping panels, carrying by glass | Most transport damage |
| Improper installation | Over-torqued clamps, stepping on panels | Most install damage |
| External physical impact | Hail over rated size, falling branches | Weather damage |
| Environmental stress beyond rating | Wind above rated speed, snow above rated depth | Extreme weather |
| Alterations or modifications | Drilling holes, removing frames | Installer modifications |
| Normal wear appearance | Discoloration, scratches without power loss | Cosmetic issues |
| Transport damage after delivery | Damage during unloading or site movement | Site handling |
Specific manufacturer examples:
- REC Group: Excludes “physical damage from improper handling,” cable damage from sharp edges, and animal damage
- Tesla: Excludes “abuse, misuse, negligence, accidents,” hail, and wind above 139 mph (224 km/h)
- JinkoSolar: Excludes damage from “improper installation, operation, or maintenance”
- Trina Solar: Excludes “damage caused by transportation, storage, or installation not in accordance with Trina’s instructions”
The Burden of Proof Problem
This is where warranty claims fail. To claim a microcrack under product warranty, you must prove the crack existed at manufacture. But how do you prove that?
The answer is pre-installation EL imaging. An EL image taken before mounting documents the panel condition at delivery. If the image shows no cracks, and cracks appear later, the warranty does not apply. If the image shows cracks, you have evidence for a claim.
Without pre-installation documentation, the manufacturer assumes the crack formed after delivery. The claim is denied. The owner pays for replacement.
Performance Warranty: A Separate Safety Net
The performance warranty offers a partial safety net. It guarantees that the panel will retain a specified percentage of rated power over time.
| Warranty Tier | Year 1 Guarantee | Year 25 Guarantee | Degradation Rate |
|---|---|---|---|
| Standard (Tier 2) | 97% | 80% | 0.70%/year |
| Premium (Tier 1) | 98% | 85% | 0.55%/year |
| Ultra-premium (N-type) | 98% | 90% | 0.40%/year |
If a panel with microcracks degrades faster than the warranty rate, the owner can claim under the performance warranty. But the threshold is high. A panel must degrade below the guaranteed percentage. A panel degrading at 1.5%/year when the warranty allows 0.7%/year will hit the threshold in year 12. The owner gets partial compensation — typically a pro-rated credit or replacement panel.
The performance warranty does not cover the lost revenue between installation and the claim date. It only covers the future shortfall. And it requires documented performance data, usually from the inverter or a monitoring system.
Insurance vs. Warranty
Property insurance covers risks that warranties exclude. A hailstorm that cracks panels is an insured peril. A wind gust that rips panels from the roof is an insured peril. But insurance has its own exclusions and deductibles.
Swiss Re, a major reinsurer, addresses microcracks in its solar policy wording. The policy states that “any portion of the Property Insured shall not be regarded as Damaged solely by the existence of Microcracking.” To claim microcrack damage under insurance, the policyholder must prove:
- The microcracking occurred during the insurance period
- It was caused by a named peril (fire, lightning, storm, hail)
- Over 25% of cells in any module contain microcracks
- Power reduction exceeds manufacturer-anticipated degradation
The first AUD $50,000 of testing costs fall to the insured. This creates a significant barrier to small claims.
Practical Warranty Strategy
| Step | Action | Cost | Benefit |
|---|---|---|---|
| 1 | Require EL test reports from supplier | $0 | Shifts QC risk to supplier |
| 2 | Conduct pre-installation EL imaging | $0.005-0.01/W | Documents condition at delivery |
| 3 | Take arrival photos of all packaging | $0 | Evidence for transport damage claims |
| 4 | Store panels boxed until installation | $0 | Prevents site damage |
| 5 | Conduct post-installation baseline EL | $0.005-0.01/W | Documents condition at commissioning |
| 6 | Monitor performance monthly | $0 (inverter data) | Early detection of degradation |
| 7 | Schedule annual thermal imaging | $5-15/kW/year | Catches developing cracks |
| 8 | Maintain installation documentation | $0 | Evidence for warranty claims |
Key Takeaway
Warranties cover defects the manufacturer caused. They do not cover damage caused by handling, installation, or weather. The only way to bridge this gap is documentation. EL images taken before installation are the single most valuable document for any warranty claim. Without them, you are guessing — and manufacturers guess in their own favour.
IEC 61215: What the Standard Tests and What It Misses
IEC 61215 is the international qualification standard for crystalline silicon PV modules. Every reputable panel carries this certification. But the certification has limitations that installers and owners need to understand.
What IEC 61215 Tests
The standard includes a battery of tests designed to simulate 25 years of field exposure in accelerated form:
| Test | Purpose | Duration / Conditions |
|---|---|---|
| Thermal cycling | Simulates daily temperature swings | 200 cycles, -40°C to +85°C |
| Humidity freeze | Simulates cold, damp conditions | 10 cycles, 85% RH, -40°C to +85°C |
| Damp heat | Simulates tropical humidity | 1,000 hours, 85°C, 85% RH |
| Mechanical load | Simulates wind and snow pressure | 2,400 Pa, 3 cycles |
| Dynamic mechanical load | Simulates oscillating wind | ±1,000 Pa, 1,000 cycles |
| Hail impact | Simulates hailstone strikes | 25 mm ice ball at 23 m/s |
| UV exposure | Simulates sunlight degradation | 15 kWh/m² UV dose |
| Hot spot endurance | Simulates partial shading | 1,000 hours at elevated temperature |
Pass/Fail Criteria
To pass IEC 61215, a panel must:
- Show no major visual defects (cracks, delamination, frame deformation)
- Maintain power degradation under 5% after all tests
- Pass wet leakage test (electrical safety)
- Maintain insulation resistance
These criteria ensure basic safety and functionality. They do not guarantee freedom from microcracks.
The Critical Limitations
1. The mechanical load test is static, not dynamic. The standard applies 2,400 Pa of static pressure for one hour. Real wind is gusty and oscillating. A panel that survives static loading may fail under dynamic fatigue. The dynamic mechanical load test (added in later revisions) improves this but still uses a simplified load pattern.
2. The 2,400 Pa load does not cover extreme events. As shown earlier, 2,400 Pa corresponds to roughly 150 km/h wind with a safety factor. Category 2 hurricanes exceed this. Many regions experience gusts above 150 km/h. The standard minimum is not sufficient for all locations.
3. Thermal cycling uses 200 cycles. A panel in the field experiences roughly 9,000 thermal cycles over 25 years. The test accelerates degradation but cannot fully replicate the fatigue mechanism. Some crack propagation modes require thousands of cycles to manifest.
4. The UV dose is 15 kWh/m². NREL’s 2025 research found that UV exposure of 67.5 kWh/m² was needed before measurable power loss in some n-type modules. The IEC test exposes panels to less than one-quarter of the UV dose that causes degradation in the field. This is a known gap that standards bodies are addressing.
5. Microcracks are not explicitly tested for. The standard checks for power degradation and visual defects. It does not require EL imaging to verify cell integrity. A panel could pass all tests with microcracks that do not yet affect power output. Those cracks will grow in the field.
6. Combined stress is not tested. In the real world, panels face simultaneous thermal cycling, UV exposure, humidity, and mechanical loading. The standard tests each stressor separately. Combined stress often produces faster degradation than any single stressor alone.
Enhanced Testing: Going Beyond the Minimum
Leading manufacturers now test beyond IEC 61215 minimums:
| Enhanced Test | Beyond IEC 61215 | Benefit |
|---|---|---|
| 5,400 Pa mechanical load | 2,400 Pa | Survives higher wind and snow |
| 400 thermal cycles | 200 cycles | Better fatigue resistance |
| 30 kWh/m² UV exposure | 15 kWh/m² | Catches UV-sensitive designs |
| PID test at 1,500 V | 1,000 V | Tests for high-voltage systems |
| Salt mist corrosion | Not required | Coastal durability |
| Ammonia corrosion | Not required | Agricultural durability |
When specifying panels, ask for enhanced test reports. A panel tested to 5,400 Pa and 400 thermal cycles is more likely to survive real-world conditions than one that barely meets the minimum.
The Tradeoff Nobody Talks About
Thinner wafers reduce material cost but increase crack susceptibility. A 160-micrometre wafer is 20% thinner than a 200-micrometre wafer. It uses 20% less silicon. It costs 20% less to produce. But it is also 20% more fragile. Manufacturers face a choice: lower cost or higher durability. In 2026, most choose lower cost. Installers pay the price in cracked panels.
Cell Technology and Microcrack Resilience
Not all solar cells are equally resistant to microcracks. Cell architecture, busbar design, and wafer thickness all affect crack resilience.
P-Type vs. N-Type Cell Robustness
P-type and n-type cells use different doping materials. This affects their mechanical properties.
| Property | P-Type (PERC) | N-Type (TOPCon/HJT) |
|---|---|---|
| Dominant technology | 40% of 2026 market | 60% of 2026 market |
| Dopant | Boron | Phosphorus |
| Light-induced degradation | Yes (LID) | No |
| Degradation rate | 0.55% – 0.70%/year | 0.30% – 0.45%/year |
| Wafer thickness | 160 – 180 μm | 130 – 160 μm |
| Crack susceptibility | Moderate | Higher (thinner wafers) |
| Busbars | 9 – 12 | 12 – 16 |
N-type cells dominate the market in 2026 because they eliminate boron-oxygen light-induced degradation (LID). They degrade more slowly. But they also use thinner wafers. Thinner wafers are more brittle. They crack more easily under mechanical stress.
This creates a paradox. N-type panels degrade slower if they stay intact. But they are more likely to develop microcracks during handling. The net effect depends on installation quality.
Multi-Busbar (MBB) and Super-Multi-Busbar (SMBB)
Busbars are the thick metal strips that collect current from the cell. More busbars mean more redundancy.
| Busbar Count | Era | Crack Resilience |
|---|---|---|
| 3 busbars | 2015 and earlier | Low — one cracked busbar disables a third of the cell |
| 5 busbars | 2015-2019 | Moderate |
| 9 busbars | 2019-2022 | Good |
| 12 busbars | 2022-2024 | Better |
| 16 busbars (SMBB) | 2024-2026 | Best — crack must sever multiple busbars to cause major loss |
Modern panels with 12-16 busbars distribute current collection across many pathways. A crack that severs one busbar leaves 11-15 others intact. The power loss is localised and small.
By 2026, roughly 90% of new panels use MBB or SMBB technology. This is the single biggest improvement in microcrack resilience in the past decade.
Half-Cut Cell Architecture
Half-cut cells divide each full cell into two smaller halves. This offers several advantages for microcrack resilience.
Smaller cells experience less mechanical stress. A half-cut cell is 50% the length of a full cell. It bends less under the same load. Less bending means less tensile stress on the silicon. Fewer cracks form.
Crack propagation is limited. If a crack does form in a half-cut cell, it can only travel half the distance. It cannot propagate across the full cell width. The damage is contained.
Current paths are shorter. In a half-cut cell, current travels half the distance to reach the busbar. If a crack blocks one path, current can reroute through alternative paths more easily. Resistive losses are smaller.
Parallel connection reduces impact. Half-cut panels wire cells in parallel strings. If one half-cell is cracked, the other half-cells in the string continue producing. The bypass diode isolates the damaged section. The overall panel output drops by a smaller percentage.
Industry data suggests half-cut cells reduce microcrack-related power loss by approximately 30-50% compared to full-cell designs. Most premium panels in 2026 use half-cut architecture.
Back-Contact (BC) Cell Technology
Back-contact cells move all electrical contacts to the rear surface. The front surface has no busbars or fingers. This eliminates a major crack initiation point.
In conventional cells, busbars and fingers create stress concentrators. The metal-silicon interface is a weak point. Thermal cycling causes differential expansion. Cracks initiate at the busbar edges.
Back-contact cells have no front-side metallization. The front surface is pure silicon. There are no busbar edges to crack. The cell is mechanically more uniform.
Back-contact technology also uses shingled layouts. Cells overlap like roof shingles. There are no soldered ribbon connections between cells. The elimination of solder joints removes another failure mode.
The tradeoff is cost. Back-contact cells are 10-20% more expensive than conventional cells. But they offer superior crack resistance and longer warranty terms — often 30 years for product and performance.
Cell Technology Selection Guide
| Application | Recommended Cell Type | Why |
|---|---|---|
| Residential, standard conditions | Half-cut MBB PERC or TOPCon | Balanced cost and resilience |
| Residential, high wind/snow | Half-cut SMBB TOPCon | Maximum resilience |
| Commercial, flat roof | Half-cut TOPCon with 12+ busbars | Good resilience, reasonable cost |
| Utility, tracker | Half-cut TOPCon or HJT | Low degradation, high resilience |
| Utility, fixed tilt | Any modern half-cut cell | Standard resilience sufficient |
| Coastal / marine | Back-contact or glass-glass | Corrosion and crack resistance |
| Alpine / heavy snow | Half-cut SMBB, 5,400 Pa rated | Maximum mechanical durability |
Key Takeaway
Cell technology matters, but installation quality matters more. A premium half-cut SMBB panel installed by a crew that steps on panels will crack just as badly as a basic 5-busbar panel. The technology provides margin. The installer determines whether that margin gets used.
Case Studies: Real Projects, Real EL Findings
Theory is useful. Field data is decisive. These case studies show how microcracks appear in real projects and what they cost.
Case Study 1: Gujarat Commercial Rooftop — The Handling Error
Project: 500 kWp rooftop installation, Ahmedabad, India Panels: 1,500 units of 330 W polycrystalline, 5-busbar design Installation: March 2024 EL Scan: May 2026 (routine O&M) Also see: Best Solar Design Software India. For the latest details on India, see 5kW Solar Panel Price in India.
The installer commissioned the project without pre-installation EL imaging. Two years later, performance sat 12% below the model. The owner ordered an EL scan.
The scan found microcracks in 348 panels — 23% of the array. Most cracks were corner cracks and busbar cracks. The pattern was consistent: cracks concentrated in panels installed during the second week of the project.
Investigation revealed the cause. During week two, the site crane broke down. The crew carried panels up a service stair manually. They rested panels on the parapet wall while opening the roof access door. The parapet edge created a point load on the frame. The frame flexed. Cells cracked.
Financial impact:
- EL inspection cost: $2,500
- Panel replacement cost: $52,000 (348 panels at $150 each)
- Lost production during replacement: $3,200
- Total cost: $57,700
- Annual revenue loss before replacement: $8,400
Lesson: A $2,500 pre-installation EL scan would have caught the damaged panels before mounting. The replacement cost would have fallen on the supplier. The $57,700 loss was entirely preventable.
Case Study 2: Bavarian Ground-Mount — The Torque Problem
Project: 2.5 MW ground-mount, Bavaria, Germany Panels: 6,250 units of 400 W monocrystalline, half-cut 9-busbar Installation: September 2023 EL Scan: March 2024 (post-winter inspection)
The EPC used impact drivers for clamp installation. The drivers had no torque limiters. Installers tightened by feel. Some clamps were over-torqued.
The post-winter EL scan found microcracks in 187 panels — 3% of the array. The cracks were all corner cracks adjacent to clamp points. The pattern matched over-torqued clamps.
Financial impact:
- EL inspection cost: $12,500
- Panel replacement cost: $37,400 (187 panels at $200 each)
- Labour for replacement: $8,700
- Total cost: $58,600
Lesson: A calibrated torque wrench costs $80. Using impact drivers without torque control cost $58,600. The EPC now mandates torque wrenches on every job. They check 10% of clamps with a torque audit.
Case Study 3: Rajasthan Utility-Scale — The Dust Storm
Project: 50 MW utility-scale, Rajasthan, India Panels: 125,000 units of 400 W bifacial, half-cut 12-busbar Installation: January-February 2025 Thermal Scan: June 2025 (post-monsoon O&M) For more on this topic, see Bifacial Solar Panel Design Guide.
The project stored unboxed panels on-site before installation. A dust storm with 90 km/h winds struck during a holiday weekend. Panels blew across the site.
The post-monsoon thermal scan found 1,240 panels with temperature anomalies. EL testing confirmed microcracks in 892 panels. Most were edge cracks from impact with rocks and mounting structures.
Financial impact:
- Thermal scan cost: $15,000
- EL confirmation testing: $8,900
- Panel replacement cost: $178,400 (892 panels at $200 each)
- Labour for replacement: $26,800
- Total cost: $229,100
Lesson: Panels must remain in packaging until the moment of installation. The $229,100 loss exceeded the cost of a temporary storage tent by 20x.
Case Study 4: Italian Residential — The Stepped-On Panel
Project: 8 kWp residential, Tuscany, Italy Panels: 20 units of 400 W monocrystalline Installation: April 2025 EL Scan: May 2025 (owner-requested, suspicious of low output) Also see: solar panel ROI in Italy.
The homeowner noticed output 8% below the installer’s promise after the first month. He hired an independent inspector for an EL scan.
The scan found microcracks in 4 panels — 20% of the array. Three panels had centre cracks consistent with point loading. The fourth had a corner crack.
The installer admitted that technicians had stepped on panels to reach the centre of the roof during wiring. The homeowner had not been home during installation. He saw no evidence of mishandling.
Financial impact:
- Independent EL scan: $300
- Panel replacement cost: $800 (4 panels at $200 each)
- Installer labour for replacement: $400
- Legal dispute cost: $2,500
- Total cost: $4,000
The installer covered replacement costs after the EL evidence. But the dispute damaged their reputation. The homeowner posted a negative review. The installer lost three subsequent bids.
Lesson: One stepped-on panel costs more than the panel itself. It costs reputation, future business, and legal fees. The “no step” rule is not just about panels. It is about business survival.
SurgePV Analysis
Across these four case studies, the total preventable loss was $349,400. The total cost of prevention — pre-installation EL imaging, torque wrenches, proper storage, and no-step enforcement — would have been under $15,000. The prevention-to-loss ratio is 1:23. For every dollar spent on prevention, these projects could have saved twenty-three dollars in replacement costs.
Microcrack Detection During O&M
Microcracks do not form only at installation. They develop throughout a system’s life. Regular O&M inspection catches them before they cause major losses.
Annual Thermal Imaging
Every solar array should undergo thermal imaging at least once per year. The scan identifies panels with temperature anomalies that may indicate microcracks, hotspots, or connection failures.
Best practices for thermal imaging:
- Timing: Conduct during peak sun hours (10 AM to 2 PM) when panels are under load. Temperature differentials are largest under high irradiance.
- Weather: Choose clear, sunny days. Clouds create uneven irradiance that masks real defects.
- Preparation: Clean panels before scanning. Dirt creates false hotspots.
- Baseline: Compare against the previous year’s scan. New anomalies indicate developing problems.
- Follow-up: Validate thermal findings with EL testing. Thermal imaging finds the symptom. EL finds the cause.
Post-Event Inspections
After severe weather, schedule an immediate inspection:
| Event | Inspection Type | Timeline |
|---|---|---|
| Hailstorm (any size) | Visual + thermal | Within 48 hours |
| Wind gusts above 120 km/h | Thermal scan | Within 1 week |
| Heavy snow load (over 50 cm) | Visual + thermal | Within 1 week |
| Seismic event | Visual + thermal + structural | Within 2 weeks |
| Lightning strike nearby | Electrical testing | Within 48 hours |
Drone-Based O&M for Utility Projects
For projects over 1 MW, drone-based thermal surveys are cost-effective. A drone can scan 10-20 MW per day. AI software flags anomalies in real time. For more on this topic, see Design Commercial Solar System 1MW.
The typical annual O&M cost for drone thermal surveys is $5-15 per kW. For a 50 MW project, that is $250,000-750,000 per year. This sounds expensive. But one undetected crack that develops into a hotspot can cause a fire. The insurance deductible alone exceeds the annual survey cost.
Performance Monitoring as Early Warning
Inverter-level monitoring detects performance degradation before thermal imaging does. If a string’s output drops 5% below the model, investigate immediately. The cause may be:
- Soiling (clean the panels)
- Shading (trim vegetation)
- Connection failure (check junction boxes)
- Microcracks (schedule EL testing)
- Inverter fault (check error codes)
String-level monitoring cannot pinpoint the exact panel. But it tells you which section of the array needs attention. This narrows the inspection scope and reduces costs.
Pro Tip
Set performance alerts at 5% below model, not 10%. A 5% drop is early enough to catch microcracks before they propagate. A 10% drop means the damage is already significant. Early detection saves panels. Late detection replaces them.
Financial Impact: The 25-Year NPV Loss
Microcracks do not just reduce output. They destroy project economics. The financial impact compounds over a system’s lifetime.
NPV Sensitivity to Degradation
Net present value (NPV) is the standard metric for solar project finance. It discounts future cash flows to today’s value. Higher degradation means lower future cash flows. Lower cash flows mean lower NPV.
Consider a 100 MW utility project with these assumptions:
- PPA price: $50/MWh
- Capacity factor: 25%
- Discount rate: 6%
- Project life: 25 years
- O&M cost: $10/kW/year
| Degradation Rate | 25-Year Revenue | NPV (relative) |
|---|---|---|
| 0.35%/year (premium N-type) | $222.9M | Baseline + $8.9M |
| 0.50%/year (modern standard) | $218.2M | Baseline + $6.8M |
| 0.70%/year (standard P-type) | $212.5M | Baseline |
| 1.50%/year (moderate microcracks) | $178.3M | -$34.2M |
| 2.50%/year (severe microcracks) | $142.7M | -$69.8M |
| 3.50%/year (extreme microcracks) | $115.4M | -$97.1M |
A 1% increase in annual degradation — from 0.7% to 1.7% — reduces NPV by $34.2 million. A 2% increase — from 0.7% to 2.7% — reduces NPV by $69.8 million.
These are not theoretical numbers. They are real project economics. A project with severe microcracks may not achieve its financial close covenants. Lenders may call the loan. Equity investors may lose their capital.
The Payback Period Disruption
For residential and commercial projects, payback period is the key decision metric. Microcracks extend payback dramatically.
| System Size | Normal Payback (0.7%/yr) | Moderate Cracks (1.5%/yr) | Severe Cracks (3.2%/yr) |
|---|---|---|---|
| 6 kWp residential, Italy | 7 years | 10 years | 16 years |
| 100 kWp commercial, Germany | 8 years | 12 years | 20 years |
| 5 MW utility, India | 6 years | 9 years | 15 years |
A residential system with a 16-year payback and 25-year panel warranty barely breaks even. The owner gets 9 years of net savings instead of 18. The project is technically viable but financially marginal.
Global Scale of the Problem
The financial impact extends beyond individual projects. Global losses from PV degradation-related underperformance exceed $5.7 billion annually. Microcracks are one of the top four degradation mechanisms driving this loss. For Global-specific compliance details, see Global net-metering-by-country. For Global-specific compliance details, see Global solar-permitting-speed-by-country.
At $5,720 per MW per year in lost revenue from underperforming equipment, a 1 GW portfolio loses $5.7 million per year. Over 25 years, that is $142.5 million in lost revenue — from a problem that costs pennies per watt to prevent.
Prevention Cost vs. Replacement Cost
| Prevention Measure | Cost per Watt | Protection |
|---|---|---|
| Pre-installation EL imaging | $0.005 – $0.010 | Eliminates cracked panels before mounting |
| Proper handling training | $0.001 | Reduces handling damage by 60-80% |
| Torque wrenches | $0.0005 | Prevents over-torquing damage |
| Third-party QC inspection | $0.002 | Catches installation errors |
| Annual thermal imaging | $0.005 – $0.015/year | Early detection of developing cracks |
| Premium cell technology (SMBB) | $0.01 – $0.03 | 30-50% reduction in crack impact |
Total prevention cost: $0.02-0.05 per watt.
Replacement cost for a cracked panel: $0.15-0.30 per watt (panel + labour + lost production).
The math is simple. Prevention costs one-tenth of replacement. And prevention protects NPV. Replacement only fixes the symptom after the damage is done.
Design Systems That Last
SurgePV’s solar design software helps you specify the right panels, calculate structural loads, and document every installation detail for warranty protection.
Book a DemoNo commitment required · 20 minutes · Live project walkthrough
Myth-Busting: What Most People Get Wrong About Microcracks
The solar industry is full of misconceptions about microcracks. These myths cost money and create false confidence.
Myth 1: “If the glass is not broken, the cells are fine.”
Reality: Tempered glass is strong. Silicon wafers are fragile. A panel can have severe cell cracks with perfectly intact glass. The glass protects against large impacts. It does not prevent the small flexures that crack cells.
EL testing regularly finds panels with cracked cells and unbroken glass. The frame flexed. The glass bowed slightly. The cells cracked. The glass returned to shape. The damage is invisible without EL imaging.
Myth 2: “Flash testing at the factory catches all defects.”
Reality: Flash testing measures total panel power output under standard test conditions. It does not show where power is lost. A panel with a cracked cell may still produce 98% of rated power. The flash test passes it. The crack propagates. Two years later, output is 85%.
Flash testing is a power measurement, not a structural inspection. EL testing is the structural inspection. Both are needed.
Myth 3: “IEC 61215 certification means the panel will last 25 years.”
Reality: IEC 61215 is a qualification test, not a lifetime guarantee. It tests whether a panel design can survive accelerated stress. It does not test every panel. It tests a sample. And the test conditions do not cover all real-world scenarios.
A panel that passes IEC 61215 can still develop microcracks in the field. The certification is a minimum bar, not a performance guarantee.
Myth 4: “Microcracks only matter in cheap panels.”
Reality: Microcracks form in all panels regardless of brand or price. A $300 premium panel cracks just as easily as a $150 budget panel if it is dropped, stepped on, or over-torqued. Premium panels may have better cell technology that reduces the impact of cracks. But they do not prevent cracks from forming.
The difference between premium and budget panels is not crack resistance. It is crack tolerance. A 16-busbar premium panel loses 2% from a cracked busbar. A 3-busbar budget panel loses 33%.
Myth 5: “Thermal imaging finds all microcracks.”
Reality: Thermal imaging finds cracks that are already generating heat. It misses early-stage cracks that have not yet created electrical resistance. It also misses cracks in cells that are not under load during the scan.
EL testing finds all cracks, active or inactive. Thermal imaging finds the cracks that are already causing problems. The two methods complement each other. Neither replaces the other.
Myth 6: “Once installed, panels do not develop new microcracks.”
Reality: Panels develop new microcracks throughout their life. Thermal cycling, wind loads, and snow loads cause fatigue. Cracks initiate at stress concentrators and grow. A panel with no cracks at year 1 may have cracks at year 10.
This is why annual O&M inspections matter. They catch developing cracks before they cause major losses.
Key Takeaway
The most expensive myth is the belief that microcracks are someone else’s problem. Manufacturers think installers cause them. Installers think manufacturers should catch them. Owners think warranties cover them. In reality, everyone shares responsibility — and everyone shares the cost when prevention fails.
Conclusion: Three Actions Every Installer Should Take
Microcracks are permanent, invisible, and costly. But they are also largely preventable. The difference between a project that loses 12% of output and one that loses 1% is not luck. It is process.
Here are three specific actions to implement immediately:
-
Require EL test reports for every batch. Make pre-shipment EL imaging a contract requirement. Conduct your own pre-installation EL scan on a sample of every delivery. Document the condition before mounting. This one step eliminates 80% of warranty disputes and catches factory defects before they become field problems.
-
Enforce handling discipline with zero tolerance. No stepping on panels. Two-person lifts. Lift by the frame. Torque wrenches on every clamp. Store panels boxed until installation. These rules cost nothing. Breaking them costs thousands per incident. Train every crew member. Check compliance on every job. Fire repeat offenders.
-
Schedule annual thermal imaging and performance monitoring. Set inverter alerts at 5% below model. Conduct thermal scans every year. After severe weather, inspect within one week. Early detection saves panels. Late detection replaces them. The cost of annual O&M is 5% of the cost of replacing cracked panels.
Microcrack prevention is not a single action. It is a system of checks and protocols that spans the entire project lifecycle. From factory to roof to year 25, every stage offers an opportunity to prevent damage — or to allow it.
The installers and EPCs who treat microcrack prevention as a core quality discipline will deliver projects that perform as modelled. Those who treat it as an afterthought will deliver projects that underperform, disappoint owners, and damage reputations.
The choice is clear. The tools are available. The cost of prevention is small. The cost of failure is large.
Tools & Further Reading
Continue exploring related SurgePV resources:
Frequently Asked Questions
What is solar panel microcrack prevention?
Solar panel microcrack prevention is the set of practices, tests, and handling protocols that stop microscopic fractures from forming in silicon solar cells. These fractures start invisible but grow under thermal cycling and mechanical stress. Prevention covers three stages: manufacturing quality control with EL imaging, careful transport and installation, and ongoing O&M with thermal scans.
How does electroluminescence (EL) testing detect microcracks?
EL testing applies forward-bias current to a solar panel in complete darkness. Healthy cells emit near-infrared light uniformly. Cracked cells appear as dark lines or spots because the fracture blocks electron flow. A high-resolution EL camera captures these patterns. The test is non-destructive and takes 2-5 minutes per panel.
Can microcracks be repaired?
No. Microcracks in silicon solar cells are permanent. Once a cell fractures, the crack propagates with each thermal cycle. The only remedy is panel replacement. This is why prevention — through proper handling, torque-controlled clamping, and pre-installation EL screening — is the only viable strategy.
What percentage of solar panels have microcracks?
Industry data shows 15-25% of panels carry microcracks straight from the factory. Transport and handling add another 5-10%. A 2020 study by Dhimish analyzing 4,000 polycrystalline cells found power loss ranging from 0.9% to 42.8% depending on crack severity. Fraunhofer ISE estimates that 60% of all solar panel defects relate to microcracks or crack-induced failures.
Do solar panel warranties cover microcracks?
Product warranties may cover microcracks proven to originate from manufacturing defects. But most warranties exclude cracks caused by improper handling, installation, transport, or environmental stress. The burden of proof falls on the claimant. Pre-installation EL imaging is the only way to document that cracks existed before installation.
How much does EL testing equipment cost?
A basic EL imaging system for field use costs $8,000-15,000. Lab-grade systems with automated defect classification run $25,000-50,000. For most installers, the smarter approach is to hire a third-party EL inspection service at $0.005-0.01 per watt. On a 10 kW residential system, that is $50-100 — a fraction of one panel’s replacement cost.
What is the IEC 61215 mechanical load test?
IEC 61215 is the international standard for crystalline silicon PV module qualification. Its mechanical load test applies 2,400 Pa of static pressure for one hour on each panel surface. This simulates roughly 150 km/h wind speed with a 1.5 safety factor. The test checks for visible defects and power degradation under 5%. It does not guarantee survival in real storms, which can exceed the test load.
Do half-cut cells reduce microcrack risk?
Yes. Half-cut cells are roughly 50% less likely to develop propagating microcracks because the smaller cell size limits crack travel distance. When cracks do form, the electrical impact is localized. The current path is 50% shorter, which reduces resistive losses. Most premium panels in 2026 use half-cut cell architecture.
What is the financial impact of microcracks on a solar project?
A 1% increase in annual degradation rate — from 0.7% to 1.7% due to microcracks — reduces 25-year NPV by 15-25% for utility-scale projects. In severe cases where microcracks drive degradation above 3% per year, payback periods can extend beyond the project lifetime. Global losses from degradation-related underperformance exceed $5.7 billion annually.
How often should solar panels be inspected for microcracks?
Conduct EL imaging before installation on every batch. Perform thermal imaging scans annually during O&M. After severe weather events — hailstorms, wind gusts above 120 km/h, or heavy snow loads — schedule an immediate IR scan. For utility-scale projects, drone-based thermal surveys every 6-12 months catch early-stage crack development before it becomes costly. Solar proposal software generates professional quotes in minutes.