Quick Answer
Rooftop solar structural assessments evaluate roof load capacity, typically 15–25 kg/m² for panels plus mounting. Key factors include roof age, material, slope, and local wind/snow loads. A PE-stamped structural letter is required for permits in most US jurisdictions.
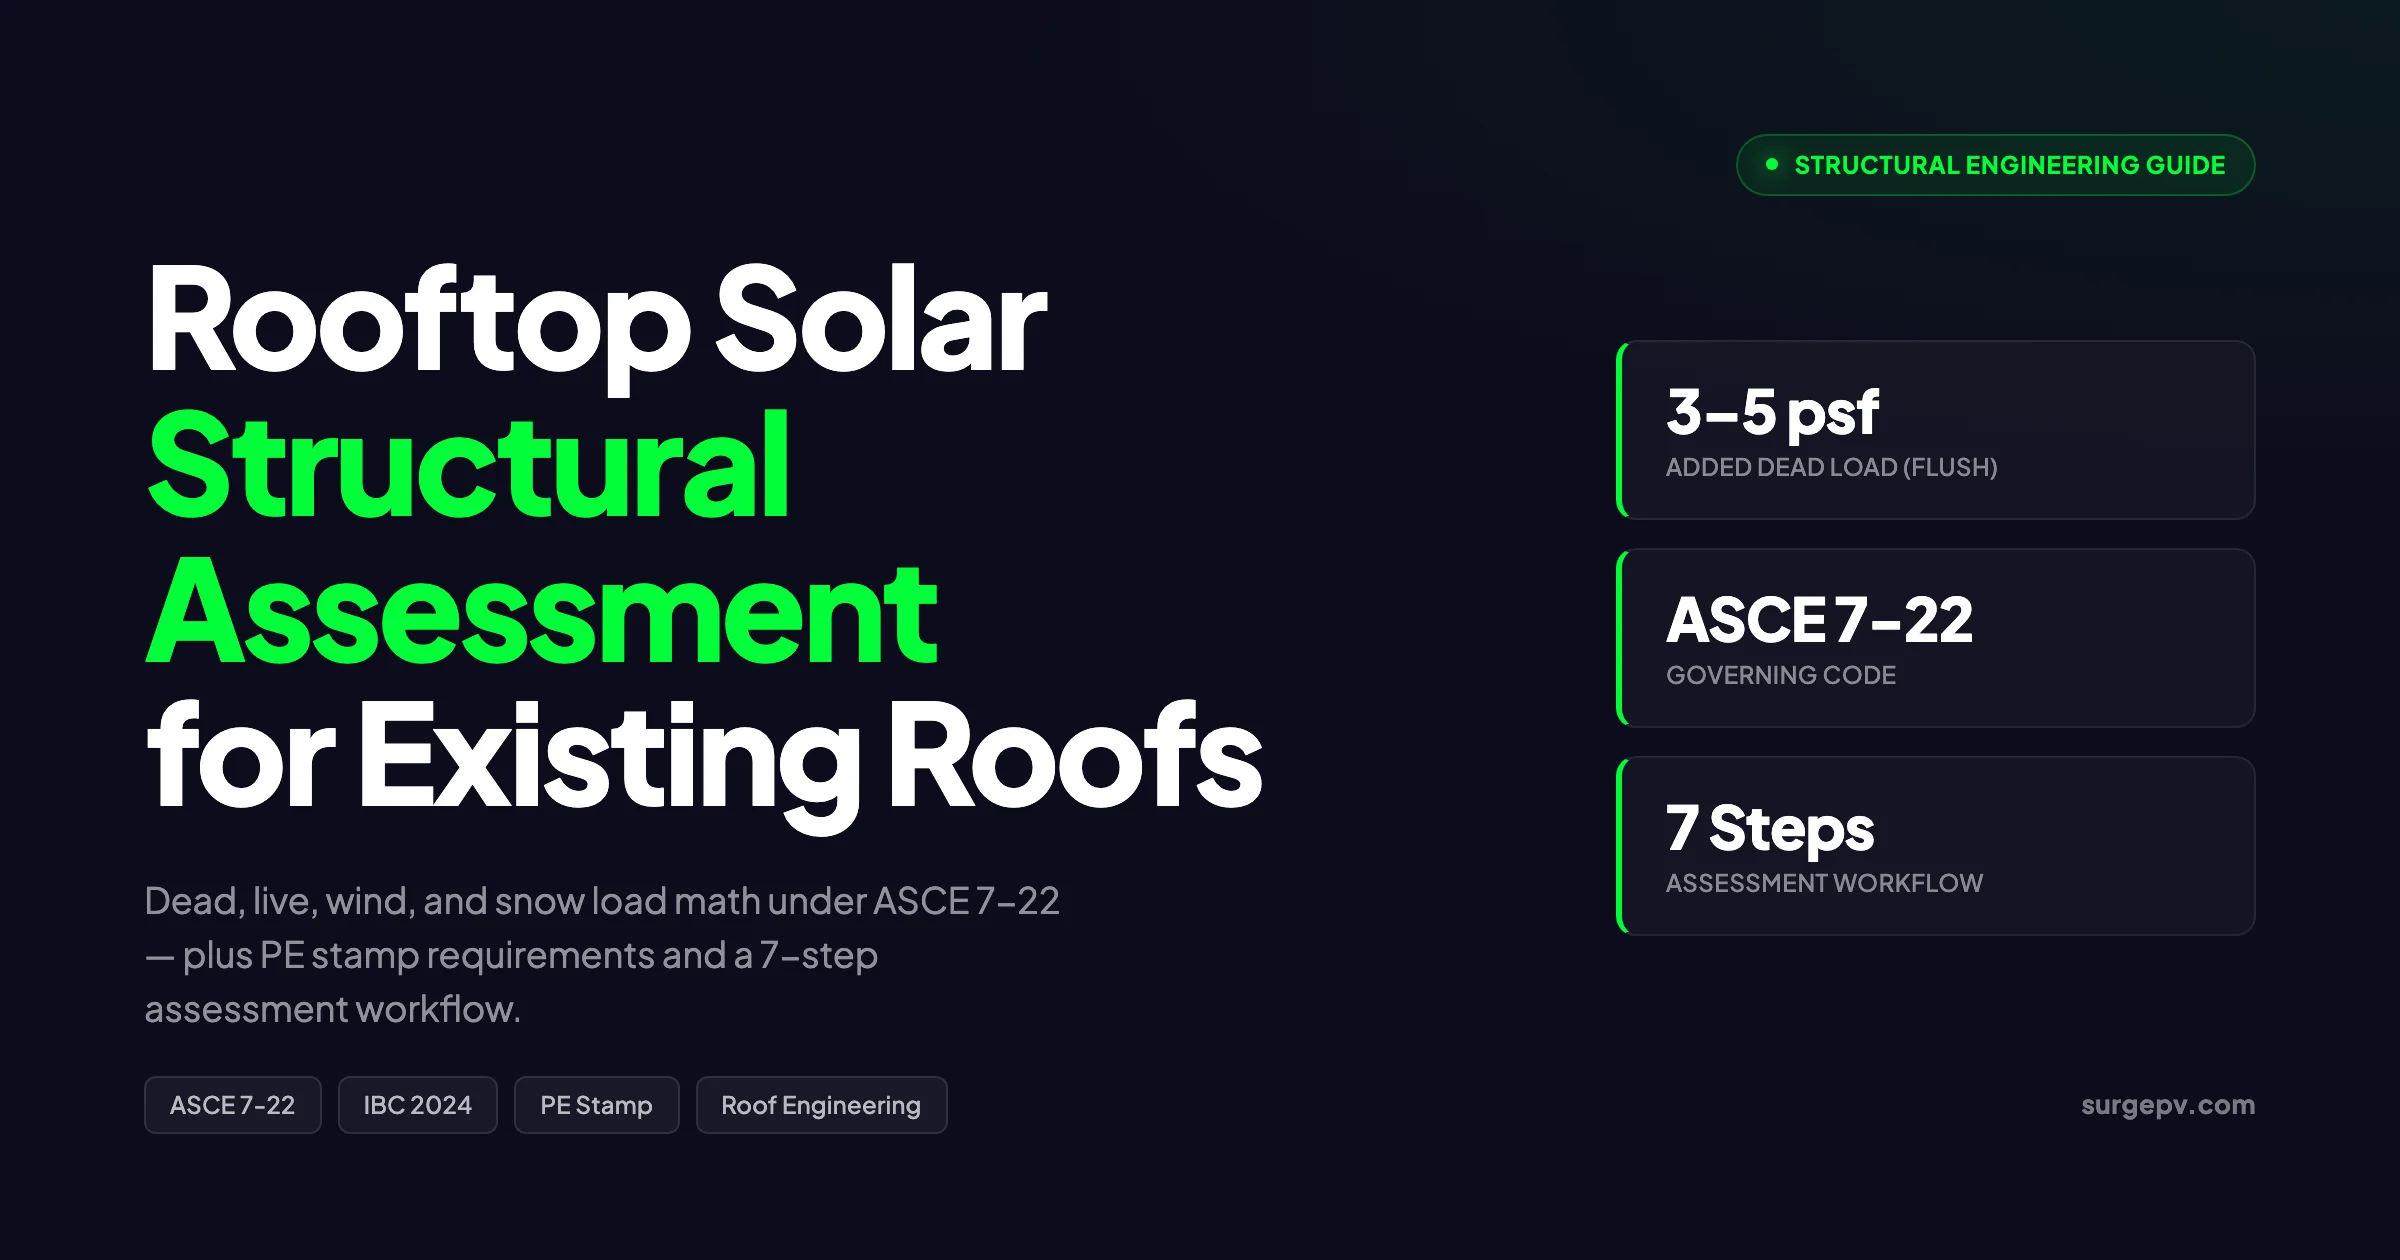
Rooftop solar structural assessment is the engineering work that tells you whether the building can carry a 25-year array without sagging, leaking, or shedding panels in a storm. Solar racking adds 3 to 5 pounds per square foot of new dead load, concentrates point loads at every rafter attachment, and changes the wind aerodynamics of the entire roof. About 20 percent of US solar permits stall on structural review, and getting the math right on the first submission is the difference between a 60-day project and a 6-month redesign loop. See Solar Racking Design Guide for detailed guidance.
Rooftop solar structural assessments evaluate roof load capacity, typically 15–25 kg/m² for panels plus mounting. Key factors include roof age, material, slope, and local wind/snow loads. A PE-stamped structural letter is required for permits in most US jurisdictions.
This guide covers the four load categories you must quantify, the codes that govern the calculations, the step-by-step assessment process, roof-type variations, state PE stamp rules, and the software workflows that compress weeks of engineering into days.
TL;DR — Rooftop Structural Assessment
A complete assessment combines a document review, a site inspection, member-by-member framing capacity math, and ASCE 7-22 load combinations for dead, live, wind, snow, and seismic forces. Most residential roofs built after 1970 pass without retrofit, but older homes, low-slope membrane roofs, and high-wind coastal sites routinely need reinforcement or pre-engineered structural letters. Plan for 3 to 7 business days and 300 to 650 dollars per project on a PE-stamped report.
What this guide covers:
- The four load types every assessment must quantify and the typical psf ranges
- ASCE 7-22, IBC 2024, and the code references AHJs check first
- A seven-step structural assessment workflow you can hand to an installer or engineer
- Roof type differences for asphalt shingle, tile, metal, membrane, and concrete decks
- US state-by-state PE stamp and structural letter requirements
- International variations for the UK, Germany, and Australia
- Reinforcement options when a roof fails and what each costs
- The most common failure modes that stall permit review
- Software workflows that integrate roof modeling, load analysis, and proposal generation Also see: Germany solar subsidies.
You can run roof load checks, attachment spacing analysis, and ballast layouts directly inside solar design software like SurgePV, which combines LiDAR-driven roof modeling with structural pre-screening in one workflow. For a direct comparison, see Arka 360 vs SurgePV.
What a Rooftop Solar Structural Assessment Actually Verifies
A rooftop solar structural assessment is the engineering analysis that confirms three things about the existing building: the roof framing has spare capacity for the new dead load, every member and connection passes the worst-case load combination, and the attachment hardware transfers force continuously from panel clamp to ridge or load-bearing wall.
This is different from a site survey or a roof inspection. A site survey records dimensions, obstructions, and tilt angles. A roof inspection checks waterproofing, fastener corrosion, and shingle wear. The structural assessment is the math layer that sits on top of both, and it is the document that the building department wants stamped, sealed, and submitted with the permit application.
The assessment exists because rooftop arrays change the roof in four ways. The dead load goes up by 3 to 5 psf for a flush array and 5 to 15 psf for a ballasted system. Point loads concentrate at every rafter attachment, where a single lag bolt may transfer 80 to 200 pounds of vertical and lateral force. Wind aerodynamics change because the array creates a new pressure surface, especially at edges and corners where uplift coefficients spike. Snow drift patterns shift because the panels create barriers and shedding zones that accumulate snow differently from the bare roof.
The output of a structural assessment is one of three documents the AHJ will accept: a full Professional Engineer stamped calculation package, a manufacturer-issued structural letter that confirms a pre-engineered racking system fits the site, or a simplified permit form that references published span tables for standard residential construction. Florida, most of California, and high-wind coastal jurisdictions require the full stamp on nearly every project. Inland low-rise residential work in much of the Midwest accepts the letter or the simplified form.
Pro Tip — Call the AHJ Before the Engineer
Phone the building department first to confirm which structural document they accept and which edition of the International Building Code and ASCE 7 they enforce. A 20-minute phone call saves rework when an engineer designs to ASCE 7-22 in a city that has not yet adopted the 2024 IBC and still requires ASCE 7-16 calculations.
The Four Load Categories Every Assessment Must Quantify
ASCE 7-22 separates the forces on a rooftop PV array into four code-defined categories. Each one is calculated independently, and the worst-case combination, not the sum, governs the design. Skipping any category triggers a permit rejection or, worse, a load combination that the roof cannot actually carry.
Dead Load
Dead load is the permanent weight of the PV system itself. ASCE 7-22 classifies panels, racking, rails, clamps, wiring, conduit, and any ballast as dead load for every load combination. The numbers depend on the mounting type.
For flush-mounted residential systems on pitched roofs, dead load runs 3 to 5 psf. A 400-watt panel weighs roughly 50 to 60 pounds and covers about 21 square feet, which works out to 2.5 to 2.9 psf for the panel alone. Rails, clamps, and standoffs add another 0.5 to 1.5 psf. The total of 3 to 5 psf is the number engineers use unless the racking vendor publishes specific values.
For ballasted flat-roof systems, dead load is much higher because concrete blocks or pavers are added to resist wind uplift. Ballast weight runs 4 to 8 psf in low-wind interior zones, 8 to 15 psf in high-wind corner and perimeter zones, and 15 to 20 psf in hurricane-zone coastal sites. The exact value comes from the racking manufacturer’s wind tunnel data, not a generic ASCE table.
Dead load does not distribute evenly across the roof even when the system specification quotes a single psf number. Mounting brackets create point loads at each rafter attachment. If lag bolts hit every other rafter, the effective tributary width doubles, and the loaded rafters carry twice the per-square-foot value of the system.
Live Load
Live load is the temporary force from maintenance workers walking on or around the array. ASCE 7-22 sets residential roof live load at 20 psf when the roof is accessible. For the roof area directly under the PV system, the live load can be waived when the clear space between the bottom of the panel and the roof surface is 24 inches or less, because the panel itself shields the deck from foot traffic.
If any portion of the PV array sits more than 24 inches above the roof surface, the engineer must apply live load in that raised area. This rule catches tilt-mounted residential arrays where the back edge is raised on a higher standoff. For ballasted commercial systems with a 5 to 10 degree tilt, the rear edge frequently exceeds the 24-inch threshold, and live load returns to the calculation.
Live load on the roof area outside the array footprint stays at the full 20 psf. The combined calculation runs the dead load under the panels plus the live load on the bare roof plus the wind and snow load on the entire envelope.
Wind Load
Wind load is the calculation that dominates almost every coastal and hurricane-zone project. Wind generates both downward pressure and upward uplift on the panel surface. The uplift case typically governs because solar panels weigh far less than the wind force trying to lift them off the roof.
ASCE 7-22 introduced new sections specifically for solar arrays. Section 29.4.3 covers low-sloped roofs at 7 degrees or less. Section 29.4.4 covers panels parallel or near-parallel to the roof on any slope. Section 29.4.5, new in the 2022 edition, covers fixed-tilt ground-mount systems, which had no prescriptive coverage in ASCE 7-16.
The wind pressure formula combines four terms:
Wind Pressure = Velocity Pressure × External Pressure Coefficients × γE × γAVelocity pressure depends on basic wind speed at the project location, building height, and exposure category. The external pressure coefficients come from Figures 30.3-2 through 30.3-7 or Figure 30.5-1 in ASCE 7. The factor γE equals 1.0 for panels not exposed to the roof edge and 1.5 for panels at or near the edge. The factor γA is the equalization factor, which ranges from 0.4 to 0.8 based on the effective wind area shown in Figure 29.4-8.
Exposure category sets the velocity pressure floor. Exposure B covers urban and suburban areas with closely spaced obstructions. Exposure C covers open terrain with scattered obstructions, including most flat-country residential subdivisions. Exposure D covers flat unobstructed areas like coastlines and salt flats and produces the highest wind pressures.
The free ASCE 7 Hazard Tool, available since December 2021 at the ASCE Hazard Tool web app, returns site-specific wind speeds, snow loads, seismic data, and flood elevations for any US address. It replaces the printed maps that older editions of ASCE 7 used and is the fastest way to pull design wind speed for a project.
Snow and Seismic Load
Snow load and seismic load round out the four categories. Both vary dramatically by geography and frequently drive structural decisions in their respective zones.
Snow load starts from a ground snow load value published in ASCE 7-22 maps and adjusts for roof slope, exposure category, and thermal conditions. The presence of solar panels creates two new effects. First, panels can shed snow onto adjacent roof areas, which creates drift accumulation along the lower edge. Second, the gap between panels and the roof deck traps blowing snow that does not melt, which produces a concentrated load along racking rows. ASCE 7-22 Section 2.4.1 added a new load combination of D + 0.7S (dead load plus 70 percent of snow load) for allowable stress design, which allows a slightly lower design load than the prior 1.0 multiplier.
Most residential panels carry a pressure rating of 5,000 Pascals or higher, which corresponds to roughly 2 to 4 feet of snow accumulation depending on density. The structural concern is rarely panel breakage; it is whether the roof framing can hold the snow plus the panel weight plus the wind load.
Seismic load applies in ASCE 7 Site Classes C, D, E, and F, which cover most of California, the Pacific Northwest, Alaska, and parts of the Intermountain West. The new mass on the roof becomes inertial mass during ground motion, which increases the lateral demand on the entire load path from rafter to foundation. ASCE 7-22 limits PV array coverage to 50 percent of the total roof area in Site Classes C through F to keep the added inertial mass within manageable bounds.
The lateral load also transfers through the panel-to-rail clamp, the rail-to-standoff connection, and the standoff-to-rafter lag bolt. A continuous load path must exist for every one of those connections, and the assessment must show that each connection has adequate capacity under the maximum lateral demand.
Load Range Quick Reference
| Load Category | Typical Range (residential pitched roof) | Typical Range (flat commercial roof) | Code Reference |
|---|---|---|---|
| Dead load (flush-mount) | 3 to 5 psf | N/A | ASCE 7-22 Chapter 3 |
| Dead load (ballasted) | N/A | 4 to 15 psf | ASCE 7-22 Chapter 3 |
| Live load (maintenance) | 20 psf (waived under panels with ≤24-inch clearance) | 20 psf | ASCE 7-22 Chapter 4 |
| Wind load (interior zone, 110 mph) | 15 to 25 psf uplift | 18 to 30 psf uplift | ASCE 7-22 Sections 29.4.3-29.4.5 |
| Wind load (corner zone, 150 mph) | 40 to 80 psf uplift | 50 to 100 psf uplift | ASCE 7-22 Sections 29.4.3-29.4.5 |
| Ground snow load (Boston metro) | 30 to 40 psf | 30 to 40 psf | ASCE 7-22 Chapter 7 |
| Seismic load (San Francisco SDC D) | Variable, function of building mass | Variable, function of building mass | ASCE 7-22 Chapter 12 |
These ranges are starting points only. Site-specific numbers come from the ASCE Hazard Tool, the racking manufacturer’s wind tunnel data, and the structural engineer’s combination check.
ASCE 7-22, IBC 2024, and the Codes That Govern Your Calculations
The codes that govern rooftop solar structural assessment in the US are the International Building Code, the International Residential Code, and the ASCE 7 standard that both reference. Pre-2015 editions had no PV-specific language at all. The 2015 and 2018 IBC editions added Section 1510 for rooftop-mounted PV, which now requires panels to be treated as dead load for every combination.
ASCE 7-22, released in December 2021, introduced the most consequential changes for solar designers. It defined γE and γA factors for PV-specific wind pressure, expanded ground-mount coverage in Section 29.4.5, updated snow load methodology with the move from ASCE 7-16 to the 2022 edition, and added the D + 0.7S allowable stress design combination.
ASCE 7 is the standard. IBC 2024 references ASCE 7-22, IBC 2021 references ASCE 7-16, and IBC 2018 references ASCE 7-16 also. Most US jurisdictions in 2026 still operate under the 2021 IBC and therefore require ASCE 7-16 calculations, but a growing number have adopted the 2024 IBC and demand ASCE 7-22. The first phone call to the AHJ confirms which edition applies.
The IRC governs one- and two-family residential construction. IRC 2021 references ASCE 7-16 for wind, snow, and seismic loads on residential roofs and applies the same dead-load classification to panels.
International codes that solar designers encounter:
- UK Building Regulations Part A and BS EN 1990, 1991, and 1993 for structural calculations. UK installs require a structural calculation when the roof is assessed as potentially marginal, which the installer or a chartered engineer documents.
- Germany DIN 1055 and DIN EN 1991 with the Eurocode wind and snow load maps. Any installation that modifies the load path requires a Statiker (structural engineer) sign-off.
- Australia AS/NZS 1170 for wind and snow loads, with AS/NZS 5033 for the electrical installation. Cyclone regions (north of the 26th parallel) require engineering review on most installations.
- Canada NBC and CSA S136 with the National Building Code wind and snow maps. Provincial variations apply, especially in Quebec and British Columbia.
Why the Code Edition Matters
An engineer who designs to ASCE 7-22 wind pressure in a jurisdiction still on ASCE 7-16 will produce a report that the permit reviewer rejects. The pressure coefficients, the γE and γA factors, and the load combinations differ between the two editions. Wasted engineering time is the most common cause of permit delays beyond the structural review itself.
Step-by-Step Structural Assessment Process
The structural assessment follows a fixed sequence. Skipping or shortcutting any step shows up as a permit kickback later, so the sequence is worth treating as gospel even when time pressure mounts.
Step 1: Collect Building Documentation
The assessment starts with the original construction drawings. Framing plans show rafter or truss size, spacing, span, and material. Structural calculations on file with the AHJ show the original design loads and any prior modifications. Permit history surfaces past roof replacements, additions, or HVAC equipment that changed the load picture.
If the original drawings are missing, the assessment falls back to a site survey to recover member dimensions. This is the case for most homes more than 30 years old. The site survey uses a combination of attic inspection, manual measurement, and sometimes destructive testing where a small piece of sheathing is removed to expose framing details.
Step 2: Inspect the Roof on Site
The on-site inspection covers two layers: the visible roofing surface and the framing underneath. Surface inspection notes shingle or membrane condition, sagging, ponding water on flat roofs, flashing wear, and any visible structural distress. Framing inspection records the actual rafter or truss type, spacing, span, and material grade, along with any visible rot, splits, fastener corrosion, or notched members.
Modern remote assessment methods extend the on-site work. LiDAR roof models generate dense 3D point clouds from aerial laser pulses and are now publicly available for much of Germany, the Netherlands, the UK, France, and large parts of the US. Drone photogrammetry creates 3D models from overlapping photos and reaches sub-centimeter accuracy on complex multi-pitch roofs. Both methods speed up the geometry capture portion of the survey, though neither replaces the attic inspection that confirms framing details. Also see: France solar feed-in tariffs.
A complete site inspection also captures roof pitch, azimuth, tilt, ridge height, eave overhang, and any obstructions that affect array layout. These geometry inputs flow back into the wind exposure calculation and the array boundary design.
Step 3: Calculate Existing Framing Capacity
The third step is the member-by-member capacity check. Each rafter, truss, beam, and connection is analyzed against its current code-prescribed live load, dead load, and snow load. Bending capacity, shear capacity, deflection limits, and any buckling concerns are documented.
Most residential roofs designed and built after 1970 carry at least 20 psf of live load capacity. However, the existing dead load from the roof itself, the insulation, the drywall, the HVAC ducts, and any prior modifications consumes a portion of that capacity before the solar load is added. The engineer subtracts the existing dead load from the total capacity to determine the spare capacity available for the new PV system.
For pre-1970 homes and older commercial buildings, the framing often has lower capacity than current code requires. Pre-1950 homes routinely use undersized members and unconventional spans that do not match modern tables. A structural site survey is mandatory in these cases because published span tables do not apply.
Sandia National Labs research published in a 2011 study on residential roof load capacity showed that rafter-based load tests demonstrated 330 percent more capacity on average than the National Design Standard calculation predicted. The reason is load redistribution: a single rafter does not act alone, because the sheathing transfers load to adjacent members. Standard engineering analysis ignores this load-sharing effect, which produces a conservative result that sometimes fails roofs that would actually carry the array.
Step 4: Determine Design Loads from the Array
The fourth step applies ASCE 7-22 procedures to compute the new design loads:
- Dead load from panels, racking, hardware, and any ballast.
- Live load from maintenance access, waived where the panel-to-roof clearance is under 24 inches.
- Wind load from velocity pressure × pressure coefficient × γE × γA, computed per Sections 29.4.3-29.4.5.
- Snow load from ground snow × slope factor × thermal factor × exposure factor, with drift adjustments at panel edges.
- Seismic load from the lateral force formula F = (Sds × W × Ip) / R or simplified equivalents per Chapter 12.
Each load is computed for the worst-case condition at the specific project location. The ASCE 7 Hazard Tool returns the input values for wind, snow, seismic, and flood. The racking manufacturer’s wind tunnel data refines the dead load and the uplift pressure for ballasted systems.
Step 5: Combine Loads and Check Limit States
The combined load check applies the ASCE 7 Section 2 load combinations. For LRFD, the relevant combinations include 1.2D + 1.6L + 0.5S, 1.2D + 1.0W + L + 0.5S, and 1.2D + 1.0E + L + 0.2S, where D is dead, L is live, S is snow, W is wind, and E is seismic.
The engineer compares each combination against the framing capacity from Step 3 at every load path: rafter bending, rafter shear, deflection, sheathing capacity, ridge capacity, eave overhang, and the lateral resistance of the roof diaphragm. The worst-case combination at each location governs the design.
A passing assessment shows every member, every connection, and every load path with capacity greater than demand under the worst-case combination. A failed assessment identifies the specific members or connections that fall short and triggers Step 6 (attachment redesign) or a return to reinforcement options.
Step 6: Design the Attachment and Document the Load Path
The attachment design specifies how every panel transfers load into the structural framing. The components include the panel clamp, the rail, the standoff or anchor, the lag bolt or self-drilling screw, the embedment depth, the pull-out resistance, the flashing, and the rafter or truss spacing.
The continuous load path requirement is the single most-cited reason for structural failures on rooftop PV. Every load must transfer cleanly from panel clamp to rail to standoff to rafter to ridge or load-bearing wall. A break anywhere in the path, even at a single connection, voids the entire calculation.
Lag bolt pull-out resistance depends on bolt diameter, embedment depth, and the species of the rafter wood. A 5/16-inch lag bolt with 2.5-inch embedment into a Douglas Fir-Larch rafter resists roughly 700 to 900 pounds of pull-out. The same bolt in a Southern Yellow Pine rafter resists 850 to 1,100 pounds. Spruce-Pine-Fir framing, which is common in newer Midwestern homes, resists 500 to 700 pounds. The attachment design must match the lag bolt selection to the rafter species at the project.
Spacing follows the same logic. A standoff every other rafter doubles the tributary load on each loaded rafter. A standoff at every rafter reduces the per-bolt demand but adds penetrations to the roof. The structural assessment specifies the spacing that balances capacity, penetration count, and the manufacturer’s racking limits.
Step 7: Produce the Stamped Report
The final step compiles the assessment into a single deliverable. The report includes:
- A cover sheet with project address, owner name, and AHJ jurisdiction.
- A summary of design assumptions: code edition, exposure category, wind speed, snow load, seismic site class.
- Member-by-member capacity calculations.
- The combined load check at every governing location.
- Attachment details with drawings, lag bolt specifications, flashing details, and rafter spacing.
- Manufacturer wind tunnel data and product datasheets.
- A site photo log showing existing conditions.
- The Professional Engineer wet stamp or digital seal where the AHJ requires it.
The report is the document submitted with the permit application. Most AHJs accept a digital PDF with a digital PE seal; some still require a wet stamp on a paper original. Confirming the AHJ’s preferred format early avoids a courier round trip at the last minute.
Roof Type and Material — How Each Changes the Math
Roof type changes both the load math and the attachment design. The same PV system on five different roofs produces five different structural calculations.
Asphalt Shingle Roofs
Asphalt shingles are the most common residential roof in North America. The structural assessment is straightforward because lag bolts penetrate the deck into the rafter below, flashing seals the penetration, and the published span tables apply directly. Most shingle roofs designed and built after 1970 pass the assessment without retrofit. Roofs older than 15 years should be replaced before installation because the remaining shingle lifespan is shorter than the array lifespan.
Concrete and Clay Tile Roofs
Tile roofs require tile-specific hooks or replacement tiles that incorporate the standoff. The tile itself does not carry load; the lag bolt still penetrates to the rafter. The structural assessment treats the load path identically to a shingle roof, but the attachment cost is higher and tile breakage during installation is a routine concern. Tile roofs routinely outlast the array, which removes the pre-installation replacement question.
Standing-Seam Metal Roofs
Standing-seam metal roofs are the easiest case structurally because clamp-on attachments grip the seam without any roof penetration. No lag bolt, no flashing, no waterproofing concern. The structural assessment focuses on the seam spacing, the clamp manufacturer’s pull-out and shear ratings, and the underlying purlin or rafter capacity. Standing-seam roofs are also the only roof type where the array can usually be removed and reinstalled at the end of the original roof’s life, which is rare for shingle or tile.
Membrane and TPO Flat Roofs
Membrane and TPO roofs almost always use ballasted racking to avoid penetrating the waterproofing. The structural assessment changes character: dead load goes up significantly (4 to 15 psf), wind uplift is the governing case, and the calculation references the racking manufacturer’s wind tunnel data instead of generic ASCE pressure coefficients. The deck below the membrane must carry the added ballast load, which often pushes flat-roof projects toward a structural letter or a full PE stamp.
Concrete Decks
Concrete roof decks (precast plank, cast-in-place slab) have very high load capacity and rarely fail the structural check. The attachment design changes to mechanical anchors set into the concrete with adhesive or expansion. The assessment focuses on the anchor pull-out and the slab punching shear at the anchor location.
Wood Truss vs Engineered Truss vs Solid Sawn Rafter
The framing type matters as much as the surface material. Pre-fabricated wood trusses carry less concentrated load than solid sawn rafters of equivalent depth because the truss web members are designed for distributed load. Hitting a truss web with a lag bolt is the wrong attachment point; the top chord is correct. Solid sawn rafters accept lag bolts at any point along the span. Engineered I-joists handle distributed load well but reject concentrated point loads at any location other than over a bearing wall.
The structural assessment must identify the framing type before specifying the attachment. A residential roof that appears identical from above can have any of these three framing systems underneath, and the wrong assumption produces a calculation that fails in practice even if it passes on paper.
When a Roof Fails Assessment: Reinforcement and Alternatives
A failed structural assessment is not a project death sentence. It is a decision point with three branches: reinforce the roof, downsize the array, or move to a ground-mount system on the same property.
Reinforcement Options
Roof reinforcement adds capacity to specific members or connections that fall short. The most common methods:
- Sister rafters: Bolt or screw a new rafter to the side of the existing one to increase combined section depth. Cost: 75 to 200 dollars per rafter for materials, 4 to 8 hours per rafter for labor.
- Add supplementary members: Install new rafters between existing ones to halve the tributary width. Cost: 100 to 300 dollars per new rafter, 6 to 10 hours per rafter for labor.
- Add structural plates: Bolt steel plates across joints, splices, or rafter-to-ridge connections to upgrade the connection capacity. Cost: 50 to 200 dollars per plate, 2 to 4 hours per location.
- Add purlins or perpendicular members: Install secondary framing perpendicular to the rafters to redistribute load. Cost: 800 to 3,000 dollars for a typical residential reinforcement project.
- Add posts and intermediate bearing: Install posts inside the attic to shorten the unsupported rafter span. Cost: 1,500 to 5,000 dollars for a full attic post installation.
Total residential reinforcement cost typically runs 2,000 to 15,000 dollars. The exact number depends on the framing type, the access conditions, and the local labor rate. Commercial flat-roof reinforcement runs 10 to 40 dollars per square foot of roof area, which can exceed 200,000 dollars on a large project.
Downsizing the Array
A smaller array is the cheapest fix when the marginal capacity gap is small. Reducing array size by 20 percent typically cuts dead load by 20 percent and often brings the design back into compliance. The energy yield drops proportionally, so the financial analysis must account for the lower output. Downsizing is most attractive on residential roofs with limited array area to begin with, where the structural margin issue is concentrated on a single roof plane.
Ground-Mount Alternative
Ground-mount systems remove the structural question entirely. On properties with available yard space, ground-mount avoids any rooftop work, eliminates penetration concerns, and produces the same energy yield as the equivalent rooftop array. The cost is higher because of the racking, the foundation, and the trench to the main panel. Ground-mount adds roughly 0.30 to 0.50 dollars per watt to the installed cost compared to rooftop. The trade is usually worth it when reinforcement costs exceed the ground-mount premium.
Run the Roof Math Before You Site-Visit
SurgePV’s roof modeling pulls LiDAR data, computes structural loads against ASCE 7-22, and previews ballast or attachment spacing for every roof plane before your engineer touches the project. Cuts pre-construction structural review from weeks to days.
Book a DemoNo commitment required · 20 minutes · Live project walkthrough
State-by-State PE Stamp and Engineering Requirements (US)
PE stamp requirements vary significantly by state and by AHJ within a state. The table below summarizes the most common requirements for residential rooftop solar as of 2026. Always verify with the local building department because municipal amendments override state defaults.
| State | Residential PE Stamp Required? | Commercial PE Stamp Required? | Notable Requirements |
|---|---|---|---|
| California | Yes, for systems over 10 kW | Always | Title 24 seismic analysis, gravity load increase over 5% triggers re-engineering |
| Florida | Always | Always | Hurricane wind zones, wet stamp on every project |
| Texas | Varies by municipality | Yes for systems over 10 kW | Coastal cities require stamps for any size |
| New York | Expedited path for under 25 kW (Unified Solar Permit) | Yes for systems over 25 kW | NYSERDA-approved racking accepted with letter |
| Massachusetts | Yes for most projects | Always | Snow load drives most decisions |
| Arizona | Letter or stamp depending on AHJ | Yes for systems over 10 kW | Heat-aging concerns on shingle replacements |
| Colorado | Letter or stamp depending on AHJ | Yes for systems over 10 kW | Snow load in mountain counties significant |
| Georgia | Usually a letter | Yes for systems over 10 kW | Lower wind speeds simplify residential |
| Nevada | Letter or stamp depending on AHJ | Yes for systems over 10 kW | Lower humidity simplifies attachment |
| Illinois | Yes in Chicago, varies elsewhere | Always | Chicago requires architect or engineer on file |
| Washington | Yes for most projects | Always | Seismic zone, structural review on every project |
| Oregon | Yes for most projects | Always | Seismic and snow load in mountain counties |
Florida’s PE stamp requirement traces to hurricane wind load. The state design wind speed reaches 170 mph in Category 5 zones, and every residential project requires a sealed wind uplift calculation. The added engineering cost is roughly 400 to 800 dollars per project, but the alternative is a project that simply cannot get permitted.
California’s seismic and gravity load rules in the California Solar Permitting Guidebook, 4th Edition, require a California-licensed civil or structural engineer or architect when the gravity load increases by more than 5 percent or when the lateral load demand-to-capacity ratio under earthquake loading increases by more than 10 percent. For most residential PV systems, the gravity threshold is the binding constraint and triggers engineering review on projects over roughly 6 to 8 kW depending on the original roof design load.
New York’s Unified Solar Permit program at NYSERDA simplifies residential installations under 25 kW by accepting pre-engineered structural designs with manufacturer letters in place of a full PE stamp. The program has cut residential permit times to under 14 days in participating municipalities and serves as a model for other states.
Cost of PE Stamps and Structural Letters
| Document Type | Typical Cost | Turnaround | When AHJs Accept |
|---|---|---|---|
| Full PE wet stamp | 400 to 650 dollars | 5 to 10 business days | Always |
| Full PE digital seal | 300 to 500 dollars | 3 to 7 business days | Most AHJs accept; confirm first |
| Manufacturer engineering letter | 150 to 300 dollars | 1 to 3 business days | Simplified permit AHJs only |
| Pre-engineered span tables | Included in racking purchase | Instant | Residential simplified permits only |
The cost difference between a full stamp and a letter is meaningful at scale. A residential installer running 200 projects per year pays roughly 80,000 dollars more for stamps over letters across the portfolio. The trade is permit acceptance: stamps work everywhere, while letters only work in AHJs that explicitly allow them.
International Variations: UK, Germany, Australia
International installations follow national codes with regional variations. The basic structural concepts are identical, but the documentation and review process differs.
United Kingdom
UK installations follow Building Regulations Part A, which references BS EN 1990 for the basis of structural design, BS EN 1991 for actions on structures (loads), and BS EN 1993 for steel design. A chartered engineer (CEng) registration with the Institution of Structural Engineers handles the analysis. For most residential UK installations on roofs less than 15 years old, a structural calculation is required only when the installer judges the roof as potentially marginal. The Microgeneration Certification Scheme (MCS) Standard MIS 3002 governs the installation process and requires the installer to document the structural assessment in the project handover pack. For the latest details on UK, see Battery Solar System Design UK.
UK design wind speeds run 22 to 30 m/s for most inland sites and 30 to 40 m/s for exposed coastal locations. Snow load is lower than equivalent latitudes in continental Europe because of the maritime climate. UK assessments often use less ballast than German equivalents on the same building. Also see: European Solar Incentives. For the latest details on Germany, see Community Solar Projects Germany. For Europe-specific compliance details, see Europe solar compliance.
Germany
Germany requires a Statiker (registered structural engineer) sign-off on any installation that modifies the building’s load path. The relevant codes are DIN 1055 (loads) and DIN EN 1991 (Eurocode actions). German design wind speeds vary by zone from 22 m/s in the interior to 30 m/s on the Baltic and North Sea coasts. Snow load reaches 3 to 4 kN/m² in Alpine areas. See our guide on Multi-Family Residential Solar Case Study for more.
The Statiker review costs 200 to 500 euros for a residential project and is mandatory in nearly every state. The German solar industry has developed a deep ecosystem of pre-engineered racking systems with published structural calculations, which speeds up the typical residential review.
Australia
Australian installations follow AS/NZS 1170 for wind and snow loads, AS/NZS 4600 for cold-formed steel design, and AS/NZS 5033 for the electrical installation. Cyclone regions, which include all of Queensland north of about latitude 26 degrees south plus the Northern Territory coast, require engineering review on most installations because cyclone wind speeds reach 50 to 70 m/s. For Australia-specific compliance details, see Australia comparisons/lgc-vs-stc.
The Clean Energy Council’s Design Guidelines for Grid-Connected PV systems, last updated in 2024, govern the structural review process. Australian engineers also reference the racking manufacturer’s wind tunnel data, which is the same approach used in the US and Europe.
Cost and Timeline Expectations
A residential rooftop structural assessment typically costs 300 to 800 dollars when bundled with the racking vendor’s engineering service and 400 to 1,500 dollars when commissioned standalone from a licensed engineer. The cost variance comes from the project complexity, the AHJ requirements, and whether the engineer needs a site visit or works from drawings and photos. Read Solar Sales Commission Structure for a complete walkthrough.
Timeline expectations:
- Residential standard pitched-roof assessment with as-built plans available: 3 to 5 business days
- Residential assessment requiring a site survey: 5 to 10 business days
- Residential assessment requiring destructive testing or attic inspection: 7 to 14 business days
- Commercial flat-roof assessment with structural drawings: 2 to 3 weeks
- Commercial assessment without drawings, requiring full structural survey: 4 to 8 weeks
Total project timeline from contract signing to permit submission runs 4 to 8 weeks for a typical residential project and 8 to 16 weeks for a commercial project. The structural assessment is rarely the bottleneck; permit office turnaround usually is.
Solar software that automates the roof modeling, the load pre-screening, and the proposal generation cuts the pre-engineering phase from 2 to 3 weeks down to 2 to 4 days. The structural assessment itself still requires an engineer, but the front-end work that feeds the engineer accelerates significantly.
Common Failure Modes That Stall Permits
The most common reasons a structural assessment gets rejected on first submission, ranked by frequency:
1. Wrong Code Edition
The engineer designs to ASCE 7-22 in an AHJ that has not yet adopted the 2024 IBC and still requires ASCE 7-16 calculations. Or the reverse. The fix is a phone call to the AHJ before the engineer starts.
2. Missing Continuous Load Path
The calculation covers the panel-to-rail and rail-to-standoff connections but skips the standoff-to-rafter or rafter-to-ridge transfer. A break anywhere in the path voids the entire calculation. The fix is a complete attachment detail drawing that traces every load to a foundation.
3. Wrong Wind Exposure Category
The engineer assumes Exposure B (urban) on a site that is actually Exposure C (open terrain) or Exposure D (coastal). Wind pressure scales linearly with exposure category factor, and the wrong category produces a calculation that the AHJ corrects on review. The fix is a careful exposure assessment using the criteria in ASCE 7-22 Section 26.7.
4. Wrong Pressure Coefficient Zone
ASCE 7-22 divides roofs into interior, perimeter, and corner zones with different pressure coefficients. Panels in corner zones see uplift pressures 2 to 3 times higher than panels in interior zones. Treating the entire array as interior zone consistently under-designs the corner attachments. The fix is zone-by-zone pressure mapping that respects the actual array layout.
5. Missing Snow Drift Analysis
The engineer applies the ground snow load uniformly across the roof and ignores drift accumulation at panel edges. Drift loads can exceed uniform loads by 50 to 200 percent on the row immediately downwind of the array. The fix is a drift analysis per ASCE 7-22 Section 7.7.
6. Inadequate Lag Bolt Embedment
The attachment detail specifies a 5/16-inch lag bolt but does not specify the embedment depth. AHJs reject any attachment without a documented embedment depth, typically 2.5 inches into a Douglas Fir-Larch rafter. The fix is a complete lag bolt specification including diameter, length, embedment depth, and material grade.
7. Outdated Wind Tunnel Data
The ballasted system uses a manufacturer’s wind tunnel report from 2015 that predates ASCE 7-22. The new code requires updated test data with the current pressure coefficients and γE/γA factors. The fix is to confirm the racking vendor’s wind tunnel report is current.
8. Ignored Roof Age and Condition
The calculation assumes a fresh roof but the actual roof is 18 years old, partially deteriorated, and missing original sheathing in two locations. AHJs reject calculations that do not account for documented existing conditions. The fix is a thorough site inspection that documents conditions and adjusts the analysis accordingly.
9. Wrong Framing Type Assumption
The calculation assumes solid sawn rafters but the actual framing is engineered I-joists or pre-fabricated trusses with different concentrated load capacity. The fix is an attic inspection that confirms framing type before specifying attachment.
10. Missing Seismic Analysis in High-Risk Zones
The calculation skips seismic load analysis in ASCE 7 Site Class D, E, or F. California, Oregon, Washington, and Alaska AHJs reject any solar package without seismic analysis. The fix is a Chapter 12 calculation that documents lateral demand and connection capacity.
Software That Speeds Up Structural Assessment
Modern solar design platforms integrate the geometry capture, the load pre-screening, and the proposal generation into one workflow. The engineer still writes the final stamped report, but the data that feeds the engineer is produced automatically.
The platforms that handle structural pre-screening as part of the design workflow:
- SurgePV: LiDAR roof modeling, automated load pre-check against ASCE 7-22, integrated ballast layout, and one-click export to engineering. The solar proposal software packages the structural data with the financial and electrical proposal for the customer.
- Aurora Solar: Aerial imagery import, manual structural override, and integration with third-party engineering services.
- HelioScope: Strong electrical design with limited native structural analysis; pairs with external engineering services for the stamped report.
- PVSyst: Energy modeling focused; structural analysis happens in adjacent tools.
- OpenSolar: Residential sales focus, with structural assessment routed to manufacturer letter providers.
Standalone structural software handles the engineering work itself. SkyCiv runs ASCE 7 calculations with cloud-based output. Bentley RAM and S-Frame handle commercial and complex residential. Tekla and SAP2000 are common for large commercial roof systems with custom framing.
The integration between solar design and structural engineering software is improving. Several platforms now export load combinations directly into engineering tools, which eliminates the manual data entry that introduces errors. The load analysis workflow runs in minutes once the geometry is captured, compared to hours of manual entry in the legacy process.
Conclusion
A rooftop solar structural assessment is the single most important engineering check on any new install. The math is straightforward when the documentation is complete and the codes are clear, and it stalls predictably when any of the four common failure modes above goes unchecked.
Three action items for any new project:
- Call the AHJ before the engineer to confirm the code edition, the document type they accept (full stamp, letter, or simplified form), and the digital versus wet seal preference.
- Pull the as-built drawings first because a structural assessment with original framing plans runs 3 to 5 business days, while one without runs 7 to 14 days.
- Run the load pre-check inside your design software before sending the project to an engineer. Catching a marginal roof at the design stage is 10 times cheaper than catching it at the permit submission stage.
Frequently Asked Questions
What is a rooftop solar structural assessment?
A rooftop solar structural assessment is the engineering evaluation that confirms an existing roof can carry the added weight, wind uplift, snow accumulation, and seismic forces of a planned solar PV system. It combines a document review, a site inspection, framing capacity math, and a load combination check against the latest edition of ASCE 7 adopted by the local building code. The output is a signed structural calculation package and, in most US jurisdictions, a Professional Engineer stamp or letter that the permit office accepts.
How much weight does a solar system add to a roof?
A standard flush-mounted residential PV system adds 3 to 5 pounds per square foot of dead load when you include panels, racking, rails, clamps, and hardware. A flat roof ballasted system adds 4 to 15 psf depending on tilt angle, wind zone, and parapet height. Concentrated point loads at each rafter attachment can reach 80 to 200 pounds, which is why the assessment focuses on individual structural members, not just the average distributed load.
Do I need a structural engineer for residential solar?
Most US jurisdictions require a Professional Engineer stamp on the structural calculations for residential rooftop solar, but a smaller subset accept manufacturer engineering letters or pre-approved racking spans for systems under specific thresholds. Florida, California, and most coastal high-wind regions mandate a stamped report on every project. The first step on any new install is a phone call to the local Authority Having Jurisdiction to confirm which form of structural review they accept.
What roof age is too old for solar panels?
Roofs with more than 10 years of remaining service life are normally fine for solar because most arrays last 25 to 30 years and panel removal for re-roofing costs 1,500 to 5,000 dollars. Asphalt shingles older than 15 years should be replaced before installation since their remaining lifespan is shorter than the PV system. Concrete tile, slate, and standing-seam metal roofs routinely outlast the array and rarely need pre-installation replacement.
What is the difference between a PE stamp and a structural letter for solar?
A Professional Engineer stamp is a full signed and sealed structural calculation package that documents every load combination, member check, and attachment detail for the specific project. A structural letter is a shorter document, usually one or two pages, where a licensed engineer certifies that a pre-engineered racking system applies to the site without re-running the math. Stamps cost 300 to 650 dollars per project, while letters typically cost 150 to 300 dollars and are accepted only by AHJs that allow simplified permit paths.
How long does a solar structural assessment take?
A residential structural assessment runs 3 to 7 business days from document submittal to signed report when the engineer has full as-built plans and a clean site survey. Commercial assessments take 2 to 4 weeks because of larger arrays, more load combinations, and the need for sealed plans across multiple disciplines. Adding LiDAR data, drone imagery, or recent renovation drawings can shorten the residential turnaround to 48 to 72 hours.
What happens if a roof fails the structural assessment?
A failed assessment usually triggers one of three responses: structural reinforcement of the affected rafters or trusses, a smaller array footprint that stays under the capacity limit, or a switch to a ground-mount system on the same property. Reinforcement costs 2,000 to 15,000 dollars for residential work and routes through sistering rafters, adding posts, or installing reinforcing plates. Sandia National Labs research suggests many older roofs have hidden load capacity that conservative single-rafter math misses, so a second opinion is sometimes worth the engineering fee before reaching for steel.


